


Click the Test button again once you have finished calibration to close Test
mode. Once Test mode has closed, click on the Program/Transfer button to
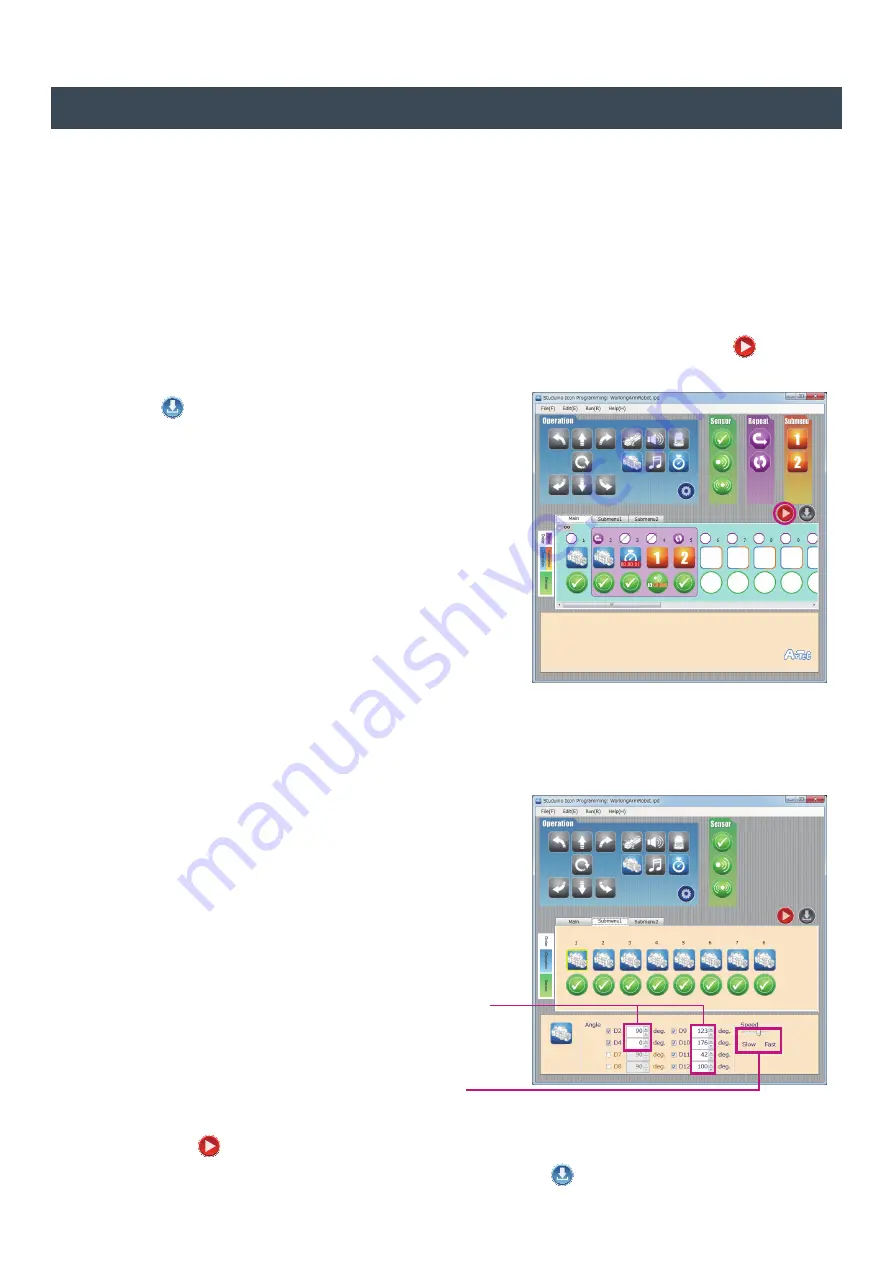
send the finished program to your Studuino and see how your robot moves.
28
Working Arm Robot
センサー値の条件設定
Calibrating Your Servomotor
Depending on where you're using your robot or the amount of power left in your
batteries, the program you've downloaded for your Working Arm Robot may not work
properly the first time.
If this happens you can use our software to calibrate the angles of your servomotors.
Connect the USB cable to the PC and the Studuino unit.
①
Open
WorkingArmrobot.ipd
and start Test mode by clicking on the Test
mode button.
②
Click on each Servomotor icon and check how the servomotor is positioned for
each angle. Adjust the angles, watching how the servomotors change position
in response.
③
★ The Program/Transfer button will turn gray
when Test mode has started.
★ Do not disconnect the USB cable during
Test mode.
Choose from twenty levels of
speed for the selected angles.
Input angles from 0-180 degrees.
④
Summary of Contents for Working Arm Robot
Page 6: ...06 Working Arm Robot...
Page 7: ...Wider 1 2 2 07 Working Arm Robot...
Page 8: ...08 Working Arm Robot...
Page 9: ...4 09 Working Arm Robot...
Page 10: ...10 Completed Base Working Arm Robot...
Page 11: ...Attaching the Articulated Arm 11 1 1 2 5 6 Working Arm Robot...
Page 12: ...12 Working Arm Robot Install the end of the articulated arm into the rails of the base...
Page 13: ...Attaching the Cargo Line 13 1 1 1 2 20 1 1 1 1 Working Arm Robot Wider...
Page 15: ...15 Working Arm Robot...
Page 16: ...3 3 6 6 Assembling Arm Servomotors Make three in total Narrower Wider 16 Working Arm Robot...
Page 17: ...Assembling the Arms 3 17 1 1 8 4 2 Working Arm Robot Wider Wider...
Page 18: ...18 Wider Wider Wider Wider Working Arm Robot...
Page 19: ...19 Completed Arm Working Arm Robot...
Page 22: ...Making Cargo 8 4 4 Line up four pieces of cargo on the line 22 Working Arm Robot...


