


Chapter 3 Auxiliary Operations
On the menu screen, you can perform instrument settings.
■
To access the menu
On the standby screen, hold down [<] for 3 seconds.
■
Options on the menu
■
Basic operations in the MENU screen
Change the MENU No. and set values.
[<] button: Moves the position of the selected digit (the digit that is blinking)
back one space.
[ ] button: Finalizes the value that is being set (the value that is blinking),
and move the position of the selected digit forward one space.
[>] button: Increases the value of the blinking digit by one. When the upper
limit of the setting range is reached, the value returns to the
beginning value.
(Example: When the setting range is 0 to 9
0 1 2 • • • 8 9 0)
■
Selecting a MENU item
Enter a MENU No. indicated in the above table to set that item or execute
that function.
The following shows an example of how the date and time are set.
a
On the standby screen, press and hold [<] for 3 seconds to display the
MENU screen.
"1-0-0" will appear in the sub-screen with the "1" (digit) blinking.
b
Press the [ ] button.
The "1" will stop blinking and the middle "0" digit will change to "1" and
start blinking.
c
Press the [>] button once.
The middle digit will change to “2”.
d
Press the [ ] button.
The MENU No. will be finalized as "1-2" and the screen will transition to
the time setting screen.
e
Set the tens digit and the ones digit for the hour, and then set the tens digit
and the ones digit for the minute, in that order.
* Repeat the same steps as above to select and set the values of the other
MENU items.
2.2.3 Measuring the Sample
a
Firmly and securely attach the pipette tip to the end of the pipette.
b
Aspirate the sample with the pipette.
c
Press the [ ] button, and then dispense a drop of sample on the test strip.
Dispense the sample onto the sample dispense area of the test strip.
Press the pipette button all the way in slowly.
d
After you dispense a drop of sample, immediately press the [ ] button and
insert the strip tray into the instrument. (Insert the strip tray within 10
seconds of pressing the [ ] button in step
d
.)
e
After the measurement time elapses, the measurement results appear on
the display.
f
Check the measurement results.
g
Withdraw the strip tray and take out the used test strip.
Check the test strip, and check that the sample has flowed in correctly and
that there are no large air bubbles or foreign matter in the reaction cell. After
checking, discard the test strip.
h
The standby screen will appear 5 seconds after withdrawing the strip tray.
2.2.4 Measuring the control
a
On the standby screen, press the [>] button. The control icon will appear.
b
Dispense a drop of the control onto the test strip, and then perform the same
procedure as when measuring a sample.
c
The measurement results are saved as a control measurement.
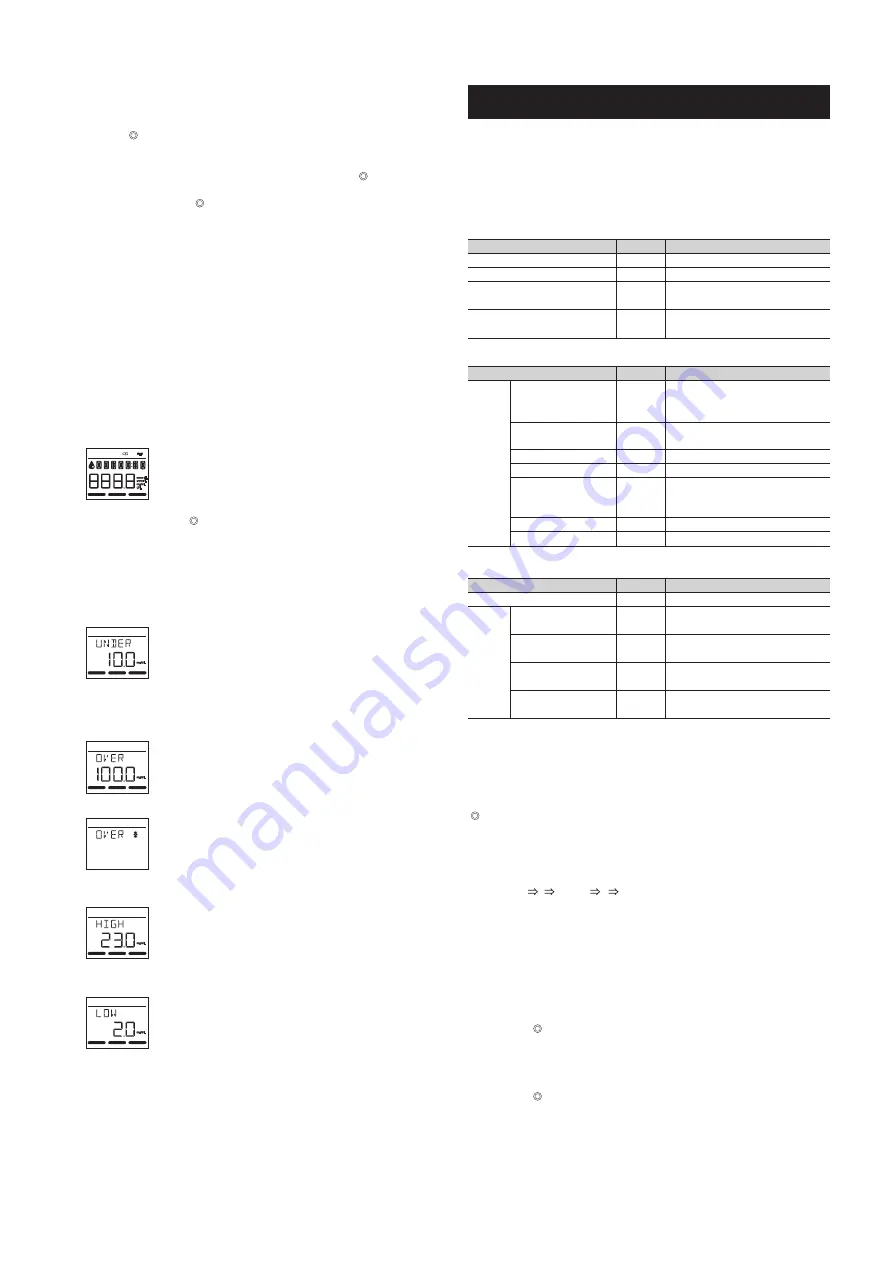
2.2.5 Understanding results
After measurement, the following information appears on the screen.
Upper line:The item name and measurement number appear alternately.
If you press the button, the display changes to the date and
time.
If there is a status indication (*), the status appears instead of the
measurement number.
Lower line:The measurement result value and units appear. However, if the
status is UNDER or OVER, the measurement range appears.
(*) Status
UNDER Under the lower limit of the measurement range.
Check the conditions. It is possible that drop dispensing failed and
the sample did not enter the reaction cell, or a large bubble
formed.
OVER
Over the upper limit of the measurement range.
OVER*
Over the upper limit of the measurement range, and the prozone
effect or a reaction abnormality may have occurred.
HIGH
The value is higher than the reference value. (only when a
reference value is set)
LOW
The value is lower than the reference value. (only when a
reference value is set)
2.2.6 Checking the measurement result history
a
On the standby screen, press [<].
The current date and time screen appears.
b
Press [>].
The most recent test results appear.
Pressing [>] again displays the measurement results prior to the one
currently displayed.
●
MENU1
Option
Description
1. Date
Sets the date.
2. Time
Sets the time.
3. Date format
Sets the date format.
Selectable items: [YMD][MDY][DMY]
4. Sound volume
Sets the beeper volume.
Selectable items: 0 to 3
●
MENU2
Option
Description
MENU No.
1 - 1
1 - 2
1 - 3
1 - 4
2 - ITEMx
2 - ITEMx
2 - ITEMx
2 - ITEMx
2 - ITEMx
2 - ITEMx
3 - 1
3 - 2 - 1
3 - 2 - 2
3 - 2 - 3
3 - 2 - 4
MENU No.
MENU No.
ITEM1 to
ITEM16
Reference value ON/OFF
Sets the reference value function to
[ON] or [OFF].
2 - ITEMx
Unit
Sets the unit.
Selectable items: [ ][mmol/L][
μ
mol/L]
[mg/dL][g/dL][U/L]
High reference value
Sets the High reference value.
Low reference value
Sets the Low reference value.
Reagent in IC-CHIP
Check parameter
reference value
Parameter of reagent in IC-CHIP
User coefficient A
User coefficient B
●
MENU3
Option
Description
1. Check measurement
Performs check measurement.
Checks light intensity of optical
unit LED
Execute this when “E-130” appears.
Sets the threshold for scanning test
strip barcodes
2. Optical
unit
1. Check light intensity
2. Light absorbance
blank adjustment
3. Light intensity gain
adjustment
4. Barcode threshold
setting


