V 05/21
20
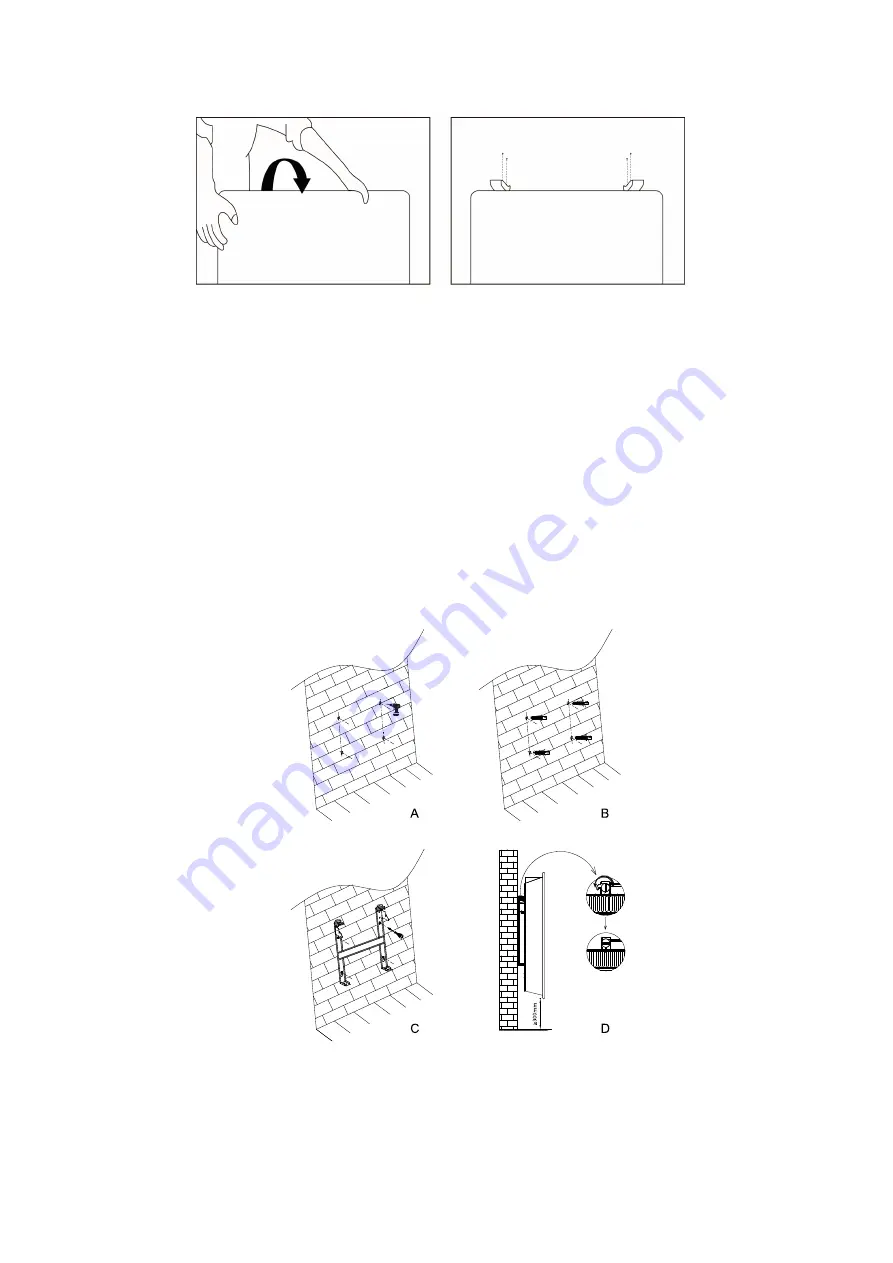
1. Turn the convector upside down
2. Insert the feet. The longest
part must be positioned behind
on the rear the convector.
3. Tighten the wing nuts on the feet.
B. Wall-mounting: how mount the convector onto the wall
The convector packaging contains all the accessories necessary for wall-mounting.
To wall-mount, proceed as follows. The appliance has already attached the bracket to the rear of the product, so
remove it from the convector following these steps:
1. Unscrew the two screws located on the upper part of the two vertical bars of the wall bracket.
2. Pull out the wall bracket by pressing down on the top of the two vertical bars of the wall bracket.
3. Remove the wall bracket completely from the convector.
After removing the bracket, proceed as follows (figure below):
A. By placing the bracket against the wall, mark on the wall with the pencil the points where to make the holes to
insert the fisher. Respect the minimum distances of the convector from the walls.
B. Drill the 8mm diameter holes in the wall and insert the fisher.
C. Attach the bracket to the wall and screw the supplied screws into the fisher.
D. Position the unit straight so that the holes are aligned with the bracket and insert the parts of the bracket into the
holes on the back in the upper part of the convector. Make sure that the convector is firmly hooked to the bracket
by gently pulling it.
Tighten the screws at the top of the convector firmly.


