background image

Chapter 4 
Hardware installation 

22 


Finished! 

4.5.


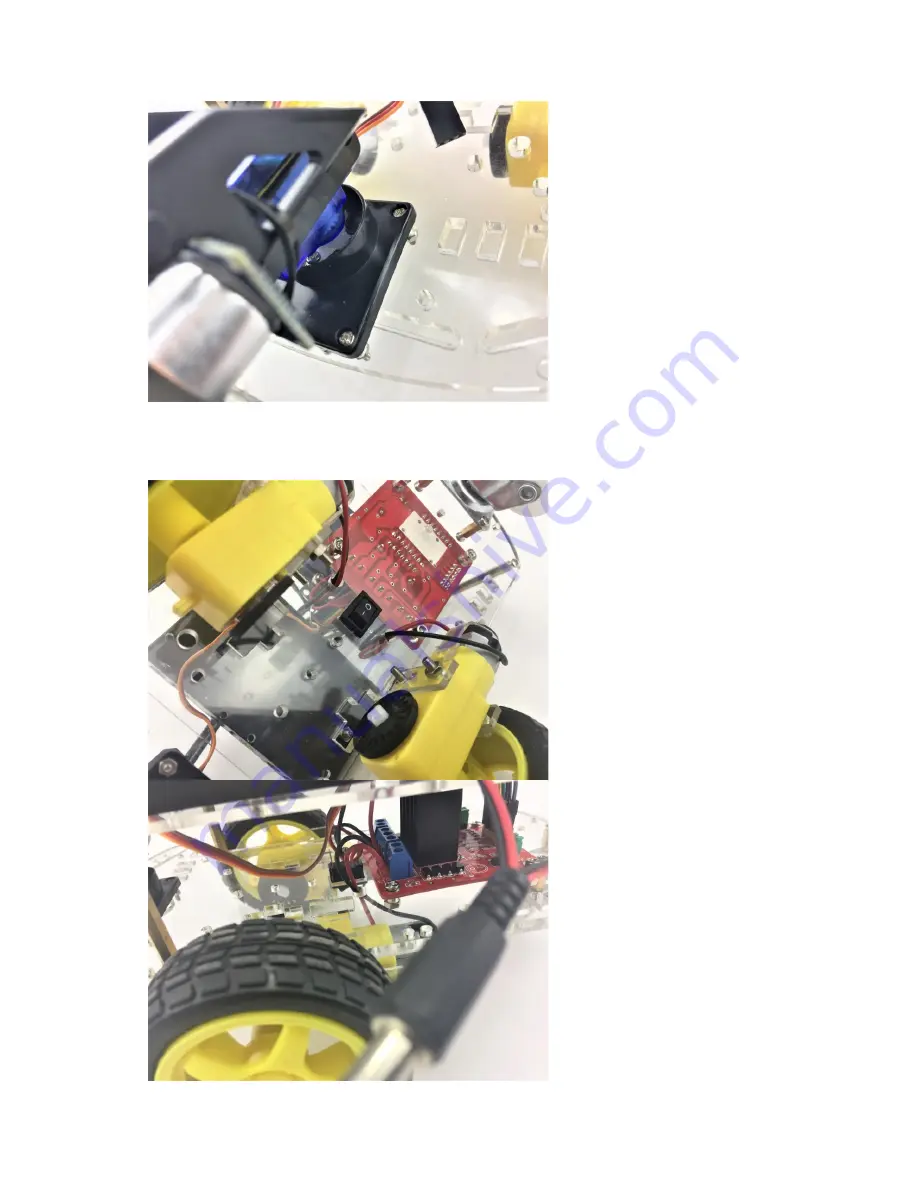
Switch 

The switch can save you a lot energy turning the car on and off. However, it’s just an option. It can be 
done by putting the switch in line with the battery box power wire. 


Insert the switch in pre-cut slot 


Solder the switch in line with the 
power cable 

Summary of Contents for TA0136

Page 1: ...I TA0136 USER MANUAL ARDUINO 2 WHEEL DRIVE ULTRASONIC ROBOT KIT...

Page 2: ...installation 2 3 1 Arduino Software IDE 2 3 2 Play with your first Hello World LED example 3 3 3 Run your Arduino 2 Wheel Drive code 4 Hardware installation 5 4 1 Unboxing and Component list 5 4 2 Ch...

Page 3: ...tput activating a motor turning on an LED publishing something online You can tell your board what to do by sending a set of instructions to the microcontroller on the board To do so you use the Ardui...

Page 4: ...rduino Easy Figure 1 Installation of drivers Connecting your UNO board with your computer Connecting UNO and your PC by a blue USB cable and if connected correctly you will see the green power LED lig...

Page 5: ...s step is vital In this case for demonstration purpose we are using the COM 4 3 2 Play with your first Hello World LED example Firstly let s tell IDE where to find our Arduino port and which board you...

Page 6: ...t simple example Following the path by File Examples 01 Basics Blink A new code window would pop up press the arrow symbol to upload You will notice the orange LED is blinking almost every second 3 3...

Page 7: ...ensor 2 Arduino UNO Development Board 3 Arduino Sensor shield V5 0 4 6 x AA Battery Box Batteries not included 5 L298N Motor Driver Board 6 Rocker Switch Optional configuration please see Chapter 4 4...

Page 8: ...4 2 Chassis Frame Installation Remove the protective cover and prepare the items 1 4 x M3 6mm Screws 2 4 x M3 10mm Spacers 3 4 x M3 6mm screws 4 Metal Pivot Wheel Assemble the M3 10 spacers and M3 6...

Page 9: ...pter 4 Hardware installation 7 Screw in the metal pivot wheel to the chassis Gather 4 x M3 10mm screws and nuts to secure L289N Motor Drive board Screw the L289N Motor Drive board from the bottom chas...

Page 10: ...Chapter 4 Hardware installation 8 Gather 4 x M3 8mm screws and 4 x M3 35mm spacers Secure Spacers onto the chassis as per the picture on the left Spacers Stand offs should look like this...

Page 11: ...4 Hardware installation 9 Gather the following components 1 2 x Acrylic Motor Brackets 2 4 x M3 35mm Screws 3 2 x Nuts Attaching wheel encoders are optional These are not required for this particular...

Page 12: ...Hardware installation 10 Place acrylic DC motor Brackets on both side of the motors as shown on the left Gather another two acrylic fasteners and two wheels Insert the acrylic fasteners first in pre...

Page 13: ...Chapter 4 Hardware installation 11 Then tighten and secure the DC motor with one nut on the other side Fix the other motor as well Pull the wire through as we need to connect them to the L289N board...

Page 14: ...Prepare the jumper cables Separate the jumper cable set into four and eight configurations Connect the 8 jumpers with L289N board as shown Please Note The 8 Jumper cables will eventually attach to th...

Page 15: ...installation 13 Prepare the following Battery pack Arduino UNO development board Top acrylic chassis 6 x nuts 6 x M3 10mm screws Peel the protective cover Place the battery pack and UNO board on the t...

Page 16: ...Hardware installation 14 Secure the screws from the bottom It should look like this Feed the jumper wire from the L289N board and pull through to the top acrylic chassis hole to connect with the UNO b...

Page 17: ...Chapter 4 Hardware installation 15 Mount the top acrylic chassis to the bottom chassis Use four M3 6 screws to secure top acrylic chassis It should look like this...

Page 18: ...Chapter 4 Hardware installation 16 Place the sensor shield on the top of the UNO board and ensure the pins line up with the Uno Board...

Page 19: ...nsor acts as the eye of this 2 wheel drive car In the following steps we are going to guide you through the installation of ultrasonic sensor and servo Items required in this step Assemble the FPV hol...

Page 20: ...are installation 18 Prepare the items To fit the servo horn into the black holder we need to modify as pictured Best tool to do this with is a side cutter Caution Be carefully with cutter and sharp ed...

Page 21: ...inside the bracket and secure with 6 M2 5 screws in the servo package It should look like this To tighten the ultrasonic sensor we can use several cable ties Not included in the Kit Alternatively you...

Page 22: ...Chapter 4 Hardware installation 20 It should look like this...

Page 23: ...tion 21 Prepare the Self tapping screw in the Servo package and tighten the sensor part with servo rack It should look like this Gather four M2 5 screws and corresponding nuts in the FPV package to se...

Page 24: ...ch The switch can save you a lot energy turning the car on and off However it s just an option It can be done by putting the switch in line with the battery box power wire Insert the switch in pre cut...

Page 25: ...9N Caution Do not modify your programming code when USB cable plugged in Arduino UNO development board and your computer with wires connecting to L289N Motor Drive board as a large amount of current w...

Page 26: ...he connection table 2 Take your time and be patient with wires Caution Any incorrect wire connection will lead to problems including device malfunction device failure damage to the device or damage to...

Page 27: ...Chapter 4 Hardware installation 25 Figure 4 Arduino Sensor shield v5 0 Diagram Figure 5 Overview...

Page 28: ...other Arduino Robot Kit versions where you can learn WIFI Bluetooth infrared remote control and so many more Arduino 4 Wheel Drive with Ultrasonic Line Tracer Bluetooth Robot Kit https www auselectron...

Page 29: ...distance int directionn 0 Servo myservo new myservo int delay_time 250 set stable time int Fgo 8 int Rgo 6 int Lgo 4 int Bgo 2 forward turn right turn left back void setup Serial begin 9600 pinMode p...

Page 30: ...LOW delay g 300 void detection test the distance of different direction int delay_time 250 ask_pin_F read forward distance if Fspeedd 10 if distance less then 10 stopp 1 back 2 if Fspeedd 25 if distan...

Page 31: ...onds 2 digitalWrite outputPin HIGH delayMicroseconds 10 digitalWrite outputPin LOW float Ldistance pulseIn inputPin HIGH Ldistance Ldistance 5 8 10 Serial print L distance Serial println Ldistance Lsp...

Page 32: ...Appendix 30 if directionn 6 back 1 turnR 6 Serial print Right if directionn 4 back 1 turnL 6 Serial print Left if directionn 8 advance 1 Serial print Advance Serial print Code End...

Reviews: