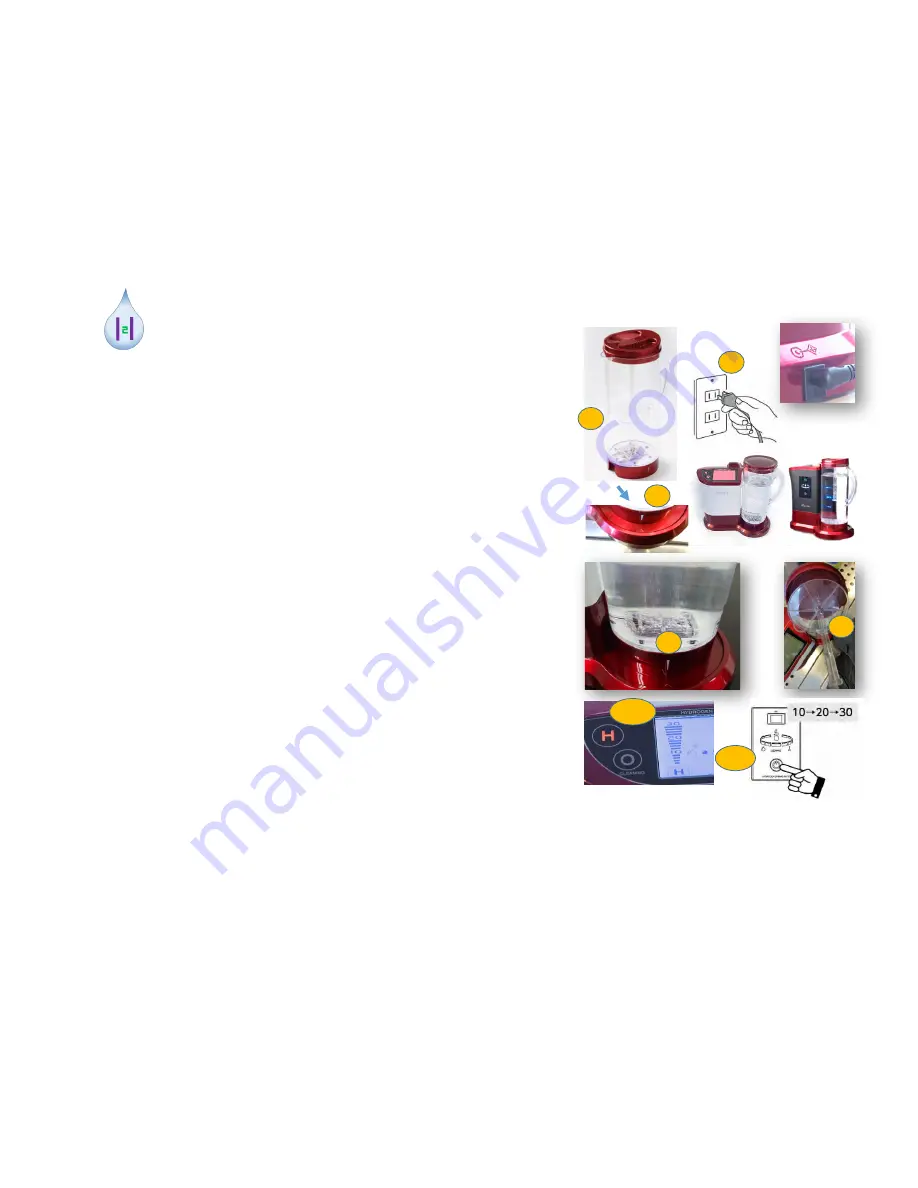
12 Producing hydrogen water
1
3
2
5
4D
4F
6
1.Now connect the mains plug of the DC power supply to both
the 220 V socket and to the DC connection on the back (2) of
the device. The correct connection is indicated by the
illumination of LEDs on each of the two device types.
2.Put the glass jug (1) filled with 1 - 1.8 liters of trustworthy drinking
water into its position.
Why should at least 1 liter be filled?
In the
electrolysis part at the bottom of the glass jug (5), hydrogen gas
is released in the jug, which should dissolve in the water as
extensively as possible (maximum 1.6 mg / l). But this takes a lot
of time because the hydrogen bubbles you see are rising very
quickly and are reluctant to dissolve in the water.
The trick of
the "Lourdes" system consists in the float disk on the sliding rod
(3)
, which catches the hydrogen bubbles below the water
surface before they gas out. So these have more time to
dissolve in the water.
The disc must always be well below the
water surface.
3.
To start Model D or F:
Briefly
press the 4D or 4F
button once (10
minutes production time), 2 times (20 minutes) or 3 times (30
minutes)
. The longer the production time is selected and the
lower the amount of water in the jug, the higher the hydrogen
concentration. After the end of production, an acoustic signal
sounds. The hydrogen water is now ready and should either be
consumed immediately
or
bottled
promptly
in a glass or
stainless steel bottle with a tight seal,
so that the dissolved
hydrogen cannot gas out
. With a sealed closure, the dissolved
hydrogen is mostly retained for more than 12 hours.
If you do not remove the jug immediately
after the acoustic signal, the device will
remain active for up to 2 hours and will
produce smaller amounts of bubbles as a
"trickle charge" through the water.


