STEP 4
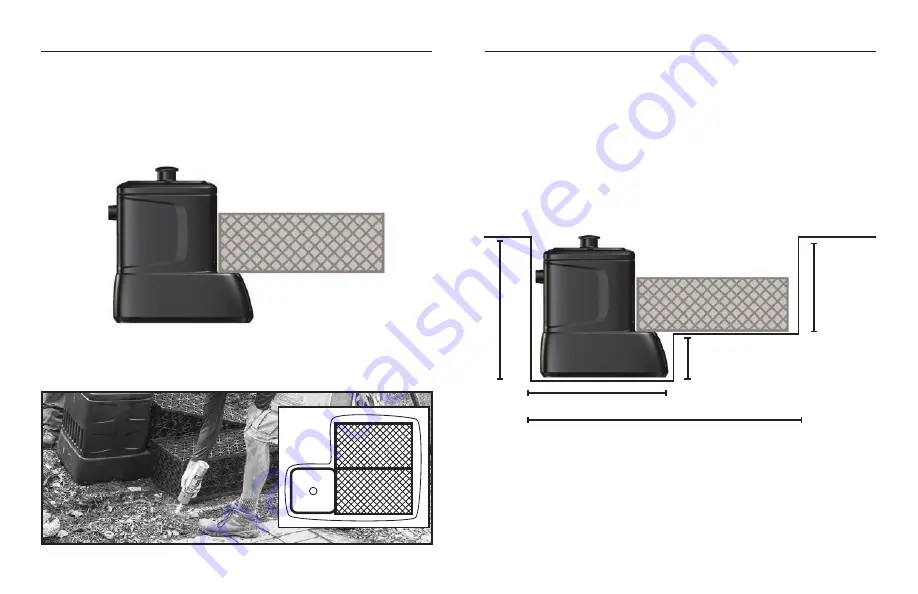
PLACE PONDLESS VAULT AND AQUABLOX
®
• Lay out the AquaBlox
®
and the Pondless Vault in desired
location. The AquaBlox
®
should be placed side by side with
the wider panel face down. Place the AquaBlox
®
over the
front edge of the Pondless
®
Waterfall Vault.
• Use a can of brightly colored, highly visible spray paint to
outline the shape around the Pondless
®
Waterfall Vault and
AquaBlox
®
.
This will help mark out the area to be excavated.
25.5"
48"
23"
7"
18.5"
STEP 5
EXCAVATE YOUR WATERFALL BASIN
• Remove vault and AquaBlox
®
and begin to excavate
approximately 18.5”depth. Once 18.5” depth has been
reached, excavate area for vault, an extra 7” down. Please
note an additional 6” of excavation is recommended per
side of the basin to allow for: AquaBlox
®
dimensions,
sufficient backfill material and compaction required during
backfilling.
• Digging can be labor intensive, so pace yourself and
get some friends to help.
• Excess soil can be used to create elevation for the
waterfall and stream or as soil for the berm around the
waterfall.
10
www.aquascapeinc.com
Summary of Contents for DIY Waterfall Kit
Page 1: ...DIY Waterfall Kit INSTRUCTION MANUAL ...
Page 21: ...STEP 20 ENJOY 21 CAN 1 866 766 3426 US 1 866 877 6637 ...
Page 43: ...ETAPE 20 À VOUS D EN PROFITER MAINTENANT 43 CAN 1 866 766 3426 US 1 866 877 6637 ...
Page 65: ...PASO 20 DISFRUTE 65 CAN 1 866 766 3426 US 1 866 877 6637 ...
Page 68: ...86240 Rev 1 16 2015 Aquascape Inc All Worldwide Rights Reserved ...


