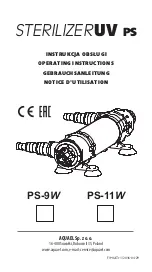


STERILIZER
UV ps
11
5.
screw out the stub pipes (5) and stopper (3), remove the gaskets (4)
from them, and carefully clean under running water,
6.
clean the housing,
7.
assemble the device in reverse order, all gaskets must be properly
placed in their groove and greased with Vaseline, and the fluorescent
lamp must be inserted all the way into the fitting until refusal.
FLUORESCENT LAMP REPLACEMENT
When the UV-C fluorescent lamp does not work it should be replaced
as follows:
1.
disconnect the device by pulling the plug from the power supply
socket,
2.
disconnect the device from the water circulation, remove any remain-
ing water inside and wipe dry,
3.
turn the fitting grip (10) clockwise, according to the „OUT” arrow
(fig.
),
4.
remove the fitting,
5.
remove the fluorescent lamp from the fitting and press a new one in
until locked,
NOTE Do not touch the glass of the fluorescent lamp; remove possible
marks with a dry cloth.
6.
place the fitting (10) along with the mounted fluorescent lamp (8) in
the housing.
WARRANTY CONDITIONS
The manufacturer grants a 24 month guarantee beginning on the date of
purchase. The guarantee covers defects arising from manufacturer fault
i.e. defective materials or assembly errors. It does not cover damage
due to user’s fault caused by improper handling of the device or using
the device for purposes discordant its destination.
Attention: any modification or disassembly attempt exceeding normal
usage and maintenance cause the guarantee void.
In case of noticing improper operation of the device send it with filled out
warranty card to the manufacturer or distributor address. . The conformity
of the production date stamped on the product and written in the guar-
antee card is a prerequisite for accepting the guarantee. The following
warranty conditions do not exclude, limit or suspend user’s rights derived
from discrepancy of the merchandise with the agreement. The guarantee
is limited to repair or replacement of the unit only and does not cover con-
sequential loss or damage to animate or inanimate objects.
4.
place the fitting (10) along with the fitted fluorescent lamp (8) in the
quartz housing (7).
II. CONNECT THE STERILIZER TO THE WATER CIRCUIT
NOTE Water flowing through the sterilizer should be mechanically
filtered (by the preliminary filter).
The sterilizer should be fed by means of a pump. The device should
only be installed outside of the pond (out of water). The sterilizer must
be connected to the pump outlet. Make sure that the device is not ex-
posed to excessive water pressure (see the data sheet for the maximum
permissible value).
NOTE For the purpose of problem-free deaeration, the UV sterilizer
should be positioned slightly inclined, so that the outlet opening is the
highest point of the sterilizer.
In mounting the sterilizer, you may find handy the brackets (1), which
can be fixed to the background by means of suction caps (2) or screws.
LAUNCH AND USAGE
Following the above preparations, you should first turn on the pump
cooperating with the sterilizer. Make sure that the hoses are tightly
connected to the sterilizer. If leaks are discovered, tighten up the con-
nections. Only after stabilizing the water flow, turn the sterilizer on by
sticking the plug in a power outlet.
NOTE Do not cover the plug stabilizer.
In order to obtain optimum results, it is recommended to use the steril-
izer non-stop for the entire season from spring to late autumn. The an-
ticipated period of effective operation of the UV fluorescent lamp is ca.
7500 hours, so it will serve its purpose problem-free for the entire sea-
son. After the lapse of the planned period of operation, the UV sterilizer
should be turned off, by pulling the plug from the power supply socket.
In order to get rid of algae from the pond, it is sufficient to use the UV
sterilizer in cycles, e.g. one month of operation and one month of inter-
val, and so forth.
CLEANING THE STERILIZER
For efficient operation of the sterilizer, it should be cleaned every several
weeks, performing the following actions:
1.
disconnect the device and the pump cooperating with it from the
power supply by pulling the plugs from the sockets,
2.
disconnect the device from the waster circulation and remove any
water remaining in it,
3.
remove the fitting with the fluorescent lamp by turning the fitting grip
(10) according to the „OUT” arrow (fig.
),
4.
carefully remove the quartz cover (7), turning it according to the
„OUT” arrow (fig.
), and rinse it under running water and carefully
wipe dry – particularly its internal side,
Summary of Contents for PS-11W
Page 3: ......