2
3
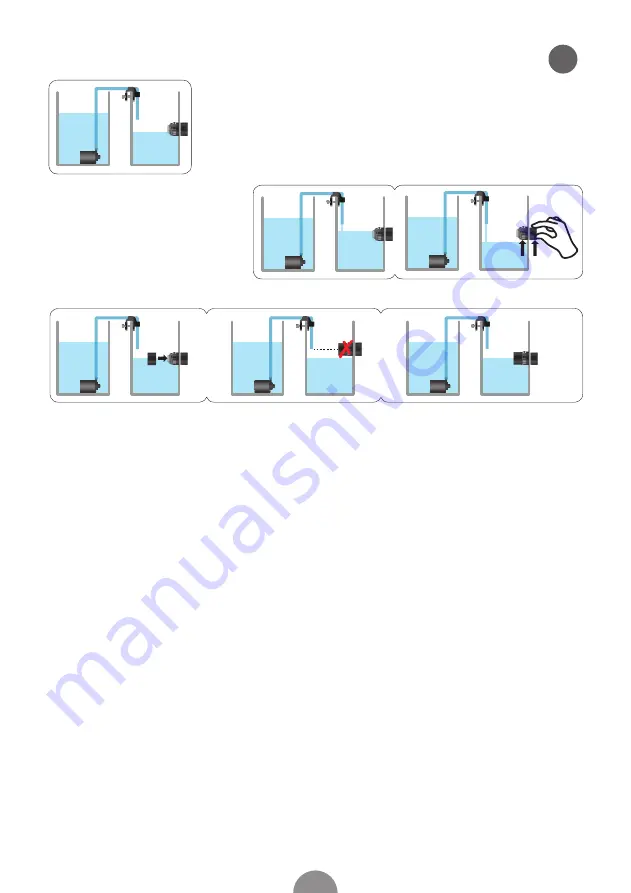
• Install the sensor at the desired water level.
• Plug in the power supply first, then plug in the pump.
• The system will automatically add
water to the high level sensing point.
• Test correct operation, lower the
water level below the low level
sensing point to see if the system
will automatically add water.
• Protective cover must be installed!
• The water outlet should not be aligned with the sensor!
• Anti-siphon prevention, if you stop the pump there is the risk of siphoning through the hose, make sure
the hose is above the maximum waterlevel at all times.
• In the case of operational errors, such as water shortage in the water reservoir, or water supply exceeding
1 cm, the pump will stop after several attempts and alarm with a red flashing light.
• To stop the alarm, unplug power supply, re-plug and the device will resume normal operation.
• Reset the system if you change the configuration of your installation, unplug power and re-start the setup
process from step 1!
Maintenance
• Scale and salt settlement may influence proper functioning, regular cleaning is needed to ensure
proper operation!
• Disconnect power supply and pump from mains before any maintenance on the aquarium.
• Open and remove rotor and axle, to clean them.
• Clean sensors, impeller and shaft with 50% vinegar and 50% water solution. Let them soak for a
minimum of 15 minutes.
• Reassemble shaft and impeller verify that shaft caps are properly installed.
• Reassemble pump and place back in aquarium.
• The pump is a wearing part that depending on usage will need changing yearly, this is
considered normal maintenance and not covered under warranty.
• Replacement pumps, sensors and power supply are available at your dealer.
Sensor installation
1. Setup
2. Testing
3. Important while testing
4. Alarm and resetting
GB


