Hint:
Attach the top of each vertical support [9] to the wall with the help of
adhesive tape. By doing so, you can temporarily secure the wall against collapse
prior to attaching it to the vertical supports
(3.6 and 4.6 pools do not have
vertical supports)
.
Hint:
Attach each rail coupling [12] to the wall with the help of adhesive tape. This
prevents the rails from sliding away from the wall when installing the liner.
4. CONNECT THE POOL WALL ENDS
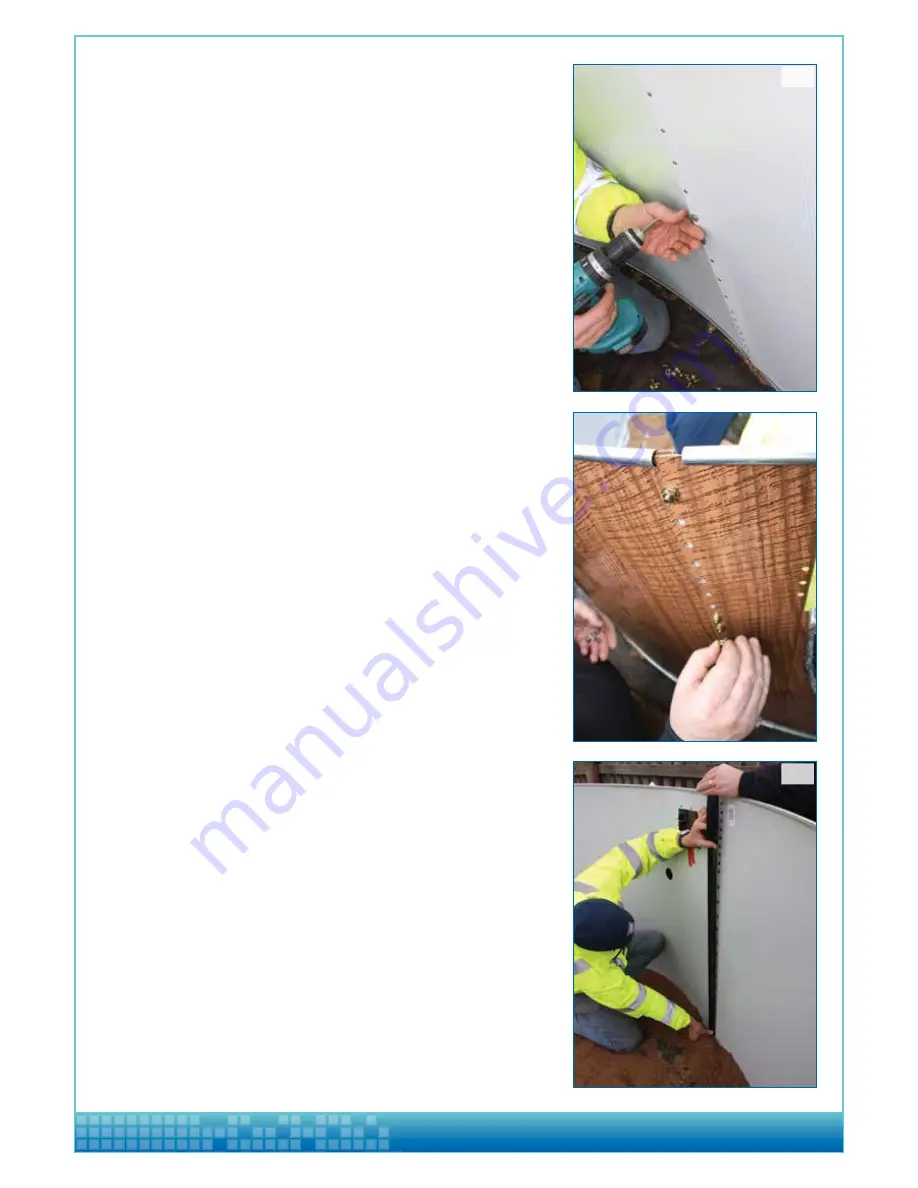
a. Align the holes in the two ends of the pool wall with each other (Image 4-7).
Hint:
Putting a screwdriver through two opposite holes will facilitate alignment.
b. In order that the holes are aligned with each other, make a circle which is formed
by the pool wall. The circle should be larger or smaller; make it in such a way that
you are pushing the base plates with your foot outwards or inwards to the
circle centre.
c.
Note:
Only on 3.6m and 4.6m Satinwood pool Kits, there is a brown plastic
trimming piece that sits on the outside of the pool and a brown plastic cover that
can slip into it to cover the bolt heads when finished. On larger pools the bolt
heads are covered by a vertical strut member.
d. Connect the ends of the pool wall insert a bolt from inside the pool into each
aligned set of holes, and screw on the nut. The bolt heads should be inside the
pool and all the nuts should be on the outside of the pool (Image 4-8).
e. First hand tighten the connections. When all the connections are made, tighten
them using the appropriate tools.
f. Cover the wall end coverings and bolt heads on the inner side of the pool wall by
using an adhesive tape (Image 4-9), if possible textile adhesive tape.
Hint:
We recommend using the assembled pool step ladder for entering and leaving
the pool.
4-7
4-8
4-9
Round Satinwood Pool
8


