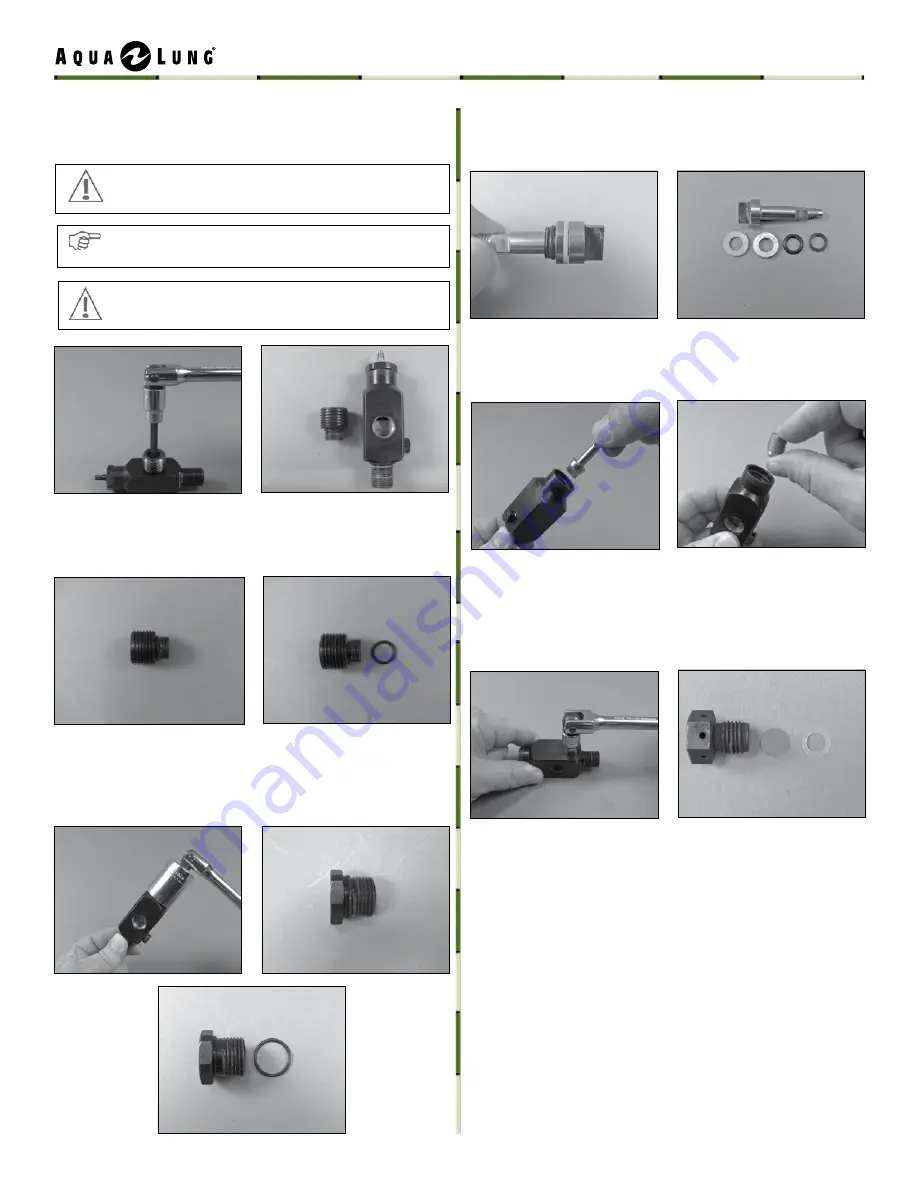
5. Using the appropriate o-ring tool (pn 944022 or pn 103102),
remove o-ring (14) from the valve seat adapter (15). Discard
o-ring. Remove the old blue Loctite from the valve seat adapter
and body.
4. Holding the valve body assembly in a vise, unscrew the valve
seat adapter (15) from the valve body (12) using a flex wrench (pn
9-44363) with 5-mm hex key adapter (pn 8367A23).
8. Unscrew the valve seat (11) from the valve body (12) using the
spindle (10). Discard valve seat.
7. Remove the spindle (10) from valve body (12). Remove back-up
ring (6), o-ring (7), metal washer (8) and plastic washer (9) from the
spindle (10).
9. Remove the safety plug (13a) from the port of the valve body (12)
using a flex wrench (pn 9-44363) and 1/2” socket (pn 944333). Discard
safety plug. Remove the safety disc, red (13b) and gasket (13c) from
the port in the valve body. Discard safety disk and gasket.
This Concludes Disassembly of the Cylinder Valve
Before starting assembly, perform parts
cleaning and lubrication in accordance with
Procedure A: Cleaning and Lubricating
in the
back of the manual.
6. Holding the valve body assembly in a vise, use a 22mm socket
(pn 769354) and flex wrench (pn 9-44363) to remove the valve
plug (4) from the valve body (12). Remove the o-ring (5) from the
valve plug (4) using the appropriate o-ring tool (pn 944022 or pn
103102). Discard o-ring.
CAutioN:
Do not damage the internal surface of
the valve seat adapter.
note: If the valve seat adapter does not loosen, use a heat
gun to heat up the body and adapter to loosen the adhesive.
CAutioN: Loctite 242 is used to hold this part in place
in addition to the torque applied during assembly.
19


