background image

Copyright © Apricorn, Inc 2017. All rights reserved.

Windows is a registered trademark of Microsoft Corporation.

All other trademarks and copyrights referred to are the property of their 

respective owners. 

Distribution of modified versions of this document is prohibited without 

the explicit permission of the copyright holder. 

Distribution of the work or derivative work in any standard (paper) book 

form for commercial purposes is prohibited unless prior permission is 

obtained from the copyright holder.

DOCUMENTATION IS PROVIDED AS IS AND ALL EXPRESS OR 

IMPLIED CONDITIONS, REPRESENTATIONS AND WARRANTIES, 

INCLUDING ANY IMPLIED WARRANTY OF MERCHANTABILITY, 

FITNESS FOR A PARTICULAR PURPOSE OR NON-INFRINGEMENT, 

ARE DISCLAIMED, EXCEPT TO THE EXTENT THAT SUCH 

DISCLAIMERS ARE HELD TO BE LEGALLY INVALID

Revised

  05/02/2017

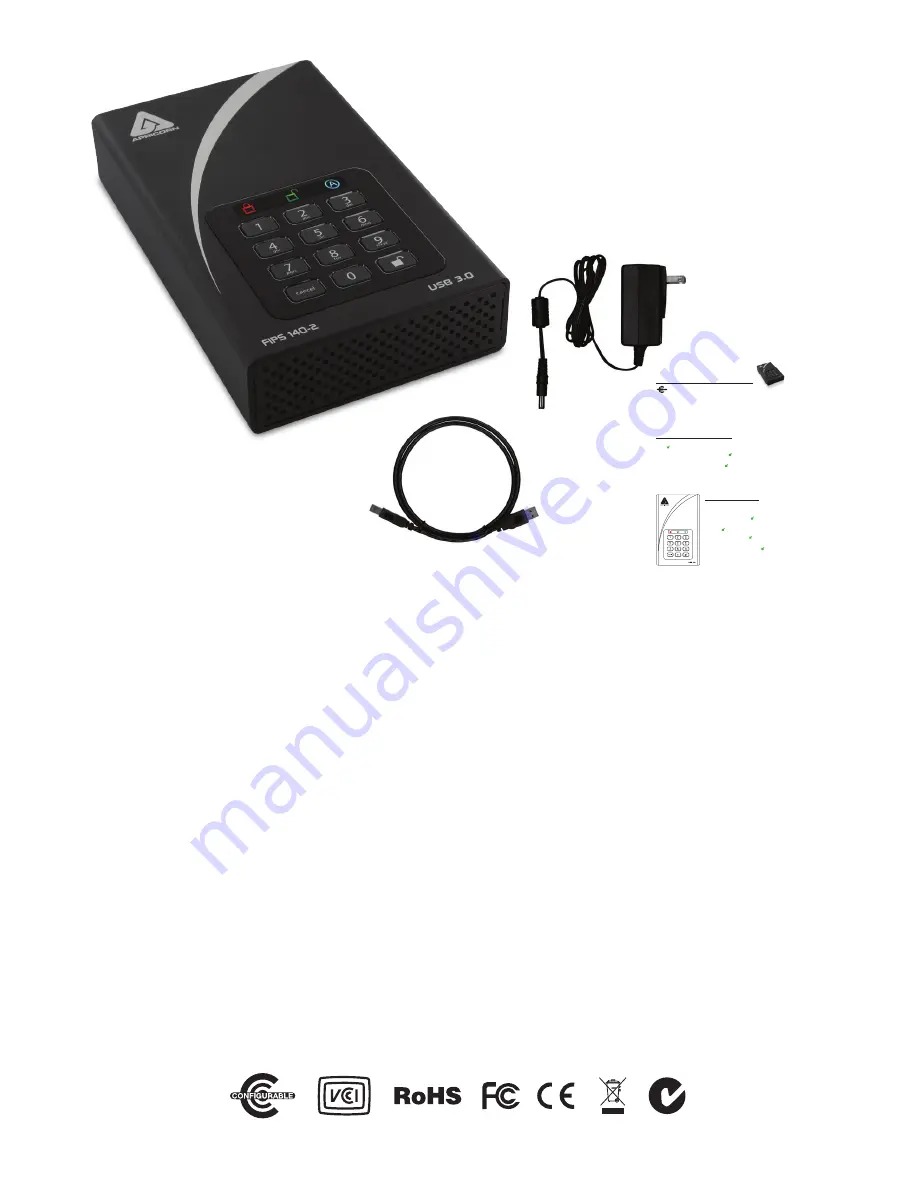
Package contents

• 

Aegis Padlock DT FIPS 

• 

AC Adapter

• 

USB 3.0 data cable 

(backwards compatible 

with USB 2.0)

• 

Quick Start Guide

Quick Start Guide

NOTE: if you are using the Aegis Configurator to set up your Padlock DT, First 

ensure that the device has the “configurable” logo on the belly label. Also, DO NOT 

perform the following Manual Admin and USER PIN SETUP steps below; The Aegis 

Configurator will only recognize devices in their factory “out of box” state or devices that have 

been completely reset.

Your Aegis Padlock DT is preformatted in NTFS for Windows

®

 and is ready for use. For Mac OS 

formatting, please refer to the Mac OS formatting instructions on the reverse.To access the Aegis 

Padlock DT, connect the drive to a power outlet via the AC Adapter and a USB port using the USB 

3.0 cable (this cable is also compatible with USB 2.0).

Each Aegis Padlock DT is shipped without a preset Personal Identification Number (PIN.) To prepare 

the drive for use, the user must first establish an Admin PIN that is between 6 and 16 digits in length. 

PINs cannot contain all consecutive numbers or all the same numbers 

(e.g. 0123456789, 987654321 

or 11111111, 22222222, etc.

This Admin PIN is used to set the Padlock DT’s various Admin features and 

also serves as the first of five User PINS for the Padlock DT’s standard operation.

1. Plug the Padlock 3 into a USB port and turn power switch to ON. 

(

BLUE

 and 

GREEN

 LEDs will glow solidly, indicating no Admin PIN has been established.)

2. Press   

+ 9

 simultaneously. 

(

BLUE

 LED will glow solidly and 

GREEN

 LED will blink.)

3. Enter the PIN to be used as your Admin code and press  . 

(If PIN is accepted, 

BLUE

 LED will turn off momentarily and 

GREEN

 LED will blink 3 times by itself, 

then will continue blinking as the 

BLUE

 LED glows solidly.)*

4. Quickly re-enter that same PIN once more and press   

(

BLUE

 LED will turn off momentarily and 

GREEN

 LED will illuminate for one second until replaced by 

the 

BLUE

 LED glowing solidly, indicating that the Admin PIN has been set and the Padlock 3.0 is in 

Admin mode, ready to add another User PIN [see reverse] or for setting up features.)

5. To exit the Admin mode, press 

cancel


(

RED

 LED will glow solidly)

 or wait 30 seconds and Padlock 

3.0 will return to standby mode. 

6. If no additional users are to be added or Admin features set, Padlock 3.0 setup is now complete and 

ready for use.

Aegis 

Padlock

 DT

Adding a New User PIN

There are two ways to establish a User PIN: Admin-generated 

while in Admin Mode, and User-generated while Padlock DT is 

placed in User Forced Enrollment State.

ADMIN-GENERATED USER PIN

1.  Enter the Admin Mode by holding 

 + 0

 for five seconds; 

With 

RED 

LED blinking, enter the Admin PIN and press the 

UNLOCK

 button. The 

BLUE 

LED will glow solidly. 

2.  Press the 

 + 1

 buttons together until the 

BLUE 

LED 

glows solidly and the 

GREEN LED 

starts blinking.

3.  Enter the User PIN

*

 and press 

.

 The 

GREEN 

LED will 

blink three times by itself, then the 

BLUE

 LED will glow 

solidly as the 

GREEN 

LED continues blinking.

4.  Re-enter that same User PIN and press  . The 

GREEN 

LED will glow solidly for three seconds verifying that 

the User PIN was successfully added, and then will be 

replaced by the 

BLUE

 LED glowing solidly, indicating that 

the drive has returned to the Admin mode.

First-Time Use / Admin PIN Setup

*  If PIN is unacceptable, Red LED will blink 3 times and return to solid 

BLUE

 / blinking 

GREEN

 LEDs.

CONFIGURABLE

Summary of Contents for Aegis Padlock 3.0

Page 1: ...Aegis Padlock DT FIPS Remember to memorize save your authentication and recovery PINs in a safe place User s Manual Data Security at Your Fingertips ...

Page 2: ... Mode 9 Setting Read Only or Read Write Modes from the User Mode 10 Setting LED Flicker Button Press Indicator Mode 11 Setting Minimum PIN Length Requirement 11 Setting the Unattended Auto Lock Feature 11 Setting a Self Destruct PIN 12 Aegis Padlock DT FIPS Brute Force Protection 13 Performing a Complete Reset 14 Initializing and Formatting After a Complete Reset 15 Hibernating or Logging Off from...

Page 3: ...is used to set the Padlock DT s various Admin features and also serves as the first of five User PINS for the Padlock DT s standard operation 1 Plug the Padlock 3 into a USB port and turn power switch to ON BLUE and GREEN LEDs will glow solidly indicating no Admin PIN has been established 2 Press 9 simultaneously BLUE LED will glow solidly and GREEN LED will blink 3 Enter the PIN to be used as you...

Page 4: ...n mode where Admin features can be set e g adding a User 6 To exit the Admin mode press the CANCEL button The drive will return to the locked standby state If no action is taken within 30 seconds the drive will return to its locked sleep state GREEN LED will blink if the PIN is accepted If the PIN is NOT accepted the RED LED will blink return to step 4 to resume the Admin PIN setup process No LEDs...

Page 5: ...ons the Admin mode must first be entered Once in the Admin mode each of the drive s functions can be addressed with the appropriate button commands While in the Admin mode the actual data on the drive will not be accessible Prior to your first use of the Aegis Padlock DT you must first create the Admin PIN Immedi ately after setting the Admin PIN you may then continue setting up other functions If...

Page 6: ...ned to the Admin mode B USER GENERATED USER PIN USER FORCED ENROLLMENT Note User Forced Enrollment state can only be implemented where there is no Admin generated User PINs set up as described in the process above User Forced Enrollment Security Warning When a drive is in the User Forced Enrollment state it is essentially unlocked until a User PIN is established Therefore DO NOT load sensitive dat...

Page 7: ...rnately 3 Press the 7 8 buttons together again for five seconds The GREEN LED will glow steadily for two seconds 4 The drive will return to Admin mode indicated by the BLUE LED glowing steadily NOTE Deleting the User PIN will also delete the Self Destruct PIN and all recovery PINs if any have been set Changing the User PIN The User PIN can be changed within the User mode drive unlocked GREEN LED b...

Page 8: ...link three times 4 Repeat by entering that same Recovery PIN and pressing the button again If PIN is accepted for the final time the GREEN LED will blink three times and the Padlock DT will then return to the Admin mode indicated by a steady BLUE LED 5 To add more Recovery PINs repeat steps 2 4 When finished press the CANCEL button to return drive to its Standby mode Remember that using a Recovery...

Page 9: ...To set the Drive to Read Only 1 Enter the Admin mode Hold 0 for five seconds with RED LED blinking enter the Admin PIN and press the button The BLUE LED will glow steadily 2 Press and hold the r o 7 6 buttons together for three seconds The GREEN LED will blink three times 3 The drive will return to Admin mode The BLUE LED will glow steadily 4 Until changed the drive can only be read To return the ...

Page 10: ...three seconds The GREEN LED will blink three times 3 Enter the User Admin PIN and press The GREEN LED will blink 4 The drive will be in a Read Only state the next time it is unlocked To Return the Drive to Read Write 1 Press the button to wake the key The RED LED will glow steadily 2 Press the r w 7 9 buttons together for three seconds The GREEN LED will blink three times 3 Enter the User Admin PI...

Page 11: ... blink three times indicating command acceptance and then will return to the Admin mode indicated by the BLUE LED glowing steadily Creates a flickering effect in LED lights indicating positive button presses 1 Enter the Admin mode Hold 0 buttons for five seconds with RED LED blinking enter the Admin PIN and press the button The BLUE LED will glow steadily 2 Once in the Admin mode press 0 3 togethe...

Page 12: ... the button The BLUE LED will glow steadily 2 Press the 7 4 buttons together The GREEN LED will blink three times and at this point the Self Destruct PIN can now be set by the Admin while the drive is in the Admin mode or it can be set up at another time by the User after the drive is unlocked with the User PIN with the following steps 3 Press UNLOCK 3 for five seconds The RED and BLUE LEDs will b...

Page 13: ...in these ten extra attempts press and hold the 5 button and then press the UNLOCK button until the RED and GREEN LEDs blink alternately 5 Enter the code LastTry 5278879 and press the button You will now have ten additional attempts 6 When the drive is successfully unlocked the Brute Force counter will return to zero The number of attempts possible both before and after the LastTry 5278879 code is ...

Page 14: ...erform the following 1 Press and hold the CANCEL button and turn the power switch to the ON position Release the CANCEL button once the power up self test concludes when only the RED LED glows steadily 2 Within five seconds of releasing the CANCEL button press and hold CANCEL 2 together for about ten seconds until the RED and BLUE LEDs blink alternately then release all buttons 3 The GREEN and RED...

Page 15: ...er Right click My Computer and then click Manage from the Windows desktop Windows 8 8 1 or 10 Right click left corner of desktop and select Disk Management 8 In the Computer Manage window click Disk Management In the Disk Management window the Aegis Padlock 3 is recognized as an unknown device that is uninitialized and unallocated 9 Perform the following to make the drive recognizable as a basic d...

Page 16: ...adlock DT FIPS Setup for Mac OS Your Aegis Padlock 3 is pre formatted in NTFS for Windows To reformat the drive to a Mac compatible format please perform the following Once the key is unlocked open Disk Utility from Applications Utilities Disk Utilities To format the Aegis Padlock 3 1 Select the Aegis Padlock 3 from the list of keys and volumes Each drive in the list will display its capacity manu...

Page 17: ...tton 11 blinks CANCEL Button 12 blinks 4 To exit the Diagnostic Mode wait for the 20 second timeout or hold the CANCEL Button for 7 seconds to return the key to its normal operation Self Diagnostics During the initial power up after the drive has been plugged into a USB port the drive will perform self diagnostics on the encryption algorithm and critical hardware components If the RED LED blinks a...

Page 18: ...e Lock Override to On 1 Enter the Admin Mode Press and hold 0 for five seconds until the RED LED blinks then enter the Admin code and press the button The BLUE LED will glow steadily 2 Press and hold 7 1 for three seconds The GREEN LED will blink three times then the BLUE LED will glow steadily 3 When the key is unlocked and attached to a USB port in Lock Override Mode the BLUE LED will blink once...

Page 19: ...es AES 256 bit algorithm Q Why could I not initialize partition or format the Aegis Padlock A Ensure that you have administrator privileges You will need Admin privileges to use the Disk Management Utility Q The LED is blinking RED and I can t enter a code Why A Somebody has tried to access the key and the code has been entered 10 times incorrectly see Brute Force section of this manual Q Is there...

Page 20: ...t Self Destruct PIN Admin or User setup Unlock 4 Set Minimum PIN length Unlock 5 Set Brute Force Attempts Unlock 6 Auto Lock Unlock 7 Set Recovery PIN Unlock 8 1X Use to Enter Recovery PIN Unlock 9 Enter Change Admin PIN 7 1 Turn Lock Override On 7 0 Turn Lock Override Off 7 4 Disable Enable Self Destruct PIN 7 6 Read Only On 7 9 Read Only Off 7 8 Erase User and Self Destruct PIN s 0 1 Set Forced ...

Page 21: ...TION GUIDE 2 BY THE USE OF PARTS NOT MANUFACTURED OR SOLD BY APRICORN 3 BY MODIFICATION OF THE PRODUCT OR 4 AS A RESULT OF SERVICE ALTERNATION OR REPAIR BY ANYONE OTHER THAN APRICORN AND SHALL BE VOID THIS WARRANTY DOES NOT COVER NORMAL WEAR AND TEAR NO OTHER WARRANTY EITHER EXPRESS OR IMPLIED INCLUDING ANY WARRANTY OR MERCHANTABILITY AND FITNESS FOR A PARTICULAR PURPOSE HAS BEEN OR WILL BE MADE B...

Page 22: ... Apricorn Inc 2017 All rights reserved 12191 Kirkham Road Poway CA U S A 92064 1 858 513 2000 www apricorn com ...

Reviews: