9
•
Bolt Switch to the overhead beam. Assemble One end of the overhead safety shut off bar into Switch. Bolt the other
end to the overhead beam. The wire from Switch will go to power unit.
•
Manually lift both carriages on each column about waist high. Let carriages down allowing them to set on the lift
safety lock stops. Make sure they are at the same height and on the safety lock stops.
•
Check to insure the cylinders are properly seated into the cylinder hole in the base plate. If they are, the round part
of the cylinder will be sitting down on the steel flat.
•
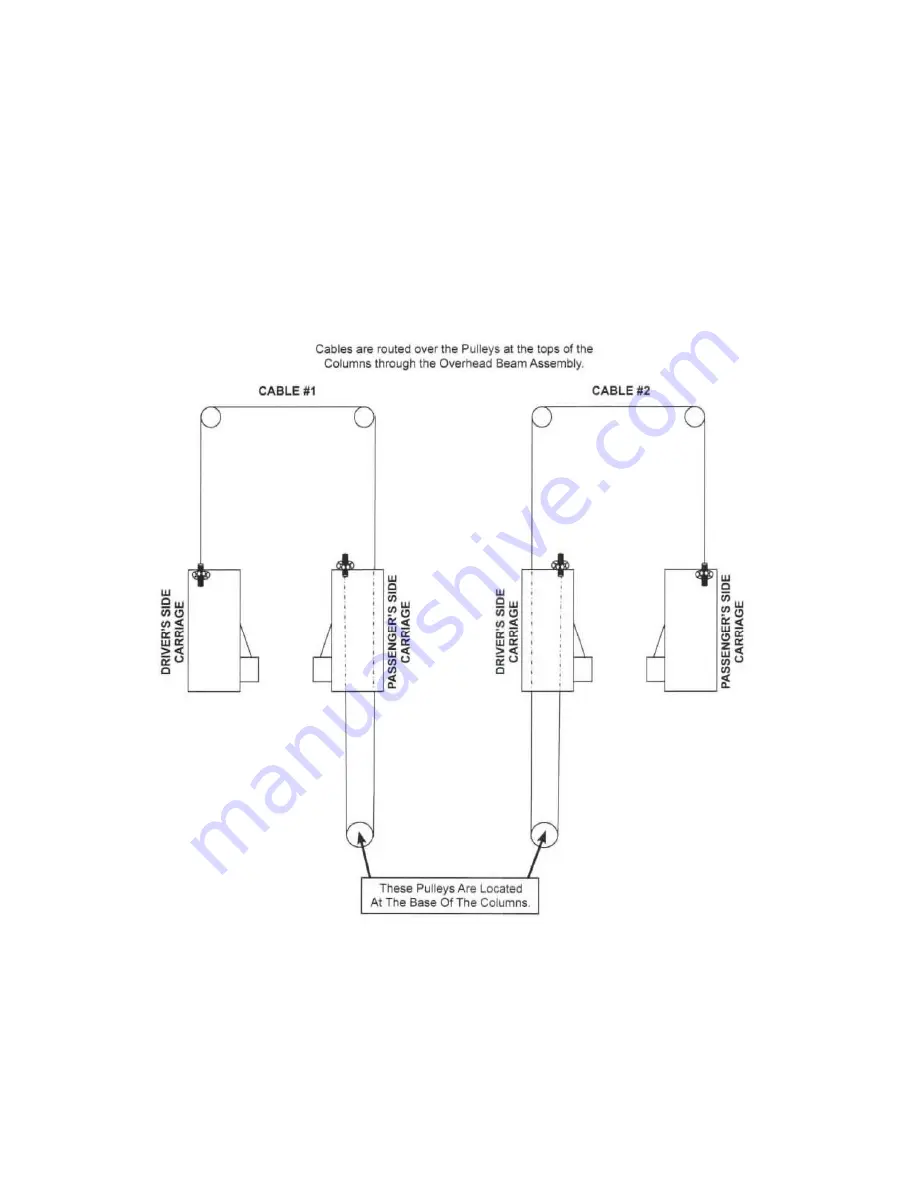
Take the equalizer cables. Using vise grips and a socket, tighten the cable nut half way down the threads.
•
Standing in front of the power unit main-side carriage notice the 4 holes in the top of the carriage.
•
Take the threaded end(end without nut) and run it up inside the carriage through the front hole on the right side of
the carriage. See figure 4 for cable routing.
Do not tighten cables at this time. Just start them on the treads.
Figure 4.
CONNECTING POWER UNIT & HYDRAULIC HOSES
•
Using four hex bolts mount the power unit to the main side column.
•
Install the TEE fitting into power unit. Install 4.3 inches extended fitting into the bottom of each cylinder. Small
thread with sealing washer for cylinder. Large thread for short hydraulic hose and long hydraulic hose.
•
Connect short hydraulic hose to the TEE fitting in power unit. Run the short hose down the side of column. Connect
the short hose to 4.3 inches extended fitting in bottom of cylinder.
•
Connect Long hydraulic hose to the TEE fitting in power unit. Run the long hose up the side of column. Run the


