


Installa
tion
2
1
AV2
AV1
HDMI 3
HDMI 2
HDMI 1
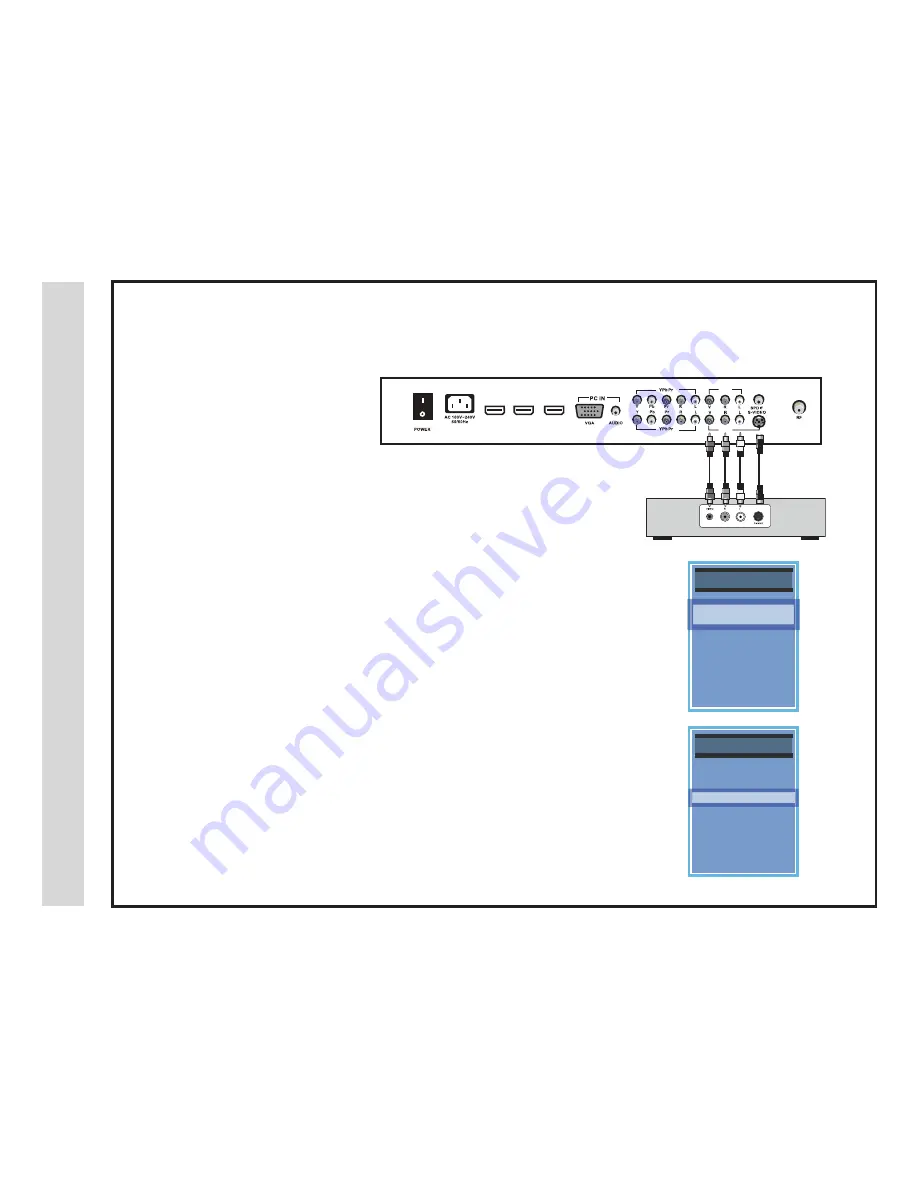
TV REAR PANEL
For GOOD video performance
Connect to A/V equipment using optional video and audio cables. Composite and
S-Video output jacks are available on most set top boxes and DVD players. (Com-
ponent or HDMI connections are recommended for best performance, if possible).
How to Connect Composite
When connecting A/V equipment to your television, match the colors of the con-
•
necting jacks (Video: Yellow; Audio: White/Red)
Connect the yellow video cable from the video output jack on your external A/V
•
equipment (ie: DVD Player, set top box) to AV1 or AV2 input on the TV’s rear
panel.
Connect the white/red audio cables for sound from the audio (L/R) output jacks
•
on your external A/V equipment (ie: DVD Player, set top box) to the AV1 or AV2
(L/R) jacks on the TV’s rear panel.
How to Connect S-Video
Connect an optional S-Video cable from the S-Video output jack on your
•
external A/V equipment to the S-Video input on the TV’s rear panel.
Connect the white/red audio cables for sound from the audio (L/R) output jacks
•
on your external A/V equipment to the AV1 (L/R) input on the TV’s rear panel.
How to Use
Press the INPUT button on the remote control. Use
•
qp
arrow buttons to high-
light the input to view (AV1, AV2, S-Video) then press ENTER.
Connecting A/V Equipment to Composite or S-Video IN on your television
I
I
NPU
NPU
T S
T S
OU
OU
RC
RC
E
E
IN
IN
PU
PU
T S
T S
OURC
OURC
E
E
TV
TV
AV
AV
1
1
AV
AV
2
2
S V
S V
ideo
ideo
Component
Component
1
1
Component
Component
2
2
HDMI 1
HDMI 1
HDMI 2
HDMI 2
HDMI 3
HDMI 3
VG
VG
A
A
-
-
Digital Set Top Box, Gaming Console
optional cables
NOTE: An S-Video
cable is for video only.
You must connect audio
cables for sound.
Connection to
Composite/S-V
ideo Inputs
13
14
Summary of Contents for LD3249
Page 1: ...03 2009 LD3249 USER S MANUAL 32 LCD TELEVISION ...
Page 3: ...Safety Instructions 2 ...
Page 4: ...Safety Instructions 3 ...
Page 5: ...Table of Contents 4 ...
Page 29: ...Specifications 28 ...
Page 30: ...Troubleshooting 29 ...


