


8
3. Operating Instructions
3.1 General Instructions
Press the power button to turn the monitor on or off. The other control knobs are located at front panel of the monitor
(See Figure ). By changing these settings, the picture can be adjusted to your personal preferences.
* The power cord should be connected.
* Press the power button to turn on the monitor. The power indicator will light up.
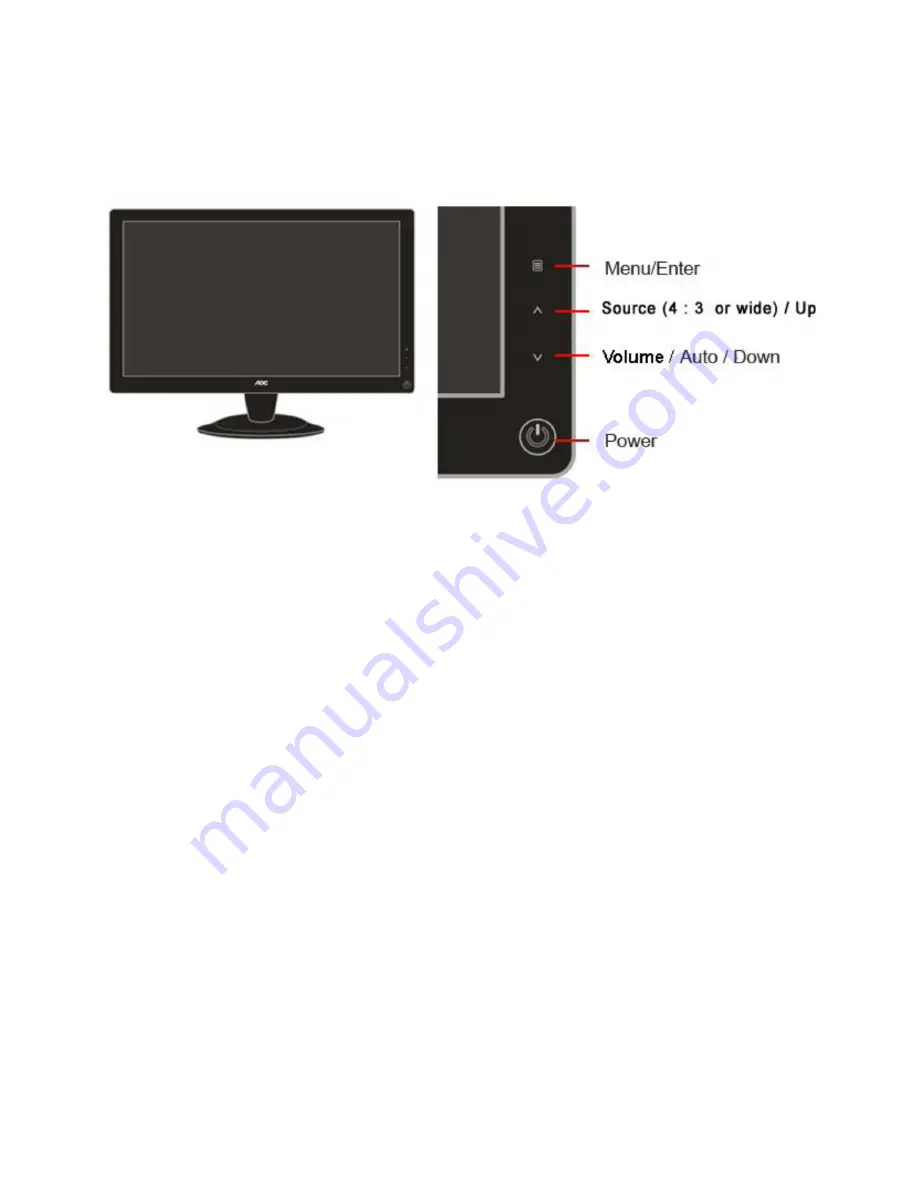
3.2 Control Buttons and Connections
Power
Press to turn on or turn off the monitor.
Source (4 : 3 or wide)/ Up
Press
∧
key to change the screen aspect ratio between standard 4:3 format or Wide format. When the input
resolution is wide format, the aspect ratio hotkey is disabled. When the main menu or sub-menu is active, the
∧
key
functions as to select up or increase value.
Source hot key : When the OSD is closed, press button will be Source hot key function (Only for the models with
dual or more inputs) .Press Source button continuously to select the input source showed in the message bar , press
Menu/Enter button to change to the source selected.
Menu / Enter
Press to activate OSD, then press Up or Down to navigate through the functions. Once the desired function is
highlighted, press the Menu button to activate the submenu. In sub-menu, Press Up or Down to navigate through
the functions. Once the desired function is highlighted, press Up or Down button to change the setting. Select Exit
icon then press Menu button to return to superior menu.
Volume(Auto) / Down
When there is no OSD, press the key to
activate
Volume and auto function, then press Up or Down to select
Volume or Auto configure function. Once the Volume icon is selected, press Menu button to activate it, and press Up
or Down to change the setting, press Menu button for confirmation and exit OSD . Once the Auto icon is selected,
press Menu button to do auto configure and exit OSD . If the product has no speaker built-in, to press the Down key
is to do auto configure directly. When it is DVI or HDMI input, auto configure function is disabled and the auto icon is
gray.
Summary of Contents for e2436Vwa
Page 4: ...4 1 Monitor Specifications...
Page 5: ...5...
Page 7: ...7 View and Dimension...
Page 11: ...11 Eco mode...
Page 13: ...13 Color Boost...
Page 15: ...15 Luminance...
Page 17: ...17 Image Setup...
Page 19: ...19 Color Temperature...
Page 20: ...20...
Page 21: ...21 Picture Boost...
Page 23: ...23 Extra Setting...
Page 24: ...24 Exit...
Page 25: ...25 LED Indicators Status LED Color Full Power Mode Blue Active off Mode Orange...
Page 29: ...29 4 3 4 Optical Characteristics Ta 25 2 Ha 50 10 RH VCC 7V...
Page 39: ...39 7 PCB Layout 7 1 Main Board 715G3329 1 2...
Page 40: ...40 7 2 Power Board Adapter 715G2824P01010001S...
Page 41: ...41...
Page 42: ...42 Converter 715G3918P03000004C 7 3 Key Board 715G3371 2...
Page 43: ...43 7 4 USB Board 715G3501 2 715G2663 2...
Page 63: ...63 7 Click Program if it shows the below mistake please try to write again...
Page 72: ...72 13 Monitor Exploded Views...


