


23
Question Answer
e-sensor no power
1. Into the factory mode
,
set Burn in to
OFF
;
2. Set
e-sensor
to
ON
.
interface show
e-sensor
The detecting range is too near or far and the User is far away the
monitor, reset the examination area.
it can’t your monitor to turn off
or dark while you are away
1. Please do not block the e-Sensor on the LOGO, which is located on
the left of AOC logo.
2. The detecting range is too far or the things blocks monitor , reset the
examination area.
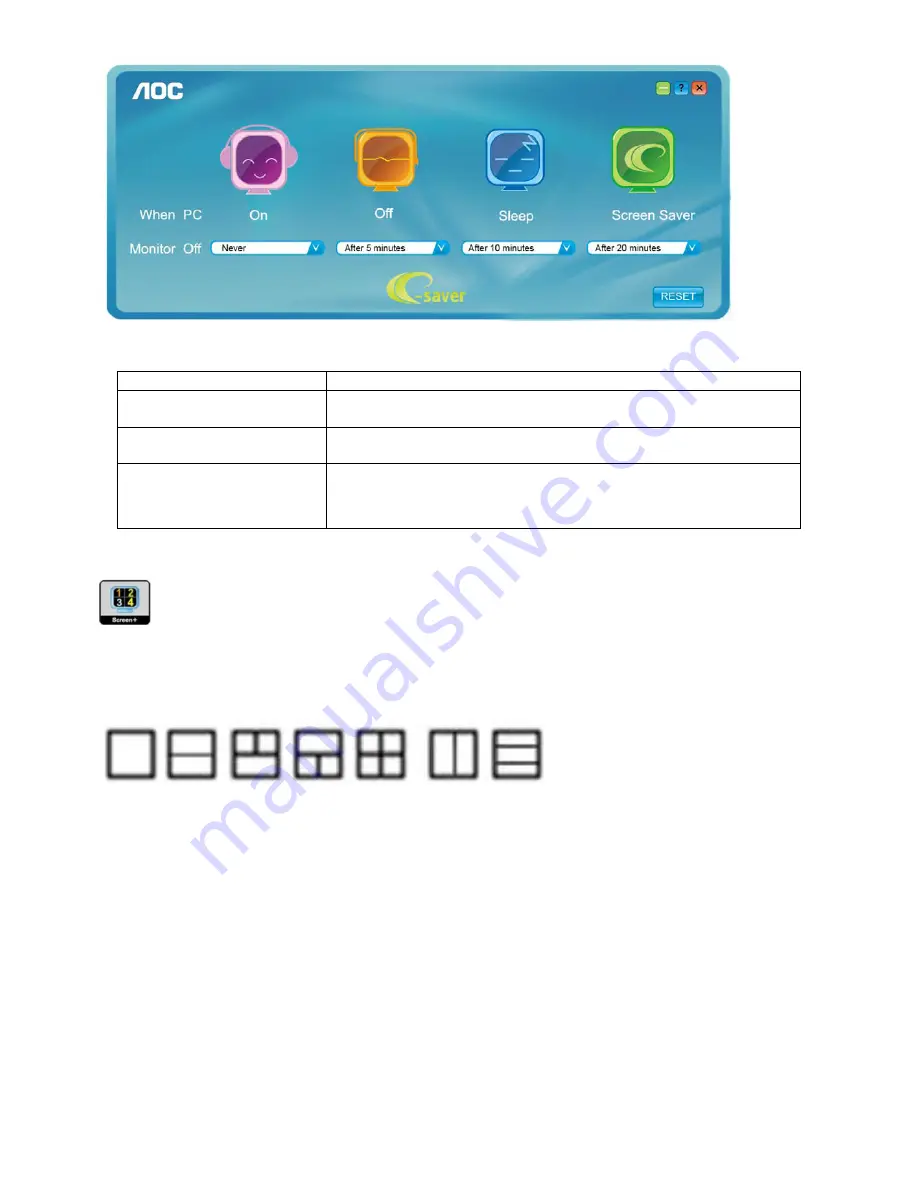
Welcome to "" software by AOC, software is a desktop screen splitting tool, it splits the desktop
into different panes, each pane displays a different window. You only need to drag the window to a corresponding
pane, when you want to access it. It supports multiple monitor display to make your task easier. Please follow the
installation software to install it.
Summary of Contents for e2050Sda
Page 4: ...4 1 Monitor Specifications ...
Page 10: ...10 5 Press two times to exit ...
Page 12: ...12 5 Press two times to exit ...
Page 14: ...14 5 Press two times to exit ...
Page 16: ...16 5 Press two times to exit ...
Page 18: ...18 5 Press two times to exit ...
Page 20: ...20 5 Press two times to exit ...
Page 24: ...24 4 Input Output Specification 4 1 Input Signal Connector Analog connector ...
Page 25: ...25 4 2 Preset Display Modes ...
Page 28: ...28 4 3 4 Optical Characteristics Ta 25 C VLCD 5 0V fV 60Hz fCLK 119MHz IBL 120mA ...
Page 38: ...38 7 PCB Layout 7 1 Main Board 715G4502M01000004C ...
Page 39: ...39 ...
Page 40: ...40 7 2 Power Board Adapter 715G4744P01000001C ...
Page 41: ...41 Converter 715G4013P01002004S ...
Page 42: ...42 7 3 Key Board 715G4747K02000001C ...
Page 51: ...51 3 Pinch the hook and remove the base 4 Use fixture to leave off the stand ...
Page 52: ...52 5 Use fixture to remove the hinge cover 6 Remove the screws of the stand ...
Page 54: ...54 9 Prize up the front frame use fixture 10 Overturn the monitor and take off the back cover ...
Page 56: ...56 3 Remove the Hexagon screws 4 Remove the LVDS ...
Page 57: ...57 5 Overturn the iron plate and remove the screws PWPC and CBPC ...
Page 58: ...58 11 Monitor Exploded Views ...


