background image


Note

: Remote control require 2x AAA batteries (not included) 

 
To install the batteries, first remove the battery cover on the remote control by sliding the 
battery cover back. Install the batteries in correct polarity inside the battery compartment 
matching the polarity shown and then refit the battery compartment cover securely. 
 
Battery type: “1.5V 2x AAA”. Alkaline batteries recommended. 


To prevent overheating DO NOT mix new and old batteries in the remote control. 
To prevent corrosion, remove the batteries if the remote control is not used for a long period of 
time. 


OPERATION 


  Before first use, charge the vacuum cleaner for 12 hours. 


  When Start/Pause indicator glows with steady white light, it indicates the device is fully 

charged. Short press 

button on device or press 

button on remote control, 

vacuum will start auto cleaning.   

  To change cleaning mode, press 

to pause the operation, then press desired 

cleaning mode button to restart cleaning. 

  To turn the vacuum cleaner off, initially pause the cleaning then press and hold the 

button on device for 4 seconds. The charge Home indicator will flash red four 

times and the robot vacuum will shut down. 


Cleaning mode 

Spot Cleaning 

The  vacuum  intensively  cleans  a  specific  area  in  a  spiral 

pattern,  useful  if  there  is  a  concentrated  area  of  dust  or 

debris. When in the Spot Cleaning mode, the vacuum  will 

stop cleaning after 1 minute. 


Summary of Contents for M3C-D

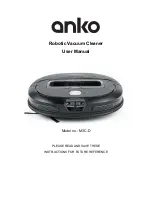
Page 1: ...Robotic Vacuum Cleaner User Manual Model no M3C D PLEASE READ AND SAVE THESE INSTRUCTIONS FOR FUTURE REFERENCE ...

Page 2: ... stated on the charger 8 When charging the appliance the power switch must be off 9 Never charge the batteries in temperatures above 37 C or below 0 C 10 It is normal for the charger to become warm to the touch when charging 11 Use only attachments provided 12 Static electricity some carpets can cause a small build up of static electricity Any static discharge is not hazardous to health 13 To prev...

Page 3: ...ycling station and not disposed of with household waste To remove the batteries please proceed according to the following inspections IMPORTANT Always fully discharge the batteries before removal and ensure the charger is unplugged 1 Run the vacuum cleaner until it stops to fully discharge the batteries 2 Remove the ergonomic handle and the screw in the main body to open the cleaner 3 Remove the m...

Page 4: ...4 IN THE BOX Main Body Charging Base Remote Control 2 AAA Batteries required but NOT included Power Adapter Cleaning Tool Side Brushes x2 HEPA filter x2 ...

Page 5: ...eaner Anti drop sensors prevent the vacuum cleaner from tumbling down starts and steep drops They may work less effectively if they are dirty or used on reflective very dark colored floors It is recommended that physical barriers are used to block off areas where the vacuum cleaner may fall Please make sure all furniture is properly organized so that the vacuum cleaner is able ot clean well withou...

Page 6: ...6 GET TO KNOW YOUR ROBOTIC VACUUM Sensors and Indicators ...

Page 7: ...e an do not place any mirrors or other reflective objects within this range NOTE If the IR signal emission window is blocked the robot will be unable to locate the charging dock Place the vacuum cleaner on top of the charging base and align the charging contacts The indicator flashes that means the device is under charging When fully charged the indicator stay steady ON ...

Page 8: ...on Vacuum will rotate 180 degree Release button to return to standby mode Press forward button Vacuum continues forward Release button to standby mode Cleaning Mode Button There a 3 cleaning mode available Spot Cleaning Edge Cleaning and Auto Cleaning mode Before switch mode press Pause button to stop operation temporarily then select another Cleaning Mode Button Suction Increase Decrease Button U...

Page 9: ...irst use charge the vacuum cleaner for 12 hours When Start Pause indicator glows with steady white light it indicates the device is fully charged Short press button on device or press button on remote control vacuum will start auto cleaning To change cleaning mode press to pause the operation then press desired cleaning mode button to restart cleaning To turn the vacuum cleaner off initially pause...

Page 10: ...lly end the cleaning session when the battery level is too low Home indicator flashes RED and the vacuum will begin to manoeuvre back to the charging base You may manually drive the vacuum back to charging base by pressing button Home indicator stays RED until the vacuum parks in charging dock successfully Note If the vacuum is unable to find the charging base please help it back home manually CAU...

Page 11: ...g tool provided Replace the Brush Roller and the cover Cleaning Dust Cup weekly cleaning recommended Press the Dust Cup Release button and take out the dust cup Unclip the dust cup latch and swing the bottom cover open Take the dust cup to the rubbish bin tip the dirt and debris into the rubbish bin The small brush provided can be used to help clean the dust cup Close the Dust Cup cover and return...

Page 12: ...ll to remove the side brush Clean hair tangled and remove small particles by using the clean brush provided Place the side brush back to the vacuum cleaner Cleaning Robot Sensors Keep the sensors clean by wiping with a dry cloth or brush them using the cleaning tool provided Keep the window on the Shock Buffer clean as there are sensors located behind Wipe the window with a damp cloth and dray wit...

Page 13: ...ll Clean if necessary following the Cleaning brush roller section 4 Remove the object and replace the robot back on the ground Low suction or poor cleaning power 1 Dust cup is full 2 Filter is blocked 3 The sensor is dirty 4 The brush roll is clogged 1 Empty the dust cup Refer to Cleaning dust cup section 2 Check and clean the filter following the guidance in Cleaning HEPA filter section 3 Wipe cl...

Page 14: ...l number M3C D Battery 14 4V 2600mAh 37 44Wh Li ion x4 cells Working time High suction approx 50min Low suction approx 90min Charging time 4 5hr Battery charger YLS0241A A165060 Input 100 240V 50 60Hz Output 16 5V d c 0 6A ...

Page 15: ...misuse abuse or neglect Please retain your receipt as proof of purchase and contact our Customer Service Centre on 1800 124 125 Australia or 0800 945 995 New Zealand or alternatively via Customer Help at Kmart com au for any difficulties with your product Warranty claims and claims for expense incurred in returning this product can be addressed to our Customer Service Centre at 690 Springvale Rd M...

Reviews: