background image

10

Rev. 5.0  06/2008

MWR -n-

MWR -n-

In order to remove any remnants of milk, use 
the Animo MPW-cleaner.

•  Pour 100 -150 ml of MPW-cleaner in the  
 

reservoir and add 1/2 ltrs of warm water.

•  Spread the solution over the side of the  
 

reservoir and leave to react (about 10    

 min.). 
•  Drain the MPW-cleaner by opening the  
 

drain tap and rinse out the reservoir. 

•  If used carefully the solution can be  


applied to the drain tap, blender, cover   


and drip tray.

8. MAINTENANCE

•  The stainless steel casing of the machine  
 

can be cleaned with a wet cloth, then    


wiped dry. Never use any abrasives, as  


these can cause scratches and mat spots.


9. TEMPERATURE SECURITY

The machine is fitted with a temperature 
security that can be accessed from the 
outside. The security is installed at the rear of 
the machine, next to the electricity cable
connection. This is activa ted when the 
temperature gets to high.

When the security is activated, do the 
following:

1.  make sure the machine has cooled down.
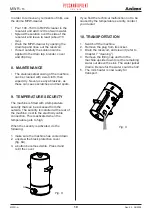
2.  unscrew the black protective cover 
 (fig. 

8A).

3.  a button becomes visible. Press it and   
 

re-fit the cover.

If you find the technical malfunction not to be 
caused by the temperature security, contact 
your dealer. 


10. TRANSPORTATION

1.  Switch off the machine.
2.  Remove the plug from its socket.
3.  Drain the reservoir, and clean it (refer to  
 

Chapter 7 “cleaning”)

4.  Remove the filling cap and turn the  


machine upside down to let the remaining  


water out above the sink. The water jacket  


drains. Be careful, the water could be hot!

5.  The milk heater is now ready for
 transport. 

A

Fig. 8

Fig. 9

Summary of Contents for MWR 10n

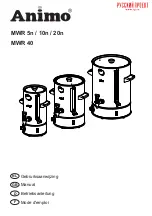
Page 1: ...MWR 5n 10n 20n MWR 40 NL Gebruiksaanwijzing GB Manual D Betriebsanleitung F Mode d emploi...

Page 2: ...out any announcements This manual is to be used for the standard model type of the machine Thus Animo cannot be held responsible for any damage resulting from the application of this manual to the ver...

Page 3: ...S 1 MILK HEATER MWR n 7 2 TECHNICAL DATA 7 3 HOW TO INSTALL AND CONNECT THE MACHINE 8 4 CONTROL PANEL 9 5 PREPARATIONS FOR USE 9 6 USE 9 7 CLEANING 10 8 MAINTENANCE 10 9 TEMPERATURE SECURITY 10 10 TRA...

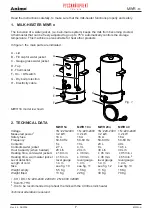
Page 4: ...N 220 240V 1N 220 240V 1N 220 240V Measured power 1 3 2 kW 3 2 kW 3 2 kW 3 2 kW Safety fuse 16 A 16 A 16 A 16 A Frequency 50 60 Hz 50 60 Hz 50 60 Hz 50 60 Hz Contents 5 L 10 L 20 L 40 L Contents water...

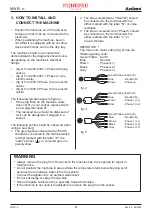
Page 5: ...either marked with the letter E the earth symbol or coloured green or green yellow 2 The blue coloured wire Neutral should be connected to the terminal which is either marked with the letter N or colo...

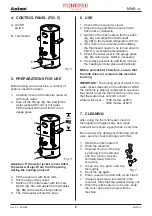
Page 6: ...Check the water level in the gauge glass fig 6C during use Refill in necessary 6 It is always possible to add fresh milk as the heating will take place automatically Milk is perishable Therefore ensur...

Page 7: ...rature security that can be accessed from the outside The security is installed at the rear of the machine next to the electricity cable connection This is activated when the temperature gets to high...

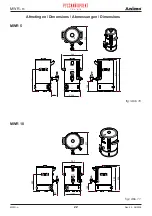
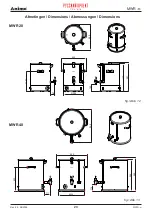
Page 8: ...22 Rev 5 0 06 2008 MWR n MWR n Afmetingen Dimensions Abmessungen Dimensions MWR 5 MWR 10 fig Abb 10 fig Abb 11 206 129 428 269 314 78 414 282 129 274 409 424 72 280 377 351...

Page 9: ...23 Rev 5 0 06 2008 MWR n MWR n Afmetingen Dimensions Abmessungen Dimensions MWR 20 MWR 40 fig Abb 12 fig Abb 13 555 595 422 0 454 115 111 554 590 346 432 132 489 501 78 455 357 5...

Page 10: ...1 2 5 4 2 4 8 8 8 7 4 9 5 5 4 0 4 6 0 0...

Reviews: