background image

1. 

T H I S   P R O D U C T   C A N N O T   R E P L A C E 

R ESP O NSIB LE  ADU LT  SU PERVISIO N .  This 
product is designed to aid in the monitoring of 
your child. When using the monitor, you must 
still provide the supervision necessary for the 
continued safety of your child.

2. 

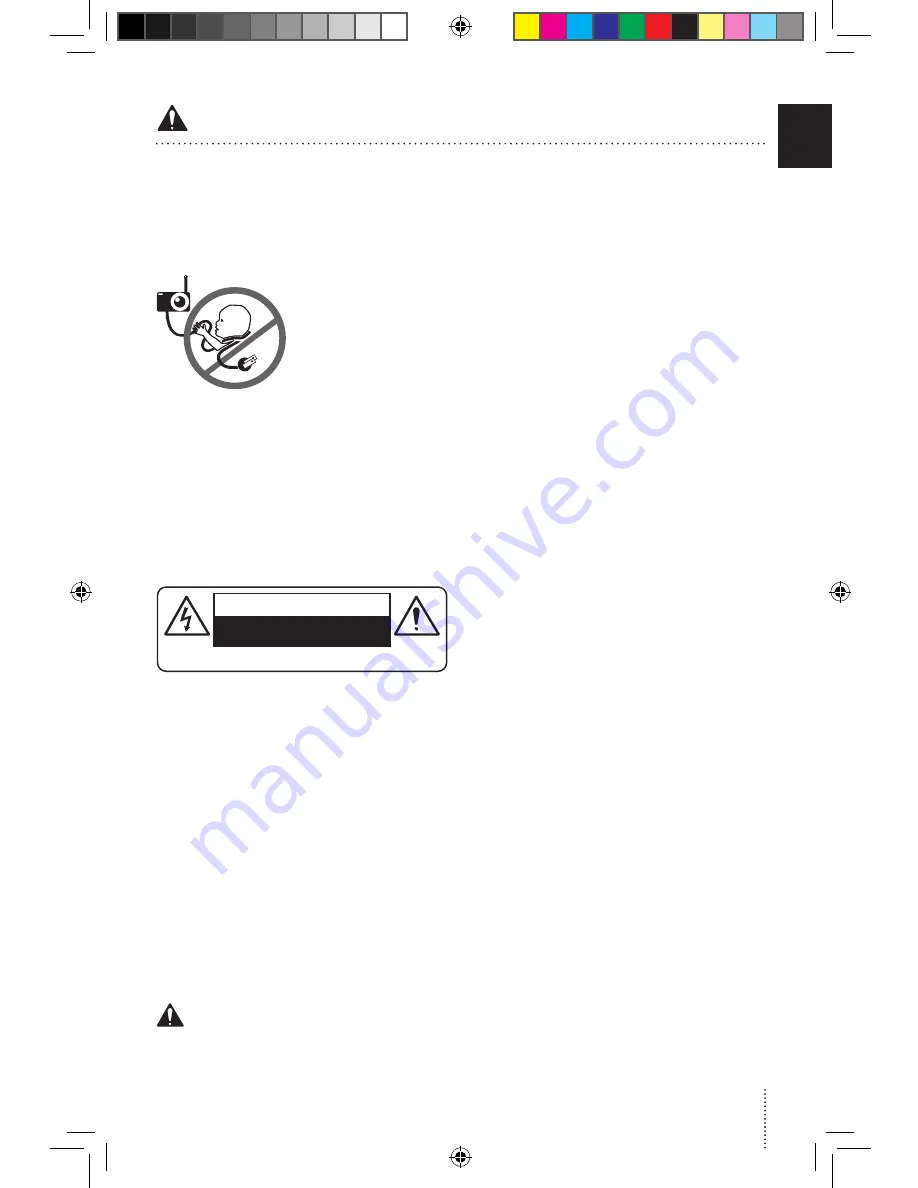
WARNING Strangulation Hazard — Children 

have STRANGLED in cords. Keep adapter cords 

out of the reach of 
c h il d re n (m o re th a n 


1 metre away).

3. 

Never use extension 

cords with adapters . 
ONLY use the adapters 
provided. 

4. 

When an adapter is 

plugged into an electrical 
outlet, DO NOT touch the 

exposed end.

5. 

ALWAYS be sure that both the transmitter and 

receiver are working properly and are within range 
of each other. Test the monitor before first use, 
periodically and when changing location of the 
Camera.

6. 

ALWAYS be sure to immediately check on baby 

whenever an alarm sounds. 

7. 

DO NOT use monitor near water (such as bath 

tub, sink, etc.). 

CAUTION

RISK OF ELECTRIC SHOCK

DO NOT OPEN

DO NOT EXPOSE TO RAIN OR MOISTURE

8. 

Keep monitor AWAY from heat sources (such 

as stoves, radiators, etc.). 

9. 

ALWAYS place both the Camera and the Parent 

Unit on a flat surface in an upright position and 
allow for proper ventilation. DO NOT place on 
sofas, cushions, beds, etc. which may block 
ventilation.

10. 

This monitor uses public airwaves to transmit 

signals. The Parent Unit may pick up signals or 
interference from other camera monitors in your 
area. Your monitor may even be picked up by 
other households. To protect your privacy, make 
sure both units are turned 

OFF

 when not in use.

11. 

This product is NOT a toy. DO NOT allow 

children to play with it. 

12. 

This product contains small parts. Adult 

assembly required. Exercise care when unpacking 
and assembling the product and keep small parts 
away from children.

13. 

When using the monitor, the room temperature 

should be between 10°C and 40°C.

 BATTERY WARNING

14. 

The Parent Unit battery is a replaceable Li-Ion 

battery.  Only use the Angelcare recommended 
replacement battery.  Danger of explosion if the 
wrong battery is used or if replaced incorrectly.  

Refer to your user manual for correct battery 
installation.  DO NOT short circuit supply terminals.  
Only use the Angelcare provided power adapter 
to charge the battery.  Remove the battery from 
your Parent Unit if product is to be stored for an 
extended period of time.  Dispose of batteries 
according to your local ordinances.  ALWAYS keep 
all batteries away from children.

15. IMPORTANT SAFETY INSTRUCTIONS

15.1 

Heed all warnings – All warnings on the 

product and in the operating instructions should 
be adhered to.

15.2 

Follow all instructions – All operating and 

use instructions should be followed.

15.3 

Water and moisture - DO NOT use this 

apparatus near water. For example, near a bath 
tub, wash bowl, kitchen sink, laundry tub, in a 
wet environment or near a swimming pool and 
the like. Care should be taken so that objects DO 
NOT fall onto units and that liquids are not spilled 
into either unit through its openings.

15.4 

Cleaning - Disconnect all units before 

cleaning. DO NOT immerse in water any part of 
the monitor. Clean only with dry cloth. 

15.5 

Ventilation - DO NOT block any ventilation 

openings. Allow for proper ventilation when units 
are in use. DO NOT cover the Camera or the Parent 
Unit with any object such as a blanket. DO NOT 
place it in a drawer or in any location which would 
muffle the sound or interfere with the normal flow 
of air.

15.6 

Heat sources - DO NOT install near any heat 

sources such as radiators, heat registers, stoves, 
TVs or other apparatus (including amplifiers) 
that produce heat. Heat can damage the case or 
electrical parts.

15.7 

Power cord protection - Protect the adapter’s 

power cord from being walked on or pinched by 
furniture or other items – Power supply cords 
should be routed so that they are not likely 
to be walked on or pinched by items upon or 
against them, paying particular attention to 
cords and plugs, convenience receptacle, and 
the point where they exit from the product. 


The socket outlet shall be installed near the 
equipment and shall be easily accessible.  Make 
sure to plug the adapter to the socket outlet 
nearest to the equipment and that is easily 
accessible. To disconnect from mains, unplug 
the adapter.

15.8 

Accessories - Only use attachments/

accessories specified by the manufacturer. DO 
NOT place this product on an unstable cart, 
stand, tripod, bracket or table. The product may 
fall, causing serious injury to a child or adult and 
serious damage to the product. Use ONLY with a 
cart, stand, tripod, bracket or table recommended 
by the manufacturer or sold with the product. 
Any mounting of the product should follow the 
manufacturer’s instructions.

15.9 

Unplug this appliance during lightning storms 

or when not used for long periods of time.

15.10 

Servicing - DO NOT attempt to service 

this product yourself as opening or removing 


WARNINGS

3

N

01mf_Manuel_AC210_EN_UK_12680.indd   3

2017-08-09   11:48 AM

Summary of Contents for AC210

Page 1: ...re away from your baby s cot For assistance FAQs or guidance with your monitor please visit our Customer Support page at angelcare co uk OWNER S MANUAL Model AC210 Baby Video and Sound Monitor 01mf_Manuel_AC210_EN_UK_12680 indd 1 2017 08 09 11 48 AM ...

Page 2: ...EFERENCE PLEASE READ THE WARNINGS AND INSTRUCTIONS CAREFULLY BEFORE ASSEMBLING USING THE PRODUCT FAILURE TO FOLLOW THE WARNINGS AND THE INSTRUCTIONS COULD RESULT IN SERIOUS INJURY OR DEATH OR DAMAGES TO THE PRODUCT WARNING Adult assembly required Keep small parts away from children when assembling We at Angelcare stand behind all of our products If you are not completely satisfied or have any ques...

Page 3: ...ocal ordinances ALWAYS keep all batteries away from children 15 IMPORTANT SAFETY INSTRUCTIONS 15 1 Heed all warnings All warnings on the product and in the operating instructions should be adhered to 15 2 Follow all instructions All operating and use instructions should be followed 15 3 Water and moisture DO NOT use this apparatus near water For example near a bath tub wash bowl kitchen sink laund...

Page 4: ...pecified in the owner s manual There is a risk of explosion if battery is replaced with an incorrect type 16 2 Charge the battery for 9 hours prior to first use Be sure to have the monitor in the OFF position during this period ONLY use the adapters included with your monitor 16 3 DO NOT use these adapters with any other equipments 16 4 When unplugging the adapter from the Camera be sure it is swi...

Page 5: ...ED Wall mount for Camera with hardware Screwdriver required for wall mounting Lithium ion battery pack for Parent Unit 2x AC adapter for Parent Unit and Camera Parent Unit Camera Tabletop stand for Camera 5 E N 01mf_Manuel_AC210_EN_UK_12680 indd 5 2017 08 09 11 48 AM ...

Page 6: ...electrical outlet 3 Charge the unit for 9 continuous hours prior to first use NOTE To optimize your battery performance please refer to Battery Guidelines in the Troubleshooting section PARENT UNIT Right Side Adapter Outlet Speaker not shown Stand Battery door not shown Front Side 3 5 LCD Screen Power ON OFF Indicator Zoom button Zzz button Video ON OFF MENU SELECT Button Brightness or Power ON OF...

Page 7: ... is not a toy Never allow children to play with it STEP 2 SETTING UP THE CAMERA Camera can be installed on the wall see included parts or using the tabletop stand Both options include magnetic mount to get the best view of baby in cot Place the Camera at least 1 metre from the cot 2 3 1 Place the Camera at a minimum of 1 metre away from the cot 2 Connect the adapter to the Camera and into an elect...

Page 8: ...ould see video within 3 4 seconds of turning ON the units The Camera connection signal strength icon will appear in the status bar 2 1 ON OFF 1 Press and hold the Parent Unit ON OFF button for 2 seconds until LCD screen is turned ON Angelcare s logo will be shown for 1 second 2 Slide the Camera ON OFF switch to the ON position 3 The Parent Unit will display Video mode screen 8 01mf_Manuel_AC210_EN...

Page 9: ...Camera Good connection Poor connection Lost connection Battery Level icon Indicates battery level Empty 1 3 Full 2 3 Full Full STEP 4 TESTING AND GETTING TO KNOW YOUR MONITOR The Angelcare monitor can be used with the pre program factory settings or you can also customize your settings to your preference Main menu on the LCD display shows the different operation settings Use the direction keys to ...

Page 10: ... keep both units at least 3 meters apart Press the down arrow for 2 seconds to mute sound Mute icon will flash in Info Bar Press again for 2 seconds to reactivate sound PUT IN SILENT MUTE MODE ADJUST SOUND LEVEL Increase volume Up arrow Lower volume Down arrow 4 2 BATTERY HOW TO CHECK THE BATTERY Unplug the adapter from the Parent Unit and check the battery level indicator 1 3 full Empty 2 3 full ...

Page 11: ...DDITIONAL FUNCTIONS IMPORTANT When in the menu or sub menu modes sound transmission between Parent Unit and Camera will be temporarily deactivated 5 1 VOICE ACTIVATION VOX OR CONTINUOUS SOUND MODE Allows you to select your option on how you monitor sound VOX voice activation picks up sound based on the setting of the sensitivity level or Continuous sound monitoring is continuously on picking up al...

Page 12: ...ress Menu Select button to access main menu 2 Select the Temperature icon to access sub menu 3 Select the C F icon 4 Use the up and down arrows to change from Celsius to Fahrenheit o C ºC ºF o F ºC ºF Celsius Fahrenheit 5 Press Menu Select button to confirm TO ACTIVATE THE TEMPERATURE ALARM 30 o C 15 o C ON o C ºC ºF 1 2 3 4 5 1 Press Menu Select button to access main menu 2 Select the Temperature...

Page 13: ... button to confirm TEMPERATURE ALARM Alarm activates when temperature reaches maximum or minimum set temperature Parent Unit will emit 4 consecutive beeps every 5 seconds Temperature Alarm icon will show on LCD screen 5 3 SCREEN SAVER Allows you to set the screen saver starting point 1 2 P 3 4 MANUAL SETTING To manually activate the Screen Saver mode press and hold the Parent Unit Zzz button Press...

Page 14: ...ED on the Camera will turn OFF automatically 5 5 ZOOM MODE Allows you to zoom in to twice the normal view 3 4 1 2 1 Press and release the Zoom button on the Parent Unit 2 The Zoom icon will appear at the bottom left corner of the screen 3 Use the arrow keys to zoom in on what you want to see more closely 4 Press and release the Zoom button on the Parent Unit again to return to normal view 5 6 KEY ...

Page 15: ... the LCD screen brightness on the Parent Unit 1 2 1 Use the left and right arrows to adjust the screen brightness level 1 LOW to 5 High 2 A light bulb will be shown on the LCD screen 15 E N 01mf_Manuel_AC210_EN_UK_12680 indd 15 2017 08 09 11 48 AM ...

Page 16: ...n procedure below be done 2 3 1 Turn both Units OFF 2 Turn the Parent Unit ON 3 Press and hold the Zoom button until the screen shows the Camera options 4 4 Press the Menu Select button to select the Camera 1 5 6 5 Turn the Camera ON 6 Press the Pairing button for 3 seconds The Parent Unit will display a forward icon during the reconnection procedure The reconnection is successful if Parent unit s...

Page 17: ...arent Unit STATIC DISTORTION INTERFERENCES FROM OTHER MONITORS WIRELESS PHONES WALKIE TALKIES ETC Rotate Parent Unit or move it away from source of interference FEEDBACK LOUD NOISES EMITTED FROM THE PARENT UNIT Move units farther apart at least 3 meters Decrease volume on Parent Unit THE PARENT UNIT SCREEN IS BLACK PARENT UNIT IS OFF Turn the Parent Unit back ON by pushing and holding the POWER ON...

Page 18: ...the warranty period see warranty table below to determine the warranty for your country If this monitoring system fails to function properly when used as directed under normal conditions and during the warranty period Angelcare will either repair or replace the product at our discretion free of charge Please contact your local distributor to validate warranty and warranty period The product must b...

Page 19: ...19 E N 01mf_Manuel_AC210_EN_UK_12680 indd 19 2017 08 09 11 48 AM ...

Page 20: ...M1210 INT 10817 www angelcarebaby com For assistance FAQs or guidance with your monitor please visit our Customer Support page at Angelcare co uk 01mf_Manuel_AC210_EN_UK_12680 indd 20 2017 08 09 11 48 AM ...

Reviews: