45
44
Collimation
button 3
button 4
2. Collimation:
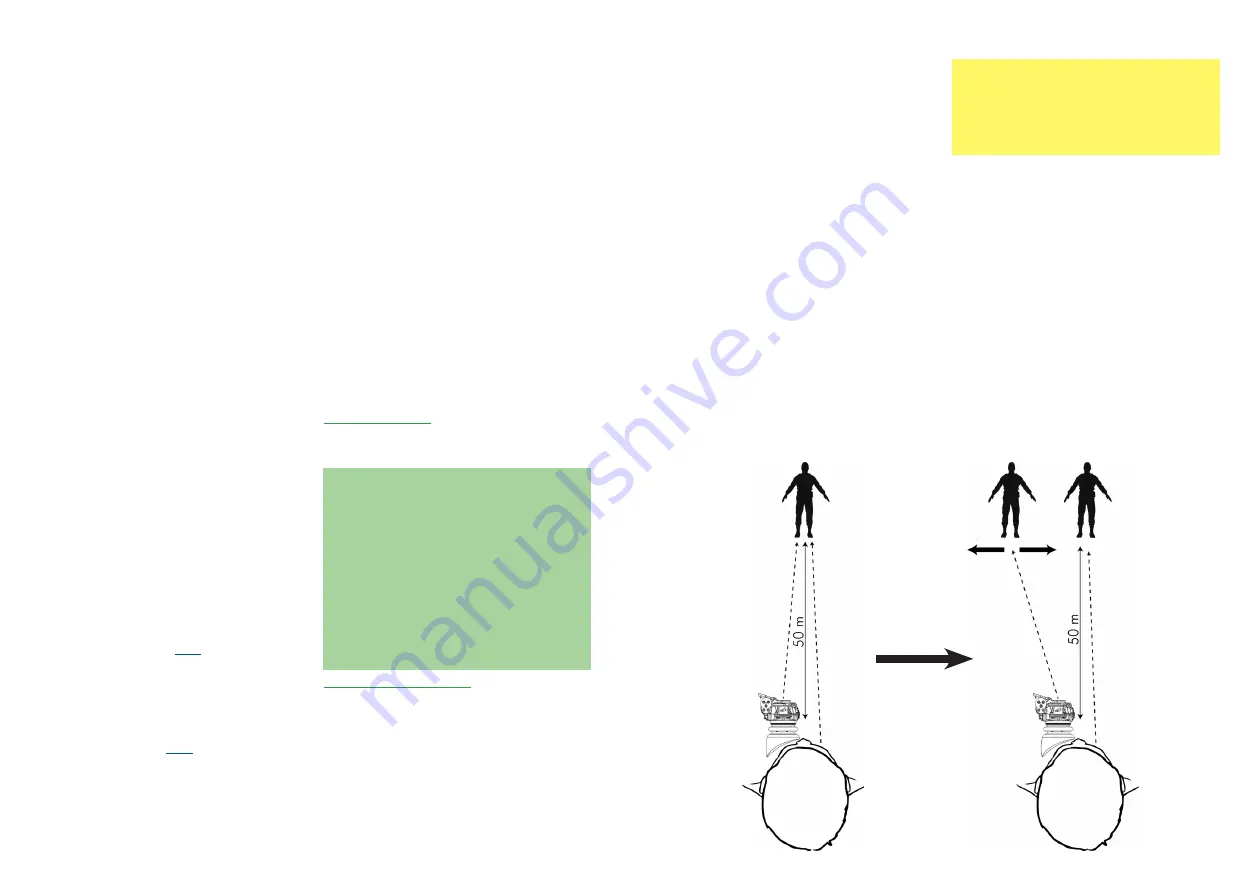
Take a look at a heat source with the TILO that
is also clearly visible in the visible spectrum. It
should be as far away as possible to avoid addi-
tional parallax deviations (e.g. a standing person
at a distance of 50 m, or a lamp).
3. Select SET:
The TILO is now in collimation mode. This starts
with zoom mode 1×. By briefly pressing the
buttons, you can align the image by pressing
button 1 to move the image down, button 2 to
move the image up, button 3 to move the image
right, and button 4 to move the image left. Now
press the keys until the thermal image and the
real image are visible for your perception at the
same position. If you also want to collimate the
other zoom levels, press button 2 long, it changes
successively into the next zoom levels. Carry out
the collimation there as described.
Note:
If a collimation has been performed, the zoom level
0.8
×
is automatically deactivated. However, it can
be manually reactivated in the zoom menu. Note
that the zoom level 0.8
×
cannot be collimated.
If you are satisfied with the result of the collimation,
save it by pressing button 4 long. “OK” appears
briefly as confirmation.
To exit the collimation menu, press and hold button
3 again.
Note:
You will find instructions for collimating the TILO-M
series as an attachment on our website.
www.andres-defence.de
in the directory TILO
→
Military versions
AVID:
Select the video output format for using the
external connection output.
Note: With activated video output, the OLED display
is disabled.
COLL:
Set the collimation here. The settings can be
saved for 6 persons. You can collimate each zoom
level individually with the 4 buttons. To change the
zoom level, press and hold button 2. At the end,
press button 4 long to save. (
)
FILT:
Deactivate all filters that you do not need during
operations. The RH and CR filters are particularly
useful at night. (
SYM:
If the TILO is often used normally and upside
down, it makes sense to deactivate the symbols. This
setting is also useful for video recording. (
FLIP:
If the TILO is used upside down most of the
time (e.g. on a tripod), all icons can be shown upside
down, too. (
)
NFOV:
If the TILO is mounted in front of a camera,
depending on the model used, it may happen that
not the entire screen is displayed. To counteract this,
NFOV is activated, which places all symbols in the
center of the screen.
DIS:
Activate the distance estimator in the DIS sub-
menu. Here you can choose between three different
settings depending on the application for which you
want to use the TILO. (
)
BAT:
When using a 16650 battery, it should also be
selected in the BAT menu. (
)
FLAP:
Flap function off. This function can be deacti-
vated at this point to prevent the TILO from switching
itself on by accidentally opening the lens cover in the
pocket. Nevertheless, it switches off automatically
when the flap is closed. (
REQ - Request:
Switches PIN query on or off for
TILO start.
CYC - Cycle:
Frequency after how many device starts
the PIN is requested.
WARN:
Number of device starts between pre-
warning and PIN request (at device start).
LED:
Deactivate here the LEDs that you do
not need. (
)
FL – Flash mode:
.
= strobe;
..
= beacon strobe;
–
= equal flash;
°
= throb/pulsating ;
F
for fast
NVFFC:
Since the sensor changes over time, it is
recommended to perform this procedure every 1-2
weeks to always get a perfect image from the begin-
ning. However, the senosr will not be damaged if the
NVFFC is not used permanently.
Note: An NVFFC can only store a manual calibration
if one has been performed shortly before. (
)
Submenu COLL
In this submenu you can adjust the collimation of
your TILO.
Collimation:
The TILO can also be used as thermal imaging
spectacles when both eyes are open. In the brain,
the image fusion of thermal image (left) and real
image (right) occurs. Instead of a real image, the
second eye could also be equipped with a light
amplifier. (This effect can only be achieved in zoom
mode 1
×
). Depending on the user, double images
may occur despite the factory calibration performed
beforehand. In this case, a collimation must be
performed.
Carrying out the collimation
The aim is to bring the camera image and the real
image into as exact a superposition as possible.
1. Select memory position:
After selecting the COLL submenu, select the
corresponding memory position. Since the col-
limation settings for persons are very individual,
the TILO has 6 memory positions. Thus, a TILO
can be used by the whole family. Each user sets
his own storage position.


