background image

8

Quick start

Connect

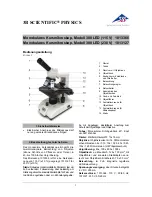
To use the microscope stand alone, you need to connect the optical stack to the power supply via the

switch cable. See the picture(P6) above.

Switch on

Then press and hold the Power button (

from the P4 “Buttons”) underneath the display until the

display turns on. (It may turn on automatically while you connecting cables at the first time, and it’s

totally fine.)

*Troubleshooting

If the display freezes, locate the “reset ” hole on the back of the monitor. Use a narrow object such as an

unfolded paperclip to depress the button located inside. This resets all settings to their factory values and

restarts the display. It does not erase saved images or video.

Adjusting the Magnification and Focus

Use the large knobs on the optical bracket to raise or lower the optical stack to the desired height. The

lower the height, the greater the magnification is. But be careful not to let the bottom of the stack contact

the object being imaged. (Note that you may need to reposition the spotlights as you move the stack up

or down.)Turn the Focus controller(

from the P4 “Buttons”) to focus the image.

To increase the digital magnification, press and hold the Up button (

from the P4 “Buttons” ) until

the desired digital magnification(up to an additional 3x beyond the optical magnification) is reached.

Use the Down (number

from the picture “Buttons”) button to decrease the digital magnification.

Using a Micro SD Card to Save Images

By using a Micro SD card (not provided), you can save images and videos to review later or export to a

computer or other device .

Insert the Micro SD card in to the TF slot on top back of the monitor. (be careful with the direction. The

side which has metal exposed, should face down. See the picture 6 )

Push it in until you hear a click. (If you don't push it in far enough, it will be ejected.)

*If you insert the card while the microscope’s working, the device would switch off automatically. Press

the Power button and hold it until the screen lights up again.

The Mode button(number

from the picture “Buttons”, marked with an "M") can be used to cycle

between three modes: video standby ( ), still image ( ), and review ( ). In video standby mode, there

are white color numbers located right to the icon, shows how many time the rest storage of the card

would allow you to record video.

To record videos

Press the OK button(

) briefly to begin recording. The elapsed time(red color) in the recording will

appear at the top left. To stop recording, hit the OK button again. The OK button on the remote has the

same function.

To Capture pictures

Press the Picture Capture button(

)(Marked with a camera) briefly to capture an image. The picture

capture button on the remote has the same function.

Note: You can’t take pictures or videos in Preview mode

Reviewing and Managing Images.

To review and manage images on the display, use the Mode button to select review

mode. Use the Up and Down buttons to cycle through the pictures and videos.

Summary of Contents for AD407

Page 1: ...2 Digital Microscope AD407 Users Manual ...

Page 2: ... and Maintenance 3 Basic Parameters 3 What s in the box 4 Assembly 5 Buttons 5 Quick start 7 Adjusting the Magnification and Focus 7 Using a Micro SD Card to Save Images 7 Reviewing and Managing Images 8 Settings 8 Warranty 11 ...

Page 3: ...pe can be cleaned with a damp cloth 6 The display on the device is very fragile Please use with care Do not drop press hard or touch the display with sharp objects The display is not waterproof please clean it with dry and soft material Do not press the display when adjusting the angle of the display Basic Parameters Image sensor 4 Mega Pixels HD Sensor Video output UHD 2880X2160 24FPS FHD1920X108...

Page 4: ...5 What s in the box P1 what s in the box P2 Assembly1 P3 Assembly2 ...

Page 5: ...optical bracket 5 Tighten the thumbscrews to hold the optical stack in place If done correctly you should be able to not just turn the focus controller of the optical stack freely but also freely adjust the monitor the angel between the base and the optical bracket while the rest of microscope remains in place If you have any question or problem for assembly please contact us as soon as possible s...

Page 6: ...7 P5 remote buttons P6 connect ...

Page 7: ...se the digital magnification Using a Micro SD Card to Save Images By using a Micro SD card not provided you can save images and videos to review later or export to a computer or other device Insert the Micro SD card in to the TF slot on top back of the monitor be careful with the direction The side which has metal exposed should face down See the picture 6 Push it in until you hear a click If you ...

Page 8: ...ges and videos Protect Lock Current All provides protection for the current all image video from deleting accidentally but not from Format function Unlock Current All unlock the current all image video Settings In each mode press the M button and hold it for a while until the Video Still Playback Menu shows up on the display Or you can press MENU button on the remote Hit M button again get into th...

Page 9: ...cross line on When you turn on the Line there will be 8 lines showing up automatically For each one you could change it s direction between HOR and VER stand for horizontal and vertical position color and width There are 480 positions on direction HOR and 800 positions on direction VER So when you change the direction from HOR to VER the position would change at the same time HOR VER 480 800 For e...

Page 10: ...ss MENU button on the remote to exit date time setting directly If you don t have the remote you have to go through all over these settings one by one and then press OK again to exit P14 Date time setting To save settings After you set everything right you should turn off the device by pressing ON OFF button on the monitor and hold it until the device switching off If you turn off the device by pr...

Page 11: ... If users use it in an improper environment such as incompatible power supply high temperature environment etc 3 If the fault caused by accident oversight misoperation or natural disasters etc 4 If the fault caused by people who are not belong to authorized organizations of our company during repacking repair dismantle Or if users repack repair or dismantle the device not following our advice 5 Ou...

Reviews: