background image


22 


7.3.3. 

TTransmitting Data to A Computer 

Real-TimeTransmission Mode) 

This method is used to transmit the environment and weighing 
data directly to a computer via the USB port. 
Data is not stored in the AD-1687.(Special software is not 
necessary) 


7.3.3.1

  Transmitting Only Environmental Data 

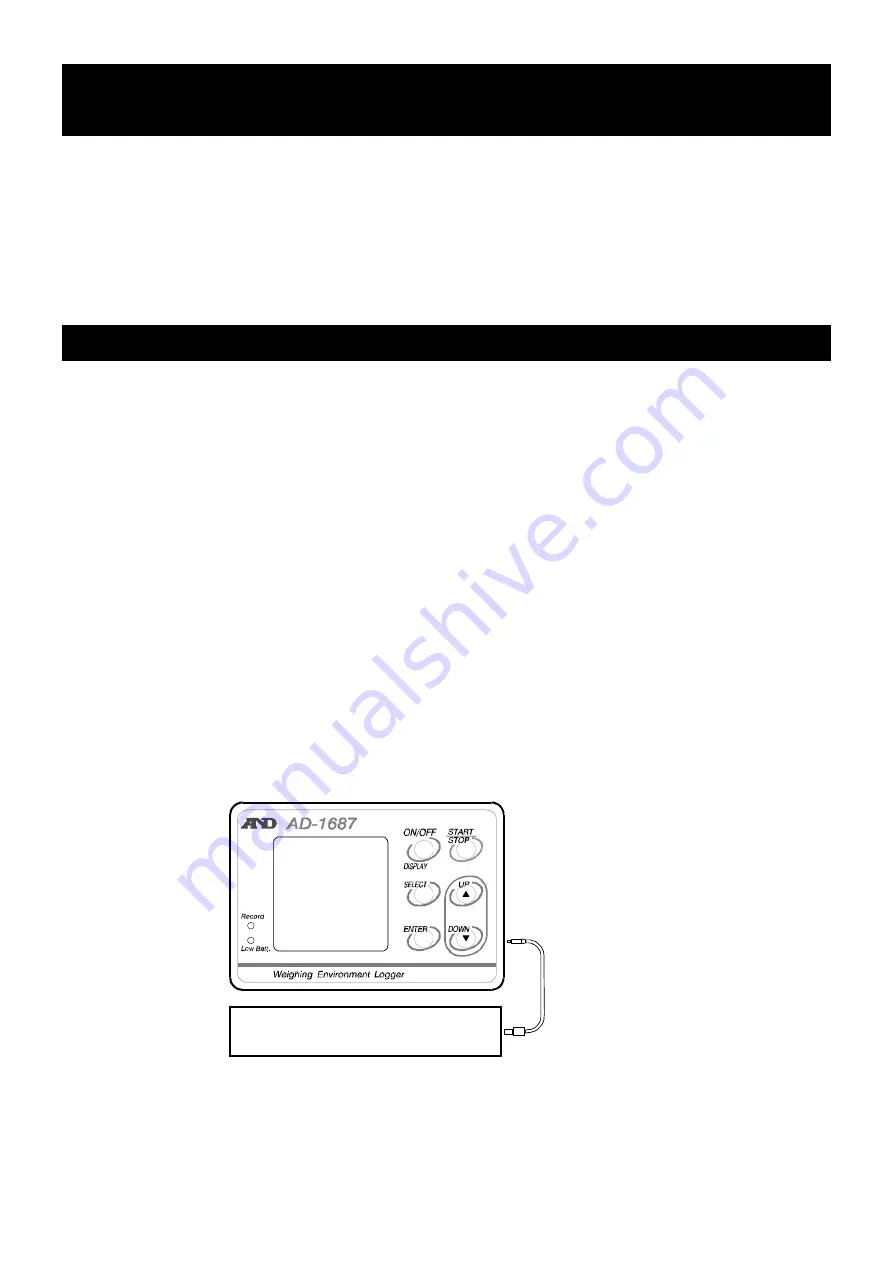
Step 1  Connect the AD-1687 and a computer with a USB 

cable. 


The display will change to "7.3.1" Display after 
Connecting. 

Step 2  Select the item "REAL TIME" and press 

the ENTER key to use the real time transmission 
mode. 

Step 3  Click on a position (cell) on the program (EXCEL etc.) 
 

to receive data. 

Step 4  Press and hold (Long press) the START/STOP   
 

key to transmit environment data. 


USB cable 

Personal Computer 

Summary of Contents for AD-1687

Page 1: ... QYLURQPHQW RJJHU QVWUXFWLRQ 0DQXDO 03 ...

Page 2: ...RWH QIRUPDWLRQ RU FDXWLRQV WR XVH WKH GHYLFH FRUUHFWO 7KLV PDQXDO LV VXEMHFW WR FKDQJH ZLWKRXW DQ SULRU QRWLFH WR LPSURYH WKH SURGXFW 1R SDUW RI WKLV PDQXDO PD EH SKRWRFRSLHG UHSURGXFHG RU WUDQVODWHG LQWR DQRWKHU ODQJXDJH ZLWKRXW WKH SULRU ZULWWHQ FRQVHQW RI WKH RPSDQ LPLWHG 3URGXFW VSHFLILFDWLRQV DUH VXEMHFW WR FKDQJH ZLWKRXW DQ REOLJDWLRQ RQ WKH SDUW RI WKH PDQXIDFWXUHU RPSDQ LPLWHG OO ULJKWV UH...

Page 3: ...Maximam Value of The Vibration Peak Hold 16 7 2 Connecting to the Weighing Instrument 18 7 2 1 The Management of the Weighing Data 18 7 2 2 The Interval Measurement for the Weighing Instrument 19 7 3 Connecting to the Computer 20 7 3 1 Supplying the Power From USB Port of Computer 20 7 3 2 Transmitting Data to A Computer CSV File 21 7 3 3 Transmitting Data to A Computer 㸦Real TimeTransmission Mode...

Page 4: ...ircumstances the user would be required to take at his own expense whatever measures are necessary to eliminate the interference FCC Federal Communications Commission in the U S A Compliance With EMC Directives of CE mark This device features radio interference suppression safety regulation and restriction of Hazardous Substances in compliance with the following Council Directives Council directiv...

Page 5: ...e date and time to be stored along with the data A maximum of 10 000 data can be stored The environmental data is stored in CSV format and can easily be used by software such as spreadsheet applications The stored data can be read by a computer after the AD 1687 is recognized as USB memory so no special software is required The AD 1687 can transmit data to programs in the computer Ex Excel etc usi...

Page 6: ...ause damage to the AD 1687 and will void the warranty When the battery cover and temperature humidity sensor unit are connected to the AD 1687 and the connectors are firmly seated in the water resistant connector covers the AD 1687 is protected against light water exposure equivalent to IP 65 Please note that the water resistance will not endure immersion in water or high pressure runnning water C...

Page 7: ...teries for temporary use Size LR6 AA ڦ This instruction manual Battery box back side Temperature humidity sensor unit Replaceable Optional connector for a second temperature sensor Water resistant connector cover ڦ Main unit RS 232C connector for weighing instruments Mini USB connector for power supply connection with a PC Interval indicator Low battery indicator Measurement monitor Protector ...

Page 8: ...ECT key repeatedly five different displays will appear Environmental data display screen Monitor display screen Trend graph to display the environmental data Trend graph to monitor two data Setting screen ڦ Recordable capacity of data storage is shown by these level indicators as follows Temperature Barometric pressure Second temperature Vibration Date time Interval time REC mark Battery level ind...

Page 9: ...een Refer to 6 2 Setting the Monitor Display 3 Trend graph to display the environmental data with example Humidity Temperature Temperature chart Relative humidity chart Barometric pressure chart Optional second temperature chart Vibration chart Duration The duration is scaled depending on the time interval setting ...

Page 10: ...lays the two environmental data that were specified in the setting screen Refer to 6 2 Setting the Monitor Display Note The battery level indicator is displayed when the battery is used It is not displayed when external power is used Humidity chart Temperature chart ...

Page 11: ...eter 1 When the display is turned off when an interval measurement is being executed press ON OFF key and the environmental data will be displayed The current display will be hidden after being idle for one minute during the interval measurement to suppress the battery consumption 2 The display will be turned off about one minute later when battery power is used except during the interval measurem...

Page 12: ...TART STOP Long press Stops the interval measurement The indicator REC is hidden ON OFF Long press Turns off the AD 1687 except during the interval recording or when power is supplied from a source other than batteries Note The time to show or hide the display can be specified at the parameter POWER SAVE in the 6 4 Function Table After being idle for one minute the AD 1687 is turned off while using...

Page 13: ... for the current item ڸ UP ۂ DOWN key Selects a parameter ENTER key Stores new parameter and proceeds to next item ON OFF key Cancels and proceeds to next item or menu 4 Operations after finishing the management SELECT key Proceeds to the intended display Note Selectable items will change depending on operating conditions Time of interval mode Selection of monitored data Item to delete data Item o...

Page 14: ...relative humidity barometric pressure vibration and weighing data with PRIMARY DATA display or Trend graph display Refer to item PRIMARY DATA of the 6 4 Function 6 3 Clear Delete the stored data that is the last data or all 1 Select CLEAR to move on to the following display 2 Select an item with ڸ UP or ۂ DOWN key and execute with ENTER key Deletes a last data Deletes all data Returns to the menu ...

Page 15: ...IMARY DATA T1 Temperature 㸣RH Humidity BAR Barometric pressure VIB Vibration WT Weighing data RECORDING TYPE ONE TIME Stops at full memory ENDLESS Overwrites at full memory BUZZER OFF Not sounded ON Sounds buzzer DECIMAL POINT dot comma BALANCE SETTING BAUD RATE 600 1200 2400 4800 9600 19200 bps BITS PARITY 7bits EVEN 7bits ODD 8bits NONE TERMINATOR CR LF CR POWER SAVE OFF 30 seconds 1 2 5 or 10 m...

Page 16: ...bration in the interval time Refer to 7 1 Record the Maximum Value of the Vibration Weighing Value Interval Recording Mode WEIGHING DATA Every Save at the time of receipt of the data Interval Save data for each interval time Refer to 7 2 2 The Interval Measurement for the Weighing Instrument Initialization of Internal Setting FUNCTION INIT Returns to the internal settings to factory settings It sh...

Page 17: ...e may not store up to 10 000 data Remove all old files using operations CLEAR ALL specified in 6 3 Clear 6 5 USB Function Selection When connecting AD 1687 and the computer with a USB cable the screen to select which function to use is displayed For each function and method of operation please see 7 3 Connecting to the computer Even when powered by a USB cable from the AC adapter screen for select...

Page 18: ...on to be recorded in the AD 1687 is the value of the interval recording If PeakHold ON mode is set which records the maximum value of the vibration the peak value during each interval time is held and recorded the peak value during each interval time is held and recorded ڦ When in the PeakHold mode will be displayed next to VIB of the display screen ...

Page 19: ...PeakHold ON Recorded value Recording time min 1 min 2 min 3 min 4 min PEAK HOLD OFF 1 Gal 6 Gal 4 Gal 1 Gal PEAK HOLD ON 1 Gal 15 Gal 8 Gal 6 Gal Note ڦ In the peak hold mode the power is always ON to because sampling speed is fast POWER SAVE in the 6 4 Function is disabled ڦ To avoid battery depletion connecting the AC adapter is recommended Interval time Interval recording 㹙min 1 min 㻝㻢 1 2 3 4 ...

Page 20: ... same time when receiving the weighing data 7 2 1 The Management of the Weighing Data Step 1 Connect the AD 1687 and A D s weighing instrument using the provided RS 232C cable Step 2 Press the data output key Ex PRINT key of the weighing instrument to transmit data The AD 1687 receives data and the indicator REC is shown for 1second Step 3 Stored data is shown for 5 seconds in the measurement moni...

Page 21: ...value interval recording mode WEIGHING DATA in 6 4 Function Table WEIGHING DATA㸸Interval The factory setting is Every Step 2 Connect the Weighing instrument that has been set in the stream output In the case that the AD 1687 has received the weighing data WT is displayed at lower left corner of the screen of the AD 1687 and the weighing data is displayed㸬In this case the weighing data is not saved...

Page 22: ...rument manual ڦ When the AD 1687 body has received the weighing data the weighing data is displayed 7 7 3 Connecting to the Computer 7 3 1 Supplying the Power From USB Port of Computer Step 1 Connect the AD 1687 and a computer with a USB cable Step 2 Select the item EXT POWER and press the ENTER key so that the AD 1687 can use power from the USB port The AD 1687 is recognized as USB memory The AD ...

Page 23: ...ess the ENTER key Step 3 The AD 1687 is recognized as USB memory without special software Step 4 The CSV file data can be read by the computer Step 5 To delete the CSV file in the AD 1687 use normal computer file operations Step 6 Follow the menu Safely Remove Hardware when removing the AD 1687 from the USB port of the computer AD 1687 csv ...

Page 24: ...ary 7 3 3 1 Transmitting Only Environmental Data Step 1 Connect the AD 1687 and a computer with a USB cable The display will change to 7 3 1 Display after Connecting Step 2 Select the item REAL TIME and press the ENTER key to use the real time transmission mode Step 3 Click on a position cell on the program EXCEL etc to receive data Step 4 Press and hold Long press the START STOP key to transmit e...

Page 25: ...se the real time transmission mode Step 3 Click on a position cell on the program EXCEL etc to receive data Step 4 Press the data output key Ex PRINT key of the weighing instrument to send weighing data When the main unit of AD 1687 receives data a buzzer sounds and weighing data and environmental data are sent to the computer Step 5 Data is displayed for 5 seconds on the measurement monitor Note ...

Page 26: ...in the battery compartment ڦ When the batteries are drained completely Low battery mark does not appear ڦ The battery life is dependent upon the environmental temperature battery type and usage ڦ Remove the batteries if the device is not to be used for a long time The batteries may leak and cause a malfunction ڦ The accessory batteries are for operation check and their life may be short Battery In...

Page 27: ...r an abnormal value may be displayed Step 1 Turn of the AD 1687 Remove the protector Step 2 Push the side of the battery cover to release hook and open it Step 3 Insert two new batteries with the positive and negative terminals properly aligned with the corresponding symbols in the battery compartment Step 4 Close the battery cover Step 5 In case of replacing the temperature humidity sensor unit s...

Page 28: ...rument our balance scales with RS 232C please check our websites Data capacity Maximum 10 000 sets including date time Interval time 1 2 5 10 15 20 or 30 seconds 1 2 5 10 15 20 30 or 60 minutes Power supply Two alkaline batteries LR6 AA AC adaptor or USB Battery life Approx 6 months Measurement interval 1 minute Clock accuracy Max 1minute month Adaptable operating systems Windows 7 8 10 32 bits 64...

Page 29: ...27 MEMO ...

Page 30: ...28 MEMO ...

Page 31: ......

Page 32: ...treet Thebarton South Australia 5031 AUSTRALIA Telephone 61 8 8301 8100 Fax 61 8 8352 7409 A D KOREA Limited 䚐ạ㜄㢨U㜈U O㨰P 㤎䔏 㔲G 㡗 䙂ῂG ῃ㩲 㦋 ZZGO㡂㦮 PG ⰾ䞮䌚ア G _X 㤆䘎 䢎 W ZZX 817 Manhattan Bldg 33 Gukjegeumyung ro 6 gil Yeongdeungpo gu Seoul 07331 Korea 㩚䢪 82 2 780 4101 䕿㓺 82 2 782 4264 OOO A D RUS OOO ɗɃ ɷɧɞ Ⱦɂ Ɋɍɋ 121357 Ɋɨɫɫɢɣɫɤɚɹ Ɏɟɞɟɪɚɰɢɹ ɝ Ɇɨɫɤɜɚ ɭɥ ȼɟɪɟɣɫɤɚɹ ɞɨɦ 17 Business Center Vereyskaya Plaz...

Reviews: