background image

Evaluation Board User Guide 

UG-015


Rev. 0 | Page 9 of 12 

POWER CONSUMPTION TAB 

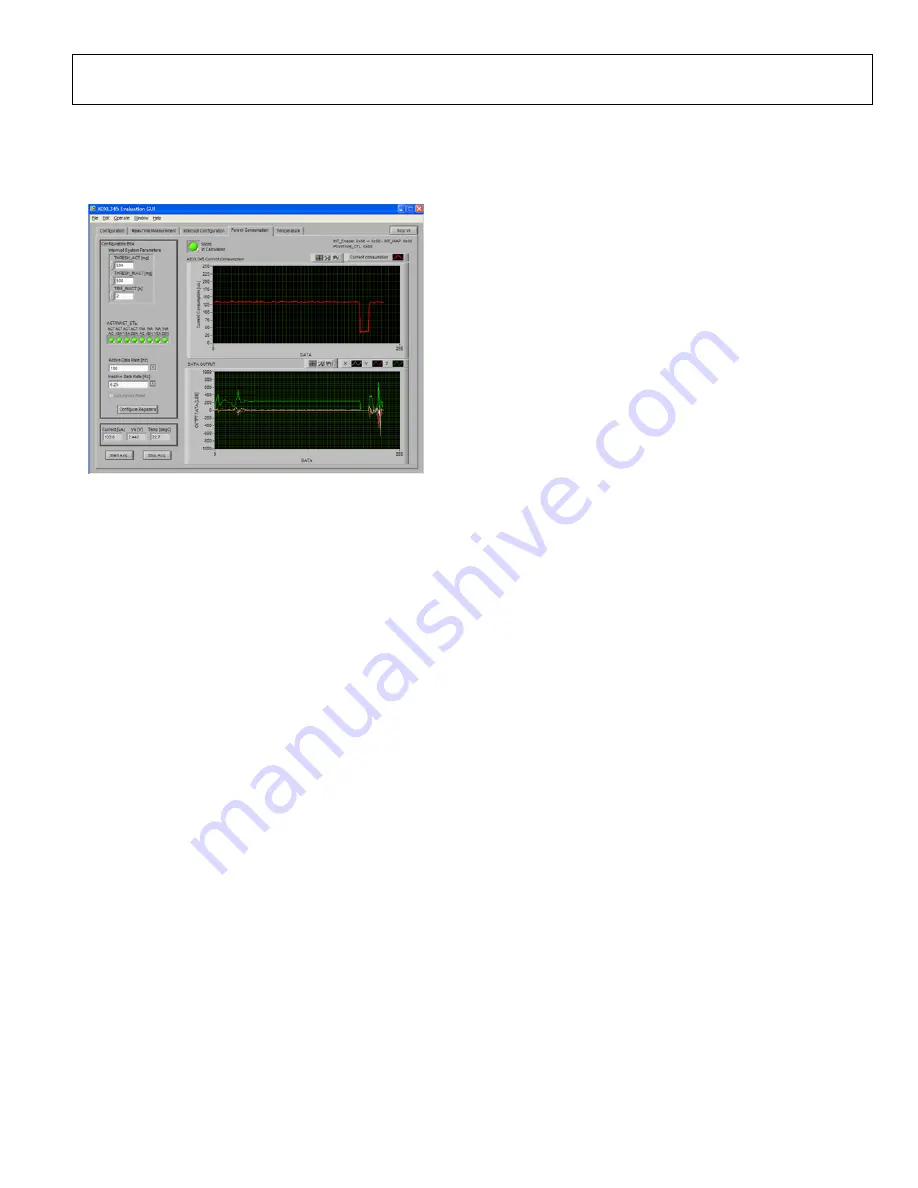
The 

Power Consumption

 tab shows the advantages of using the 

inactivity and activity functions to modulate system power and 
obtain overall power savings (see Figure 14). 

08

11

9-

01

1


Figure 14. Power Consumption Tab 

When inactivity is detected, caused by acceleration below the 
amount set in the 

THRESH_INACT [m

g

]

 box for the amount 

of time set in the 

TIME_INACT [s]

 box, the accelerometer is 

placed into a lower data rate as set in the 

Inactive Data Rate [Hz] 

menu. Because the power of the ADXL345 is modulated with 
data rate, an immediate power savings is acheived. When activity is 
detected (an acceleration above that set in 

THRESH_ACT [m

g

]


box), the part is placed back into a higher data rate as specified 
in the 

Active Data Rate [Hz]


menu.  

Additionally, the 

Micro In Calculation

 indicator lights up, 

signifying that a controller or microprocessor is actively pulling 
data from the part or processing it. In addition to power savings 
from the ADXL345, more power can be saved by powering 
down the microprocessor during periods of inactivity and using 
the ADXL345 activity interrupt to wake the microprocessor up 
during periods of activity. 

The 

ACT/INACT_CTL

 indicators can be used to enable 

different axes in the activity or inactivity events. After updating 
the participating axes, thresholds, timers, or data rates, click the 

Configure Registers

 button. The registers are not updated until 

the button is clicked. Additionally, the button updates the registers 
only when data acquisition is active. If the button is clicked when 
no acquisition is occurring, the button remains inactive until it 
is clicked again or until acquisition is started. 

To begin data acquisition, click the 

Start Acq.

 button in the 

bottom left corner of the screen. To end data acquisition, click 
the 

Stop Acq.

 button in the bottom left corner of the screen. 


Summary of Contents for iMEMS ADXL345

Page 1: ...s directly to a PC via its USB where the USB connection provides both power and communications to the board The ISEB then connects to the satellite board through a ribbon cable This cable allows the satellite to be easily manipulated for testing or for being separately placed into an environmental chamber for temperature or humidity testing Separating the boards mitigates corruption of data due to...

Page 2: ...Setup 3 Software Configuration 3 Hardware Configuration 4 Updating Repairing the ISEB Firmware 5 Inertial Sensor Evaluation System Graphical User Interface 6 Configuration Tab 6 Real Time Measurement Tab 7 Interrupt Configuration Tab 8 Power Consumption Tab 9 Temperature Tab 10 Header Pinout 11 ESD Caution 11 REVISION HISTORY 6 09 Revision 0 Initial Revision ...

Page 3: ...see Figure 2 08119 002 Figure 2 Found New Hardware Prompt 3 Select Don t search I will choose the driver to install see Figure 3 and select ADI Inertial Sensor Evaluation System from the model list see Figure 4 The ISEB should be detected automatically in the Device Manager as the ADI Inertial Sensor Evaluation System under the Ports COM LPT selection It is recommended to open the Device Manager t...

Page 4: ...e ribbon cable 5 Verify that the jumpers located in the center of the ADXL345 satellite are configured as shown in Figure 5 CONNECTOR ADXL345 JUMPER POSITIONS 08119 005 Figure 5 Correct Jumper Positions for the ADXL345 Satellite 6 Place the ADXL345 ultralow power accelerometer into the socket on the satellite board The Socket Pin 1 Indicator is located inside the socket close to the hinge as shown...

Page 5: ...hen the COM port is selected click OK to accept the changes and go back to the main screen 08119 108 Figure 8 Selecting the Correct COM Port for the Downloader When the ISEB is connected the correct firmware is selected and the downloader is fully configured follow these steps to flash the firmware 1 Click Start as shown in Figure 7 to initiate the flashing process After clicking Start the two but...

Page 6: ...I Inertial Sensor Evaluation System under the Ports COM LPT selection 08119 007 Figure 10 Selecting the Correct COM Port for the ISEB After selecting the COM port click on Connect to connect to the ISEB This causes the indicator under Vs Set to light up and update the Current Vs V value verifying that the board is connected see Figure 11 08119 008 Figure 11 ISEB Connected to PC Clicking the round ...

Page 7: ...licking the Self Test button when self test is enabled turns the self test feature off and causes the Self Test indicator to dim Self test is enabled as long as the indicator is lit The ADXL345 provides three offset registers that are used for calibration and offset adjustment On the Real Time Measurement tab these registers are easily accessible for programming offset values This can be done in t...

Page 8: ...ils refer to the ADXL345 data sheet Clicking an indicator causes it to toggle values A lit indicator causes a value of 1 to be written to that bit and an unlit indicator causes a value of 0 to be written to that bit In the Interrupt Configuration box you can select the interrupts to enable For purposes of the GUI all enabled interrupts are mapped to the INT2 pin Selecting the checkbox next to the ...

Page 9: ...n indicator lights up signifying that a controller or microprocessor is actively pulling data from the part or processing it In addition to power savings from the ADXL345 more power can be saved by powering down the microprocessor during periods of inactivity and using the ADXL345 activity interrupt to wake the microprocessor up during periods of activity The ACT INACT_CTL indicators can be used t...

Page 10: ... Figure 15 allows a maximum number of points to be set and at what rate data is acquired The testing can be stopped before reaching the maximum number of points The data rate for the accelerometer can also be set to ensure that the testing is performed under conditions most like those that the part would be configured for in a system Figure 15 Temperature Tab The data in the top graph in Figure 15...

Page 11: ... HEADER PINOUT 1 S1 2 3 S2 4 5 S3 6 7 S4 8 CS2 9 VS2 10 VS1 11 12 ST1 13 ST2 14 SCL1 15 SDA1 16 CLK 17 MOSI 18 MISO 19 CS3 20 CS4 P1 3 3V CS2 VS2 VS1 ST1 ST2 SCL1 SDA1 CLK MOSI MISO CS3 CS4 AGND GND 08119 013 Figure 16 ISEB 20 Pin Header Pinout ESD CAUTION ...

Page 12: ... use of evaluation boards Information furnished by Analog Devices is believed to be accurate and reliable However no responsibility is assumed by Analog Devices for its use nor for any infringements of patents or other rights of third parties that may result from its use Analog Devices reserves the right to change devices or specifications at any time without notice Trademarks and registered trade...

Reviews: