UG-1888
Rev. 0 | Page 7 of 16
9.
In the
A.L.S.
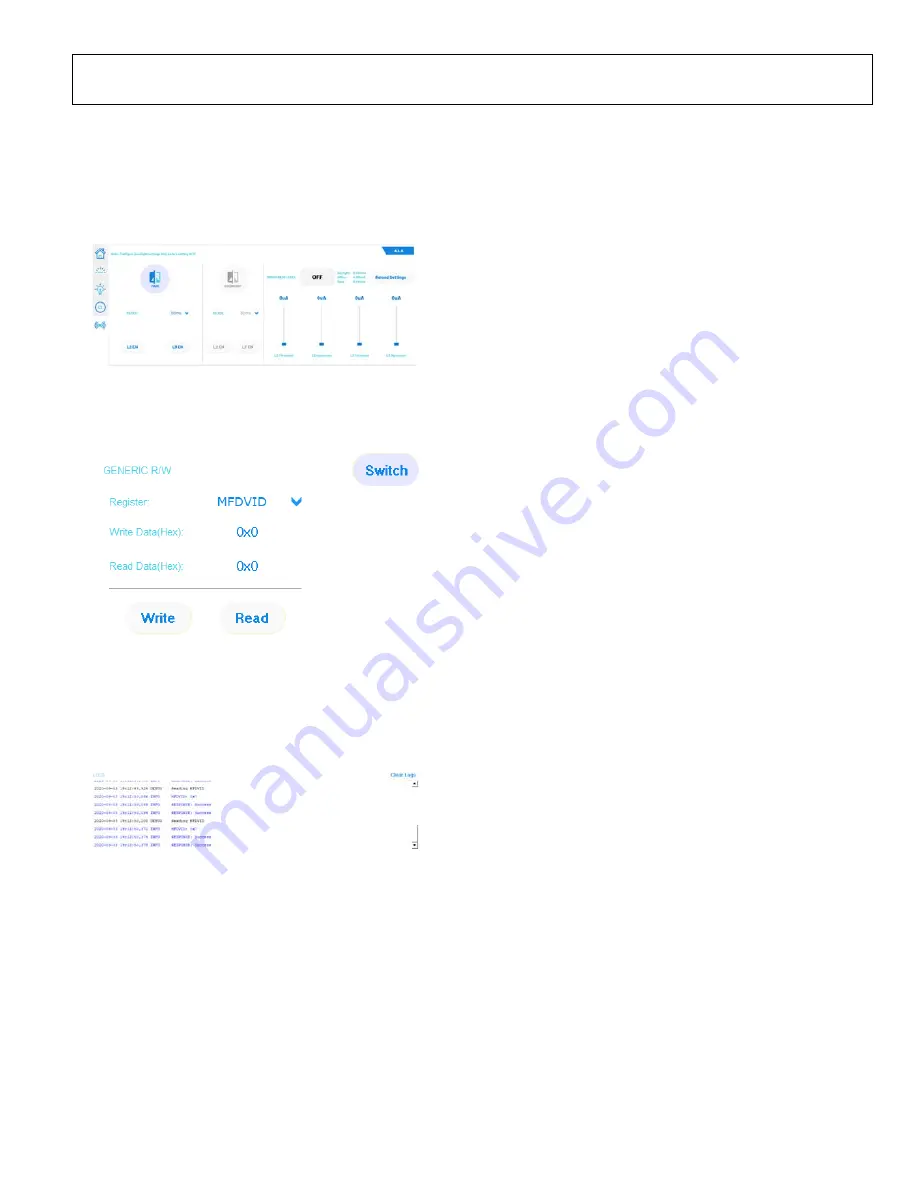
main tab for Windows, users can enable the
photosensor and comparator with a threshold and hysteresis
current configuration (see Figure 14). Note that this feature
is only available for the
. To utilize the secondary
photo sensor, move
P5
to the other position (see Figure 25
2518
6-
015
Figure 14. Ambient Light Sensing (
A.L.S.
) Tab for Windows
10.
Click
Switch
in Windows to enable the read and write of
the registers directly (see Figure 15).
25
186
-016
Figure 15. Generic Read and Write (
GENERIC R/W
) for Windows
11.
Note that all processes are logged in the
LOGs
box in
Windows. Every log contains the time and date with the
log category (
INFO
,
DEBUG
, and
ERROR
) and messages
(see Figure 16). A
Clear Logs
options is also available.
25186-
017
Figure 16.
LOGS
Box for Windows
ANDROID APP
Users must take the following flashing firmware, hardware, and
Android app steps to connect the ADP8860SHEILD-EVALZ or
the ADP8861SHEILD-EVALZ to the Android app.
Flashing Firmware (Windows Only)
To flash the firmware, take the following steps:
1.
Open the
CrossCore Serial Flash Programmer 1.5.0
app
(see Figure 4). If the programmer is not installed, download
the installer from the
webpage.
2.
Ensure that the EV-COG-AD3029LZ is connected and
select the following parameters (see Figure 5):
a.
Target
: ADuCM302x
b.
Serial Port
: (Port where the board is connected)
c.
Baudrate
: 115200
d.
Action
: Program
3.
Under the
File to download
tab, browse and choose
the source code (hex file) along with the downloaded
files from the ADP8860SHIELD-EVALZ or the
ADP8861SHIELD-EVALZ webpage.
4.
Click
Start
to flash the programmer to the EV-COG-
AD3029LZ.
Hardware
To connect and reset the hardware, take the following steps:
1.
Connect the
via the Hirose connector.
2.
Connect the GPIO28 pin of the
to GND (see Figure 7).
3.
Do a hardware reset on the ADP8860SHEILD-EVALZ or
the ADP8861SHEILD-EVALZ and the EV-COG-AD3029LZ
to reboot the flashing firmware.


