8
4. CLIMBING SMALL OBSTACLES
Pressing your foot down on the extended frame
(curb climbers) makes it easier to lift the front wheels
to negotiate curbs.
5. HANDLE HEIGHT ADJUSTMENT
(DEPENDING ON MODELS)
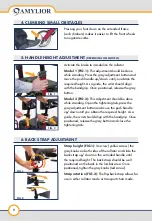
FIG. 1
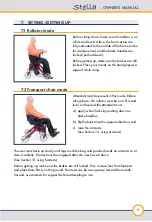
FIG. 2
Activate the brake to immobilize the rollator.
Model 1 (FIG.1):
This adjustment should be done
while standing. Press the gray adjustment button and
move the push handle up/down until you obtain the
required height. As a guide, the wrist should align
with the handgrip. Once positioned, release the gray
button.
Model 2 (FIG.2):
This adjustment should be done
while standing. Open the tightening tab, press the
gray adjustment button and move the push handle
up/down until you obtain the required height. As a
guide, the wrist should align with the handgrip. Once
positioned, release the gray button and close the
tightening tab.
6. BACK STRAP ADJUSTMENT
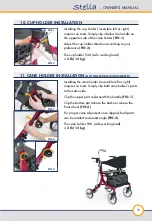
FIG. 1
FIG. 2
Strap height (FIG.1):
Unscrew (yellow arrow) the
gray knobs on both sides of the rollator and slide the
back strap up/down on the extruded handle until
the required height. The back strap should be well
positioned on the back in the lumbar area. Once
positioned, tighten the gray knobs (red arrow).
Strap rotation (FIG.2):
The flip-back strap allows for
use in either rollator mode or transport chair mode.


