I n s t r u c t i o n M a n u a l
A u t o P a t c h M a t r i x S w i t c h e r s
Precis DSP
Distribution Matrix
R e l e a s e : 7 / 0 6 / 2 0 0 9
F i r m w a r e : v 1 . 2 . 0
Page 1: ...Instruction Manual AutoPatch Matrix Switchers Precis DSP Distribution Matrix Release 7 06 2009 Firmware v1 2 0 ...
Page 2: ...y whichever is greater Products that are returned and exhibit signs of damage or unauthorized use will be processed under the Non Warranty Repair Policy AMX will continue to provide Warranty Repair Services for products discontinued or replaced by a Product Discontinuance Notice Non Warranty Repair Policy Products that do not qualify to be repaired under the Warranty Repair Policy due to age of th...
Page 3: ...PLIED WARRANTIES OF MERCHANTABILITY AND FITNESS FOR A PARTICULAR PURPOSE WITH REGARD TO THE AMX SOFTWARE THIS LIM ITED WARRANTY GIVES LICENSEE SPECIFIC LEGAL RIGHTS Any supplements or updates to the AMX SOFTWARE including without limitation any if any service packs or hot fixes provided to Licensee after the expiration of the ninety 90 day Limited Warranty period are not covered by any warranty or...
Page 4: ......
Page 5: ...5 Applying Power 16 Attaching an External Controller 17 Installing APGraphic EQ Software 18 Executing a Test Switch Using APGraphic EQ 19 Technical Support 20 Fine Tuning with APGraphic EQ 21 APGraphic EQ Views 21 Executing Switches 22 Adjusting Volume 22 Adjusting Digital Input Gain 23 Adjusting Equalization Bands Balance 24 Adjusting Tone 25 Controlling the System 27 AMX Control Devices 27 APCon...
Page 6: ...Contents ii Precis DSP Instruction Manual ...
Page 7: ...nductive work mats are specifically designed for this purpose Anyone performing field maintenance on AMX AutoPatch equipment should use an appropriate ESD field service kit complete with at least a dissipative work mat with a ground cord and a UL listed adjustable wrist strap with another ground cord These items should not be manufactured locally since they are generally composed of highly resisti...
Page 8: ...om your AMX AutoPatch product turn it off immediately and call technical support For products with multiple power supplies in each unit make sure all power supplies are turned on simultaneously Use surge protectors and or AC line conditioners when powering AMX AutoPatch products Only use a fuse s with the correct fuse rating in your enclosure Make sure the power outlet is close to the product and ...
Page 9: ...ce que tous les blocs d alimentation des appareils dotés de blocs d alimentation multiples dans chaque unité soient allumés simultanément Servez vous de protecteurs de surtension ou de conditionneurs de lignes à courant alternatif lorsque vous mettez les appareils AMX AutoPatch sous tension Placez uniquement des fusibles de calibre exact dans les boîtiers Veillez à ce que la prise de courant soit ...
Page 10: ...mmission Radio Frequency Interference Statement This equipment generates and uses radio frequency energy and if not installed and used properly that is in strict accordance with the manufacturers instructions may cause interference to radio and television reception It has been type tested and found to comply with the limits for a Class B computing device in accordance with the specifications in Su...
Page 11: ...alk are registered trademarks of Echelon TosLink is a registered trademark of the Toshiba Corporation Ethernet is a registered trademark of the Xerox Corporation Other products mentioned herein may be the trademarks of their respective owners Warnings Cautions This manual uses the following conventions and icons to draw attention to actions or conditions that could potentially cause problems with ...
Page 12: ...Notices 6 Precis DSP Instruction Manual ...
Page 13: ...ted RCA connectors RS 232 control port Supports full Device Discovery through AMX s AutoPatch Duet module firmware v1 2 0 or higher required Rack mounting ears included Limited Warranty see warranty at www amx com or on the AMX AutoPatch CD 24 hour technical support Precis DSP Control Features Precis DSP systems support two different protocols BCS Basic Control Structure and TCP IP Several differe...
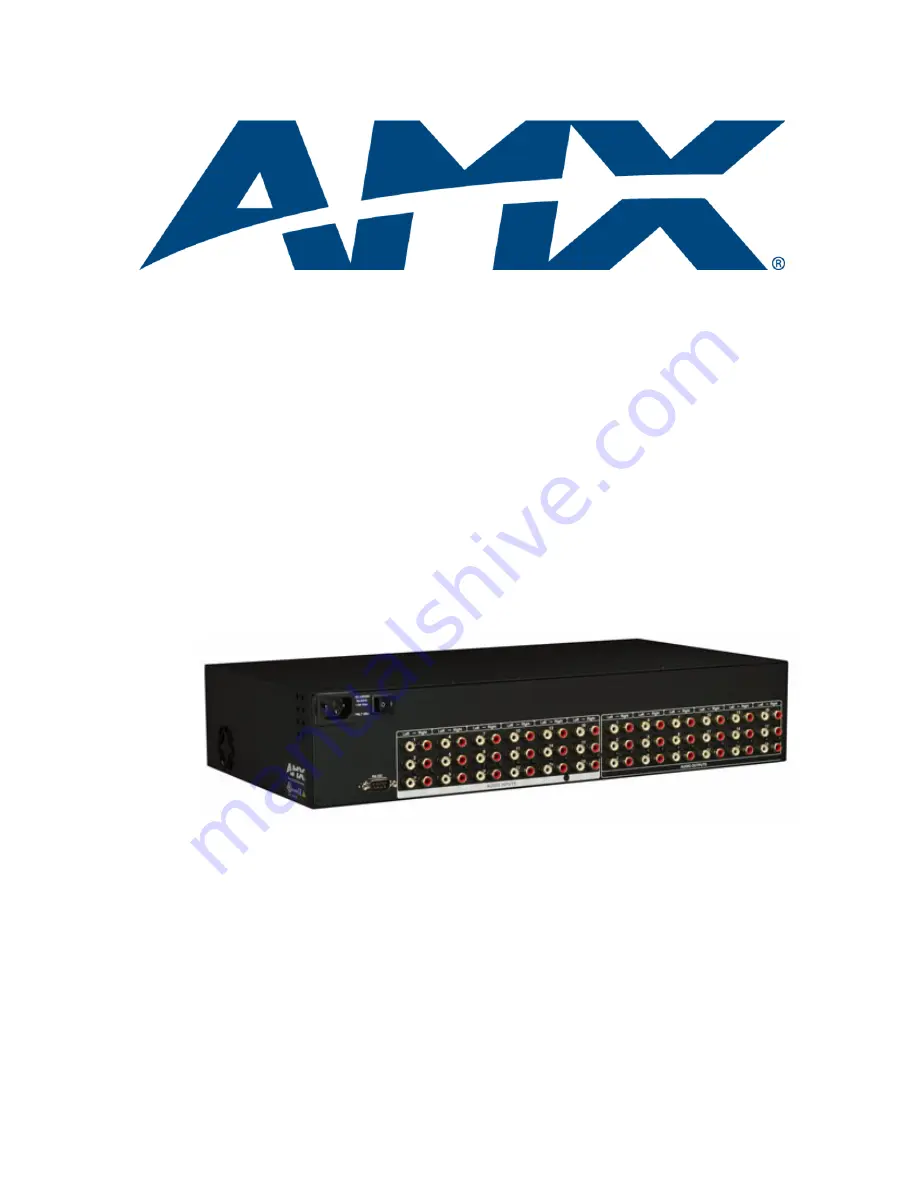
Page 14: ...acle the power specifications are also in the table on page 9 Always use an earth grounded power cord system with the Precis DSP Input Output Connectors Precis DSP models have gold plated RCA connectors for routing audio These connectors are the attachment points for source and destination devices that connect to the system Viewed from the rear of the enclosure the inputs sources are on the left s...
Page 15: ...4 32 cm 1 RU Weight 18x18 model 8x8 model Approximately 10 5 lb 4 76 kg per enclosure Approximately 7 0 lb 3 18 kg per enclosure Specifications Stereo Audio Signals Parameter Conditions Value Frequency Response f 20 Hz to 20 kHz 0 dB to 0 8 dB THD Noise f 1 kHz Vin 10 dBu to 10 dBu 0 1 Crosstalk f 1 kHz Vin 14 dBu 115 dB Signal to Noise Ratio SNR f 20 Hz to 20 kHz Vin 14 dBu 90 dB Input Level max ...
Page 16: ...interface such as a web browser e g Internet Explorer Setup and operation information are in the APWeb Server Module s documentation on the AMX AutoPatch CD or at www amx com Contact AMX regarding limitations and conditions for operating a Precis DSP on a company LAN Local Area Network If your AMX account has the required permissions the program can be downloaded from www amx com BCS Serial Contro...
Page 17: ...tial hazards that are common to all installations Elevated Operating Temperature The maximum rated ambient temperature for Precis DSP enclosures is 95 F 35 C All equipment should be installed in an environment compatible with the manufacturer s maximum rated ambient temperature In a closed or multi unit rack assembly the operating ambient temperature of the rack environment may be greater than the...
Page 18: ...Other enclosure products as needed The documentation in each box includes AMX AutoPatch Precis DSP Quick Start Guide AMX AutoPatch CD with APGraphic EQ software for system setup For orders comprising multiple enclosures the shipping boxes are marked as Chassis __ of __ where the first blank is the box number and the second blank is the total number of boxes in the shipment Unpacking Tips Before fu...
Page 19: ...e left on the end of the enclosure Use earth grounded power cords system with the Precis DSP Attach all power cords to a single surge protector and or an AC line conditioner Apply power to the Precis DSP enclosure before applying power to its source and destination devices Installation Procedure A flow chart showing the basic installation sequence is in FIG 2 The procedure which follows on page 14...
Page 20: ...as power Step 4 4 Apply power to the system according to the power up procedure see page 16 Note We recommend using a surge protector and or an AC line conditioner 5 Connect the Precis DSP to the PC and establish communication see page 17 6 Install and open the APGraphic EQ software on the PC see page 18 7 Execute a test switch to ensure the system is working properly see page 19 8 When the test s...
Page 21: ... connectors for routing stereo audio Each input and output consists of a pair of connectors left and right with the number of the input output between the two connectors Before connecting all input and output cables attach only the first two input and output pairs and execute a test switch see page 19 When the test switch is successful attach the rest of the input and output cables To attach RCA c...
Page 22: ... an overload note the power consumption rating of all the equipment connected to the circuit breaker before applying power Caution We recommend attaching all power cords to a surge protector and or an AC line conditioner Power Up Sequence To apply power 1 Attach the first two source and destination devices see page 15 Do not apply power to the source and destination devices until Step 5 2 Plug the...
Page 23: ...r options see page 27 PC Requirements for APGraphic EQ also for APControl 3 0 Windows XP Professional or Windows 2000 Java Runtime Environment JRE v1 4 2 or the latest version JRE v1 4 2 can be installed as part of APGraphic EQ Minimum Hardware 166 MHz 128 MB RAM 20 MB free disk space 800x600 display Recommended Hardware 2 0 GHz 512 MB RAM 20 MB free disk space 1280x1024 display Serial port Disk s...
Page 24: ...nto the CD drive If the CD does not autorun explore the folder for APGraphic EQ 3 If Java JRE v 1 4 2 is already installed on the PC select the APGraphic EQ option without JVM If Java JRE v 1 4 2 is not installed select the APGraphic EQ option with JVM 4 Install the program according to the installer instructions 5 Open the program from the location specified during the installation normally it is...
Page 25: ...utput connectors Note For directions for executing a test switch using BCS commands see page 31 We recommend executing a test switch that routes Input 1 to Output1 and Output 2 To execute a test switch using the CrossBar in APGraphic EQ 1 From the main interface open the Options menu and select Show CrossBar View 2 Click the crosspoints for Input 1 to Output 1 and Input 1 to Output 2 inputs are on...
Page 26: ...t the switch again If the switch still does not work contact technical support see below Technical Support Before contacting technical support with a question please consult this manual If you still have questions contact your AMX representative or technical support Have your system s serial number ready Viewed from the rear the system s serial number is located to the left on the end of the enclo...
Page 27: ... page 22 Adjusting volume see page 22 Adjusting digital input gain see page 23 Adjusting equalization bands and balance see page 24 Adjusting tone see page 25 Important To properly adjust the sound for the environment you will need to route signals and adjust the volume as necessary throughout the fine tuning process BCS command equivalents for all DSP functionality adjustments are provided for ad...
Page 28: ...e Options menu select Show CrossBar View 3 Click a crosspoint to execute a switch The crosspoint changes to an active state and the switch is routed Click an active crosspoint to disconnect a switch Adjusting Volume This section explains how to adjust volume using the APGraphic EQ main interface To adjust volume for an output 1 Using the CrossBar route an input to the output needing adjustment 2 F...
Page 29: ...ls The following steps tell how to adjust input gain as part of the process of equalizing input levels Caution We strongly recommend that input gain adjustments be made only by a qualified installer or dealer To adjust input gain 1 Using the CrossBar route the input needing adjustment to an output 2 From the main interface open the Options menu and select Show Input Gain View The Input Gain dialog...
Page 30: ...s Tone when the Tone sliders are visible the button says EQ To adjust equalization bands and balance for outputs 1 Using the CrossBar route an input to all outputs needing adjustment 2 From the main interface select an output from the Output Device list 3 Adjust the sliders for each equalization band until the desired sound is achieved If the equalization sliders are not visible click the EQ butto...
Page 31: ... visible the button says EQ To adjust tone for an output 1 Using the CrossBar route an input to the output needing adjustment 2 From the main interface click the Tone button The Tone sliders appear 3 Select the output from the Output Device list 4 Adjust the sliders for bass and treble until the desired sound is achieved Tip The Tone bands for an output can be set to 0 flat response by clicking th...
Page 32: ...Fine Tuning with APGraphic EQ 26 Precis DSP Instruction Manual ...
Page 33: ...t channels must be entered The system should be turned on and connected to the PC via the serial port before using the Wizard To install and use APControl 3 0 1 Download APControl 3 0 from the AMX AutoPatch CD 2 From the APControl Launchbar menu select System New 3 Select AutoPatch Heritage System click Next 4 Select Manual Configuration Entry click Next 5 Enter 8 or 18 depending on the configurat...
Page 34: ...es VM 0 all and VM 2 audio either virtual matrix can be used since the Precis DSP has a single stereo audio virtual matrix Executing Switches Using the CrossBar The crosspoint images in the CrossBar field represent the intersections of the input channels buttons on the left and the output channels buttons along the top The channel names and CrossBar color can be customized see page 29 The CrossBar...
Page 35: ...tions for icon images and enter the desired channel names use a maximum of 23 characters 3 Click Accept Custom icons need to be 16 32 or 48 pixels square jpg or gif files If 16 or 48 pixel square files are used be sure to modify the button properties see below to accommodate the change in image size To modify the button properties 1 From the CrossBar View menu select View Properties The View Prope...
Page 36: ... command characters appear in HyperTerminal when the enclosure responds When all of the entered characters appear in HyperTerminal the command has been successfully executed To establish communication between the Precis DSP and HyperTerminal 1 Open HyperTerminal or other terminal emulation software program 2 Select the COM port and check that the settings match those in the Precis DSP Serial Port ...
Page 37: ...ted the command If any other characters appear the command was not successful Verify that the source signal is audible at the destination Important When entering values for BCS gain commands do not add any leading zeros e g to set the volume to 9 dB enter CO3VA 90T do not enter CO3VA 090T Troubleshooting If the test switch did not execute correctly Check the power indicator on the front of the enc...
Page 38: ...Controlling the System 32 Precis DSP Instruction Manual ...
Page 39: ...a level of detailed information on one of the five components Only one verbosity setting and one component setting can be entered in a command The order in which the verbosity and component settings are entered is interchangeable AMX reserves the right to add to the contents of the splash screen at any time without notice Verbosity i e wordiness refers to the amount of information provided the hig...
Page 40: ...owest verbosity level for all components v0i0 FIG 9 on page 33 Using BCS to Access System Diagnostic Information Instructions are provided for accessing the lowest level of verbosity for all components and for accessing a specific level of verbosity for a specific component To access the lowest level of verbosity for all components 1 Enter scr or scrv0i0 Note Either of these commands provides a me...
Page 41: ...entire display Use the first example to check the host software IOS version and the hardware driver appcode version FIG 10 Display for v3i1 verbosity 3 component 1 FIG 11 Display for v3i3 verbosity 3 component 3 scrv3i1 1 Enclosure Precis DSP host software v3 4 2 hardware driver v1 2 0 R build date Jan 13 2009 08 03 50 xnet address 0xdcf1 ap system id 0x0 nvram status valid user preferences restor...
Page 42: ...splay for v3i4 verbosity 3 component 4 FIG 13 Display for v3i5 verbosity 3 component 5 scrv3i4 4 Hardware Boards detected io boards count 1 board 1 e000 hardware function checks none scrv3i5 5 VM Configuration count 2 VM 0 All 8x8x1 VM 2 A2 8x8x1 VM 0 master 0x0 0 0 1 self VM 2 master 0x0 0 0 1 self ...
Page 43: ...registered trademarks of AMX AMX reserves the right to alter specifications without notice at any time It s Your World Take Control 3000 RESEARCH DRIVE RICHARDSON TX 75082 USA 800 222 0193 469 624 8000 469 624 7153 fax 800 932 6993 technical support www amx com ...