background image

Introduzione 

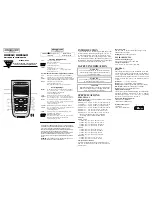
Il modello TMD90A è un termometro a due ingressi che consente il 
collegamento di termocoppie di tipo K, J, T, R, S ed E. Dispone di un 
display diviso in tre sezioni per la visualizzazione delle misure e 
dell’orologio relativo. Il software e il cavo RS-232 opzionali permettono 
la trasmissione di dati in tempo reale a un PC per l’ulteriore analisi e 
rapporti. 
All’accensione, il TMD90A visualizza tutti i segmenti del display a 
cristalli liquidi per circa 3 secondi e quindi fornisce informazioni sulle 
termocoppie eventualmente collegate. Sono disponibili numerose 
configurazioni di visualizzazione. Il display a cristalli liquidi è diviso in 
tre sezioni distinte: una più ampia nella parte superiore (visualizzazione 
principale) e due più piccole nella parte inferiore (visualizzazione 
secondaria e orologio relativo).  
Le tre aree di visualizzazione vengono aggiornate continuamente con le 
misure della temperatura e le informazioni di tempo relativo. Lo 
strumento offre diverse opzioni relative al tipo e al formato dei dati 
presenti sul display. 


Le letture di temperatura possono essere facilmente convertite da 
gradi Fahrenheit a gradi centigradi e viceversa. 


La retroilluminazione rende luminoso il display a cristalli liquidi per 
una facile lettura in ambienti scarsamente illuminati. 


Il pulsante 

A

 blocca i dati della sezione superiore del display, 

mentre la sezione inferiore continua ad aggiornarsi. 


L’indicatore di pila scarica è anch’esso aggiornato secondo la 
necessità. 


Il termometro attiva automaticamente l’ultima modalità selezionata 
prima dello spegnimento. 

Nota:

 se non vi sono termocoppie collegate, il visualizzatore della 

temperatura presenta quattro trattini (----). 

Contenuto della confezione 

Termometro TMD90A 

Sonda per termocoppia tipo K  

Manuale d’uso  

Custodia di plastica rigida per il trasporto 

Pila da 9 V 

TMD90A_all.pdf   53

3/23/2007   3:22:52 PM

Summary of Contents for TMD90A

Page 1: ... Dual Input Digital Thermometer User Manual Mode d emploi Bedienungshandbuch Manuale d Uso Manual de uso Visit www Amprobe com for Catalog Application notes Product specifications User manuals Please Recycle ...

Page 2: ...ut Digital Thermometer User Manual Mode d emploi Bedienungshandbuch Manuale d Uso Manuel de uso PN 2099366 March 2007 2007 Amprobe Test Tools All rights reserved Printed in China TMD90A_all pdf 1 3 23 2007 3 22 47 PM ...

Page 3: ...TMD90A_all pdf 2 3 23 2007 3 22 49 PM ...

Page 4: ...TMD90A Dual Input Digital Thermometer User Manual English TMD90A_all pdf 3 3 23 2007 3 22 49 PM ...

Page 5: ...TMD90A_all pdf 4 3 23 2007 3 22 49 PM ...

Page 6: ...nctions 5 Auto Power Off Sleep Mode 5 Change Thermocouple Type 5 Using the Pushbuttons 6 RS 232 Output 7 Troubleshooting 8 Replacing the Battery 9 9 V ac Adapter 9 Repair 10 Limited Warranty and Limitation of Liability 11 Thermocouple Definitions 11 Specifications 12 Additional Specifications 12 TMD90A_all pdf 5 3 23 2007 3 22 49 PM ...

Page 7: ... the thermometer only as specified in this manual or the protection provided by the thermometer might be impaired Replace the battery as soon as BAT appears to avoid false readings that can lead to electric shock and injury XWWarning Supplied thermocouple is not intended for contact with liquids or live electrical circuits Symbols Used in this Manual X Dangerous Voltage W Refer to the manual T Dou...

Page 8: ...y and Relative Clock The three display areas are continually updated with the temperature measurements and relative time information There are several options regarding how and what information is presented on the LCD Temperature readings are easily toggled between Fahrenheit and Celsius A backlight illuminates the LCD for viewing in low light areas The A button will freeze the upper display data ...

Page 9: ...ential on Primary and alternating T1 T2 temperatures on Secondary display G Primary data display Displays T1 T2 or T1 T2 temperature differential TD or a relative zero of T1 T2 or TD H KJTRSE Selects proper input reference for thermocouple in use T1 and T2 must be the same thermocouple type I Secondary data display Displays T2 T1 or T1 and T2 temperatures J Thermocouple input Positive and negative...

Page 10: ... simultaneously while powering on When n then appears in the center of the screen you can release the On button Auto power off is disabled when you turn off the meter Change Thermocouple Type Press E and D simultaneously for 2 or more seconds until K appears Press the C button the type of probe cycles through K the default J T R S and E types The current mode is displayed on the left side of the L...

Page 11: ... the Pushbuttons The display defaults to the mode last used For your convenience the meter defaults to the settings used during the last operation C F HOLD REL REC T1 T2 TMD90A_all pdf 10 3 23 2007 3 22 49 PM ...

Page 12: ...roximately 30 seconds then turns off C Press momentarily and the unit toggles between Fahrenheit the default and Celsius temperatures The current mode is indicated on the right side of the LCD E Press momentarily and the Relative Clock starts in the lower right screen All other button functions are locked out except Power and Backlight T1 T2 or T1 T2 is displayed on the Primary screen The Secondar...

Page 13: ...T2 data screens with thermocouples inserted Measure resistance of thermocouples to ensure they are not broken internally Clean the thermocouple and restart Temperature drifts from a known value in a controlled environment Verify that thermocouple type matches the displayed icon Clean and dry the thermocouple blades and allow to air dry Confirm temperature with a known good thermocouple Replace the...

Page 14: ...if the battery was recently replaced check the voltage level if there is no response from the meter To replace the battery 1 Remove all thermocouples from the top of the meter 2 Lay the instrument face down on a clean flat surface 3 Loosen the screw and remove the battery door 4 Replace the battery 5 Replace the battery door and tighten the screw Remove the battery if you do not plan to use the me...

Page 15: ...f distributors near you Additionally in the United States and Canada In Warranty repair and replacement units can also be sent to a Amprobe Test Tools Service Center Non Warranty Repairs and Replacement US and Canada Non warranty repairs in the United States and Canada should be sent to a Amprobe Test Tools Service Center Call Amprobe Test Tools or inquire at your point of purchase for current rep...

Page 16: ...L OTHER WARRANTIES WHETHER EXPRESS IMPLIED OR STAUTORY INCLUDING IMPLIED WARRANTIES OF FITNESS FOR A PARTICULAR PURPOSE OR MERCHANTABILITY ARE HEREBY DISCLAIMED MANUFACTURER SHALL NOT BE LIABLE FOR ANY SPECIAL INDIRECT INCIDENTAL OR CONSEQUENTIAL DAMAGES OR LOSSES ARISING FROM ANY CAUSE OR THEORY Since some states or countries do not allow the exclusion or limitation of an implied warranty or of i...

Page 17: ...1 C 1001 to 1760 C 1 0 C 0 3 rdg 0 7 C 32 to 1000 F 0 1 F 1001 to 3200 F 1 0 F 0 1 rdg 1 4 F E 200 to 380 C 0 1 C 381 to 736 C 1 0 C 0 3 rdg 0 7 C 328 to 720 F 0 1 F 721 to 1832 F 1 0 F 0 1 rdg 1 4 F Additional Specifications OPERATING CONDITIONS 0 to 50 C 32 to 122 F at 0 to 85 relative humidity non condensing Ambient Coefficient 0 to 18 C and 28 to 50 C Ambient temperatures For each C ambient be...

Page 18: ...TMD90A Dual Input Digital Thermometer User Manual Mode d emploi Bedienungshandbuch Manuale d Uso Manuel de uso Français TMD90A_all pdf 17 3 23 2007 3 22 50 PM ...

Page 19: ...TMD90A_all pdf 18 3 23 2007 3 22 50 PM ...

Page 20: ...ons 5 Arrêt automatique mode de veille 5 Changer le type de thermocouple 5 Utilisation des boutons poussoirs 6 Sortie RS 232 8 Dépannage 9 Remplacement de la pile 11 Adaptateur secteur de 9 V 11 Réparation 12 Limites de garantie et de responsabilité 13 Définitions des thermocouples 13 Spécifications 14 Autres caractéristiques 14 TMD90A_all pdf 19 3 23 2007 3 22 50 PM ...

Page 21: ...ant les indications de ce manuel afin de ne pas entraver sa protection intégrée Remplacer la pile dès l apparition de l indicateur de pile faible apparaît pour éviter les mesures erronées qui posent des risques d électrocution et de blessures XWAvertissement Le thermocouple fourni n est pas conçu pour être en contact avec des liquides ou des circuits électriques sous tension Symboles utilisés dans...

Page 22: ...s trois zones d affichage sont actualisées en permanence avec les mesures de température et les informations de temps relatif Plusieurs options permettent de configurer la présentation et le type des informations apparaissant sur l écran LCD Les relevés de température basculent facilement entre les unités Fahrenheit et Celsius Un rétroéclairage illumine l écran LCD pour les lectures en zones faibl...

Page 23: ...iel sur l affichage principal et les températures alternées T1 T2 sur la fenêtre secondaire G Affichage des données primaires Affiche T1 T2 ou T1 T2 différentiel de température TD ou un zéro relatif de T1 T2 ou TD H KJTRSE Sélectionnelaréférenced entréeappropriéepourle thermocouple utilisé T1 et T2 doivent avoir le même type de thermocouple I Affichage des données secondaires Affiche les températu...

Page 24: ...s désactivez le mode de veille en appuyant sur D et sur A simultanément avec l appareil sous tension A l apparition de n au centre de l affichage relâchez la touche On L arrêt automatique est désactivé à la mise hors tension de l appareil Changer le type de thermocouple Appuyez sur le bouton E et sur D simultanément pendant au moins 2 secondes jusqu à l apparition de K Appuyez sur le bouton C et f...

Page 25: ...opération C F HOLD REL REC T1 T2 Utilisez les boutons poussoirs pour contrôler le fonctionnement du TMD90A Dans le tableau suivant on suppose que le TMD90A a été mis sous tension avec deux thermocouples installés et qu il est réglé pour afficher par défaut T1 sur l affichage primaire le thermocouple de type K et l enregistrement inactif TMD90A_all pdf 24 3 23 2007 3 22 50 PM ...

Page 26: ...e et l instrument revient au réglage par défaut B Une pression momentanée et le rétroéclairage s allume pendant une trentaine de secondes avant de s éteindre C Une pression momentanée et l appareil bascule entre les températures en Fahrenheit par défaut et Celsius le mode courant est indiqué à droite sur l écran LCD E Une pression momentanée et l horloge relative REC démarre dans la fenêtre inféri...

Page 27: ...u à 16 000 valeurs exemples en mémoire avec horloge en temps réel Intervalle d échantillonnage programmable de 1 s à 3600 s Paramètres d alarme maximum et minimum définis par l utilisateur Permet une analyse approfondie en téléchargeant les données vers un programme informatique Toutes les données sont enregistrées en format txt permettant de les convertir facilement dans un autre programme d appl...

Page 28: ...a borne de la pile Des tirets apparaissent dans le fenêtres de résultats T1 et T2 Insérez le thermocouple manquant Des tirets apparaissent dans les fenêtres de résultats T1 et ou T2 avec les thermocouples insérés Mesurez la résistance des thermocouples pour vérifier s ils ne présentent pas de cassure interne Nettoyez le thermocouple et recommencez TMD90A_all pdf 27 3 23 2007 3 22 50 PM ...

Page 29: ...n du bouton E Vérifiez si le thermocouple est inséré correctement Des tirets apparaissent pendant l examen de la valeur maximale enregistrée Le thermocouple n est pas reconnu Vérifiez l absence de retraits intermittents ou momentanés du thermocouple Les données continuent d être actualisées après la pression du bouton A Recherchez l icône HOLD sur l affichage Appuyez fermement sur le bouton A L ap...

Page 30: ...capot de pile et serrez la vis Retirez la pile si vous n envisagez pas d utiliser l appareil pendant plus d un mois Ne laissez pas la pile dans l appareil s il risque d être exposé à des températures extrêmes Adaptateur secteur de 9 V Un adaptateur secteur de 9 V peut être utilisé à la place de la pile pour enregistrer les mesures à long terme Cet adaptateur vendu dans les magasins d électronique ...

Page 31: ...points de vente sur le site web www amprobe com De plus aux USA et au Canada les appareils peuvent être envoyés à un centre de service après vente Amprobe Test Tools pour réparation ou remplacement Réparations ou remplacement en dehors de la garantie USA et Canada Pour les réparations en dehors de la garantie aux Etats Unis et au Canada les appareils sont envoyés à un centre de service après vente...

Page 32: ... RECOURS TOUTES AUTRES GARANTIES EXPLICITES IMPLICITES OU STATUTAIRES NOTAMMENT LE CAS ECHEANT LES GARANTIES DE QUALITE MARCHANDE OU D ADAPTATION A UN OBJECTIF PARTICULIER SONT EXCLUES PAR LES PRESENTES LE FABRICANT NE SERA EN AUCUN CAS TENU RESPONSABLE DE DOMMAGES PARTICULIERS INDIRECTS ACCIDENTELS OU CONSECUTIFS NI D AUCUNS DEGATS OU PERTES DE DONNEES SUR UNE BASE CONTRACTUELLE EXTRA CONTRACTUEL...

Page 33: ... C 1 0 C 0 3 de lecture 0 7 C 32 à 1000 F 0 1 F 1001 à 3200 F 1 0 F 0 1 de lecture 1 4 F E 200 à 380 C 0 1 C 381 à 736 C 1 0 C 0 3 de lecture 0 7 C 328 à 720 F 0 1 F 721 à 1832 F 1 0 F 0 1 de lecture 1 4 F Autres caractéristiques CONDITIONS D EXPLOITATION 0 à 50 C 32 à 122 F avec 0 à 85 d humidité relative sans condensation Coefficient ambiant de 0 à 18 C et de 28 à 50 C températures ambiantes Pou...

Page 34: ...TMD90A Dual Input Digital Thermometer User Manual Mode d emploi Bedienungshandbuch Manuale d Uso Manuel de uso Deutsch TMD90A_all pdf 33 3 23 2007 3 22 51 PM ...

Page 35: ...TMD90A_all pdf 34 3 23 2007 3 22 51 PM ...

Page 36: ...omatische Abschaltung Ruhemodus 5 Ändern des Thermoelementtyps 5 Verwenden der Tasten 6 RS 232 Ausgang 8 Fehlerbehebung 9 Ersetzen der Batterie 11 9 V Wechselstromadapter 11 Reparatur 12 Beschränkte Gewährleistung und Haftungsbeschränkung 13 Thermoelementdefinitionen 13 Spezifikationen 14 Weitere Spezifikationen 14 TMD90A_all pdf 35 3 23 2007 3 22 51 PM ...

Page 37: ...ie in diesem Handbuch beschrieben einsetzen da sonst die im Thermometer integrierten Schutzeinrichtungen beeinträchtigt werden können Zur Vermeidung falscher Messwerte die zu Stromschlag oder Verletzungen führen können die Batterie ersetzen sobald die BAT eingeblendet wird XWWarnung Das gelieferte Thermoelement darf nicht mit Flüssigkeiten oder stromführenden Stromkreisen in Kontakt kommen Symbole...

Page 38: ...reiche werden kontinuierlich mit Informationen zu Temperaturmessungen und zum relativen Zeitgeber aktualisiert Es gibt mehrere Optionen bezüglich Anzeige und Auswahl der auf der LCD dargestellten Informationen Temperaturmesswerte können einfach zwischen Fahrenheit und Celsius umgeschaltet werden Eine Hintergrundbeleuchtung beleuchtet die LCD für Ablesungen in Arbeitsbereichen mit wenig Licht Die A...

Page 39: ...T2 Differenzial auf der Primäranzeige und wechselweise T1 T2 Temperaturen auf der Sekundäranzeige G Primärdatenanzeige Zeigt T1 T2 oder T1 T2 Temperaturdifferenzial TD oder einen relativen Nullpunkt von T1 T2 oder TD an H KJTRSE Wählt korrekte Eingangsreferenz für das verwendete Thermoelement aus T1 und T2 müssen denselben Thermoelementtyp aufweisen I Sekundärdatenanzeige Zeigt T2 T1 oder T1 und T...

Page 40: ...ges Drücken der Tasten D und A während des Einschaltens deaktiviert werden Wenn n in der Mitte der Anzeige erscheint kann die ON Taste losgelassen werden Die automatische Abschaltung wird deaktiviert wenn das Messgerät ausgeschaltet wird Ändern des Thermoelementtyps Die Tasten E und D gleichzeitig mindestens 2 Sekunden lang drücken bis K angezeigt wird Die Taste C drücken sodass die möglichen Sond...

Page 41: ...zeige kehrt standardmäßig zum zuletzt verwendeten Modus zurück Das Messgerät verwendet standardmäßig die Einstellungen die während des letzten Einsatzes verwendet wurden C F HOLD REL REC T1 T2 TMD90A_all pdf 40 3 23 2007 3 22 51 PM ...

Page 42: ...e zeigt T1 an schaltet nochmaliges kurzzeitiges Drücken bewirkt dass T1 T2 angezeigt wird Sekundäranzeige wechselt zwischen T1 und T2 nochmaliges kurzzeitiges Drücken bewirkt dass das Instrument auf Standard zurückschaltet B Kurzzeitiges Drücken bewirkt dass die Hintergrundbeleuchtung ungefähr 30 Sekunden lang leuchtet und dann ausschaltet C Kurzzeitiges Drücken bewirkt dass die Einheit zwischen F...

Page 43: ...s zu 16000 Messwerten in Speicher mit Echtzeituhr Programmierbares Intervall 1 bis 3600 Sekunden Benutzerdefinierte Maximal und Minimal Alarmeinstellungen Ermöglicht weitere Analysen durch Herunterladen von Daten auf einen Computer Verarbeitung mit einem Programm Alle Daten werden im txt Format gespeichert sodass sie einfach in andere Softwareprogramme übernommen werden können TMD90A_all pdf 42 3 ...

Page 44: ...e Batteriepole sicher festhalten Gedankenstriche erscheinen in den T1 und T2 Datenanzeigen Fehlendes Thermoelement einsetzen Gedankenstriche erscheinen in den T1 und oder T2 Datenanzeigen und Thermoelemente sind eingesetzt Widerstand der Thermoelemente messen um interne Defekte auszuschließen Das Thermoelement reinigen und neu beginnen TMD90A_all pdf 43 3 23 2007 3 22 51 PM ...

Page 45: ... E gedrückt wird Sicherstellen dass das Thermoelement korrekt eingesetzt ist Gedankenstriche erscheinen während der Anzeige des aufgezeichneten Maximalwerts Thermoelement ist nicht bestätigt Auf zeitweilige kurzzeitige Trennung des Thermoelements prüfen Daten werden nach Drücken der Taste A weiterhin aktualisiert Prüfen ob das HOLD Symbol HOLD auf der Anzeige erscheint Die Taste A fest drücken Ins...

Page 46: ...ersetzen 5 Die Batteriefachabdeckung wieder anbringen und die Schraube anziehen Die Batterie entfernen falls das Messgerät voraussichtlich einen Monat oder länger nicht verwendet wird Die Batterie nicht in einem Messgerät belassen das möglicherweise extremen Temperaturen ausgesetzt wird 9 V Wechselstromadapter Für Langzeit Messwertaufzeichnung kann ein 9 V Wechselstromadapter an Stelle der Batteri...

Page 47: ...u finden Darüber hinaus können in den USA und in Kanada Geräte an ein Amprobe Test Tools Service Center Adresse siehe weiter unten zur Reparatur oder zum Umtausch eingesendet werden Reparatur oder Austausch ausserhalb der Garantieperiode USA und Kanada Für Reparaturen außerhalb der Garantie in den Vereinigten Staaten und in Kanada werden die Geräte an ein Amprobe Test Tools Service Center gesendet...

Page 48: ...LEINIGEN RECHTSANSPRUCH AUF SCHADENERSATZ DAR ALLE ANDEREN GEWÄHRLEISTUNGEN VERTRAGLICH GEREGELTE ODER GESETZLICHE VORGESCHRIEBENE EINSCHLIESSLICH DER GESETZLICHEN GEWÄHRLEISTUNG DER MARKTFÄHIGKEIT UND DER EIGNUNG FÜR EINEN BESTIMMTEN ZWECK WERDEN ABGELEHNT DER HERSTELLER ÜBERNIMMT KEINE HAFTUNG FÜR SPEZIELLE INDIREKTE NEBEN ODER FOLGESCHÄDEN ODER VERLUSTE DIE AUF BELIEBIGER URSACHE ODER RECHTSTHE...

Page 49: ... 1 0 C 0 3 Anz 0 7 C 32 bis 1000 F 0 1 F 1001 bis 3200 F 1 0 F 0 1 Anz 1 4 F E 200 bis 380 C 0 1 C 381 bis 736 C 1 0 C 0 3 Anz 0 7 C 328 bis 720 F 0 1 F 721 bis 1832 F 1 0 F 0 1 Anz 1 4 F Weitere Spezifikationen BETRIEBSBEDINGUNGEN 0 bis 50 C 32 bis 122 F bei 0 bis 85 relativer Feuchtigkeit nicht kondensierend Umgebungskoeffizient 0 bis 18 C und 28 bis 50 C Umgebungstemperatur Pro C Umgebungstempe...

Page 50: ...TMD90A Dual Input Digital Thermometer User Manual Mode d emploi Bedienungshandbuch Manuale d Uso Manuel de uso Italiano TMD90A_all pdf 49 3 23 2007 3 22 52 PM ...

Page 51: ...TMD90A_all pdf 50 3 23 2007 3 22 52 PM ...

Page 52: ...utomatico modalità di risparmio energetico 5 Cambio del tipo di termocoppia 5 Uso dei pulsanti 6 Uscita RS 232 8 Soluzione dei problemi 9 Sostituzione della pila 11 Adattatore di c a da 9 V 11 Riparazioni 12 Garanzia limitata e restrizioni di responsabilità 13 Descrizione delle termocoppie 13 Dati tecnici 14 Dati tecnici aggiuntivi 14 TMD90A_all pdf 51 3 23 2007 3 22 52 PM ...

Page 53: ... termometro solo come specificato nel presente manuale altrimenti si può compromettere la protezione offerta dallo strumento Sostituire le pile non appena si visualizza il simbolo BAT per evitare letture errate che potrebbero causare scosse elettriche e lesioni XWAvvertenza La termocoppia fornita non deve entrare in contatto con liquidi o circuiti elettrici sotto tensione Simboli adoperati nel pre...

Page 54: ... di visualizzazione vengono aggiornate continuamente con le misure della temperatura e le informazioni di tempo relativo Lo strumento offre diverse opzioni relative al tipo e al formato dei dati presenti sul display Le letture di temperatura possono essere facilmente convertite da gradi Fahrenheit a gradi centigradi e viceversa La retroilluminazione rende luminoso il display a cristalli liquidi pe...

Page 55: ...ternanza di temperature T1 T2 sul visualizzatore secondario G Visualizzatore principale Mostra gli ingressi T1 T2 o T1 T2 temperatura differenziale TD o lo zero relativo di T1 T2 o TD H KJTRSE Permette di selezionare il riferimento in ingresso corretto per la termocoppia in uso T1 e T2 devono essere termocoppie dello stesso tipo I Visualizzatore secondario Indica le temperature T2 T1 o T1 e T2 J I...

Page 56: ... lo strumento acceso Quando al centro dello schermo appare il simbolo n si può rilasciare il pulsante On La funzione di spegnimento automatico rimane disattivata quando si spegne il termometro Cambio del tipo di termocoppia Premere contemporaneamente i pulsanti E e D per almeno 2 secondi finché non appare l indicatore K Premere il pulsante C per visualizzare uno alla volta i tipi di sonda K il tip...

Page 57: ...l display visualizza automaticamente l ultima modalità selezionata Inoltre per comodità il termometro richiama le impostazioni usate durante l ultima operazione C F HOLD REL REC T1 T2 TMD90A_all pdf 56 3 23 2007 3 22 52 PM ...

Page 58: ...cipale passa all ingresso T2 lo schermo secondario visualizza T1 Premendolo di nuovo brevemente sul visualizzatore principale appare T1 T2 quello secondario alterna tra T1 e T2 Premendolo una terza volta lo strumento ritorna all impostazione predefinita B Premendo brevemente il pulsante la retroilluminazione si accende per circa 30 secondi e poi si spegne C Premendo brevemente il pulsante il displ...

Page 59: ... un massimo di 16 000 letture campione con memoria dell orologio di tempo reale intervallo di campionamento programmabile da 1 secondo a 3 600 secondi limiti di allarme minimo e massimo definiti dall utente possibilità di analisi ulteriori mediante lo scaricamento di dati in un programma del computer memorizzazione di tutti i dati nel formato di testo txt per agevolarne l importazione in un altro ...

Page 60: ...n buon contatto con i morsetti I visualizzatori dei dati T1 e T2 presentano dei trattini Collegare la termocoppia mancante I visualizzatori dei dati T1 e o T2 presentano dei trattini benché le termocoppie siano collegate Misurare la resistenza delle termocoppie per accertarsi che non vi siano dei guasti interni Pulire le termocoppie e riprovare TMD90A_all pdf 59 3 23 2007 3 22 53 PM ...

Page 61: ...e che la termocoppia si stata inserita bene Appaiono dei trattini durante la revisione del valore massimo registrato La termocoppia non è stata riconosciuta Verificare che non vi sia un contatto intermittente o che la termocoppia non sia stata rimossa temporaneamente I dati continuano ad aggiornarsi anche dopo aver premuto il pulsante A Verificare la presenza dell icona HOLD sul display Premere il...

Page 62: ...rne allentato la vite 4 Sostituire la batteria 5 Rimontare lo sportello e serrare la vite Se si prevede di non usare il termometro per un mese o più rimuovere la pila Rimuoverla anche nel caso in cui lo strumento venga esposto a temperature estreme Adattatore di c a da 9 V Per la registrazione a lungo termine delle misure anziché alimentare lo strumento a batteria si può usare un adattatore di c a...

Page 63: ... vendita sul sito Internet www amprobe com Inoltre gli apparecchi possono essere spediti negli USA e in Canada ad un Amprobe Test Tools Service Center per l indirizzo si veda più in basso per la riparazione o la sostituzione Riparazioni e sostituzione al di fuori della garanzia USA e Canada Per le riparazioni al di fuori della garanzia negli Stati Uniti in Canada si potranno spedire gli apparecchi...

Page 64: ... GARANZIA È IL SOLO RICORSO A DISPOSIZIONE DELL ACQUIRENTE E SOSTITUISCE QUALSIASI ALTRA GARANZIA ESPRESSA IMPLICITA O PREVISTA DALLA LEGGE COMPRESA MA NON A TITOLO ESCLUSIVO QUALSIASI GARANZIA IMPLICITA DI COMMERCIABILITÀ O DI IDONEITÀ PER SCOPI PARTICOLARI IL PRODUTTORE NON SARÀ RESPONSABILE DI DANNI O PERDITE SPECIALI INDIRETTI O ACCIDENTALI DERIVANTI DA QUALSIASI CAUSA O TEORIA Poiché alcuni s...

Page 65: ...0 3 lettura 0 7 C da 32 a 1000 F 0 1 F da 1001 a 3200 F 1 0 F 0 1 lettura 1 4 F E da 200 a 380 C 0 1 C da 381 a 736 C 1 0 C 0 3 lettura 0 7 C da 328 a 720 F 0 1 F da 721 a 1832 F 1 0 F 0 1 lettura 1 4 F Dati tecnici aggiuntivi CONDIZIONI DI FUNZIONAMENTO Da 0 a 50 C 32 122 F a umidità relative fra 0 e 85 senza condensa Coefficiente ambientale Da 0 a 18 C e da 28 a 50 C temperature ambiente Per cia...

Page 66: ...TMD90A Dual Input Digital Thermometer User Manual Mode d emploi Bedienungshandbuch Manuale d Uso Manuel de uso Español TMD90A_all pdf 65 3 23 2007 3 22 53 PM ...

Page 67: ...TMD90A_all pdf 66 3 23 2007 3 22 53 PM ...

Page 68: ...ico modo de reposo 5 Cambio del tipo de termopar 5 Uso de los botones pulsadores 6 Salida RS 232 8 Localización y resolución de fallos 9 Reemplazo de la batería 11 Adaptador de 9 V CA 11 Reparación 12 Garantía limitada y Limitación de responsabilidad 13 Definiciones de los termopares 13 Especificaciones 14 Especificaciones adicionales 14 TMD90A_all pdf 67 3 23 2007 3 22 53 PM ...

Page 69: ... se especifica en este manual de lo contrario la protección provista por el termómetro podría verse afectada Reemplace la batería tan pronto como aparezca BAT para evitar lecturas falsas que podrían traer como consecuencia choques eléctricos y lesiones XWAdvertencia El termopar suministrado no está diseñado para tener contacto con líquidos ni circuitos eléctricos con presencia de tensión Símbolos ...

Page 70: ...tivo Las tres zonas de visualización se actualizan continuamente con las mediciones de temperatura y la información sobre tiempo relativo Existen diversas opciones referentes a cómo y cuál información se presenta en la pantalla LCD Las lecturas de temperatura se alternan fácilmente entre grados Fahrenheit y centígrados Una luz de fondo ilumina la pantalla LCD para permitir la visualización en área...

Page 71: ...alla principal y alternando las temperaturas T1 T2 en la pantalla secundaria G Pantalla principal de datos Muestra T1 T2 o T1 T2 diferencial de temperatura TD o un cero relativo de T1 T2 o TD H KJTRSE Selecciona la referencia de entrada correcta para el termopar en uso T1 y T2 deben ser del mismo tipo de termopar I Pantalla secundaria de datos Muestra T2 T1 o las temperaturas T1 y T2 J Entrada del...

Page 72: ...táneamente cuando se enciende el instrumento Cuando aparece n en el centro de la pantalla puede soltar el botón On Se desactiva la función de apagado automático al apagarse el medidor Cambio del tipo de termopar Pulse E y D simultáneamente durante 2 o más segundos hasta que aparezca K Pulse el botón C El tipo de sonda pasará cíclicamente a través de los tipos K el tipo predeterminado J T R S y E E...

Page 73: ...lla arranca de manera predeterminada en el último modo utilizado Para su conveniencia el medidor utiliza de manera predeterminada los ajustes empleados durante la última operación C F HOLD REL REC T1 T2 TMD90A_all pdf 72 3 23 2007 3 22 54 PM ...

Page 74: ...áneamenteunavezmásymostraráT1 T2 la pantallasecundaria alterna entre T1 y T2 pulse momentáneamente unavezmásyelinstrumentoretornaráa suvalorpredeterminado B Pulse este botón momentáneamente y la luz de fondo se iluminará durante aproximadamente 30 segundos para luego apagarse C Pulse este botón momentáneamente y la unidad alternará entre las temperaturas en Fahrenheit la opción predeterminada y en...

Page 75: ... software Registra hasta 16 000 lecturas de muestra con memoria del reloj en tiempo real Intervalo de muestras programable desde 1 seg hasta 3600 seg Configuraciones de alarma máxima y mínima definidos por el usuario Permite un posterior análisis mediante la descarga de los datos a un programa informático Todos los datos se guardan en formato txt para su fácil transformación en otro programa de so...

Page 76: ... batería sujeten de manera firme los bornes de la misma Aparecen guiones en las pantallas de datos T1 y T2 Inserte el termopar faltante Aparecen guiones en las pantallas de datos T1 y o T2 con los termopares insertados Mida la resistencia de los termopares para asegurarse de que no estén partidos internamente Limpie el termopar y reinicie el proceso TMD90A_all pdf 75 3 23 2007 3 22 54 PM ...

Page 77: ...icia cuando se pulsa el botón E Verifique que el termopar se haya insertado correctamente Aparecen guiones durante una revisión del valor máximo registrado El termopar no se reconoce Compruebe que no haya una desconexión intermitente o momentánea del termopar Los datos continúan actualizándose después de que usted pulsa el botón A Verifique que aparezca el icono HOLD en la pantalla Pulse el botón ...

Page 78: ...a batería 5 Instale nuevamente la puerta del compartimiento de la batería y apriete el tornillo Retire la batería si no tiene intención de utilizar el medidor durante un mes o más No deje la batería en un medidor que pueda ser expuesto a extremos de temperatura Adaptador de 9 V CA Para el registro de mediciones a largo plazo se puede usar un adaptador de 9 V CA en lugar de la batería Dicho adaptad...

Page 79: ...demás en los EstadosUnidos y Canadá las unidades para reparación y reemplazo cubiertas por la garantía también se pueden enviar a un Centro de Servicio de Amprobe Test Tools Reparaciones y reemplazos no cubiertos por la garantía Estados Unidos y Canadá Las unidades para reparaciones no cubiertas por la garantía en Estados Unidos y Canadá se deben enviar a un Centro de Servicio de Amprobe Test Tool...

Page 80: ...A CONSTITUYE SU ÚNICO RESARCIMIENTO TODAS LAS DEMÁS GARANTÍAS TANTO EXPRESAS IMPLÍCITAS O ESTATUTARIAS INCLUYENDO LAS GARANTÍAS IMPLÍCITAS DE ADECUACIÓN PARA UN PROPÓSITO DETERMINADO O COMERCIABILIDAD QUEDAN POR LA PRESENTE DESCONOCIDAS EL FABRICANTE NO DEBERÁ SER CONSIDERADO RESPONSABLE DE NINGÚN DAÑO O PÉRDIDA TANTO ESPECIALES INDIRECTOS CONTINGENTES O RESULTANTES QUE SURJAN DE CUALQUIER CAUSA O...

Page 81: ...0 3 lectura 0 7 C 32 a 1000 F 0 1 F 1001 a 3200 F 1 0 F 0 1 lectura 1 4 F E 200 a 380 C 0 1 C 381 a 736 C 1 0 C 0 3 lectura 0 7 C 328 a 720 F 0 1 F 721 a 1832 F 1 0 F 0 1 lectura 1 4 F Especificaciones adicionales CONDICIONES DE OPERACIÓN 0 a 50 C 32 a 122 F a valores de humedad relativa del 0 al 85 sin condensación Coeficiente ambiente 0 a 18 C y 28 a 50 C temperaturas ambiente Para cada C de tem...

Reviews: