USING THE OTOWAVE 302+
35
OTOWAVE 302+ INSTRUCTION FOR USE
4.9.5.
UNDERSTANDING THE ACOUSTIC REFLEX TEST RESULT
The navigation key
►
and
◄
are required to navigate in the reflex result screens.
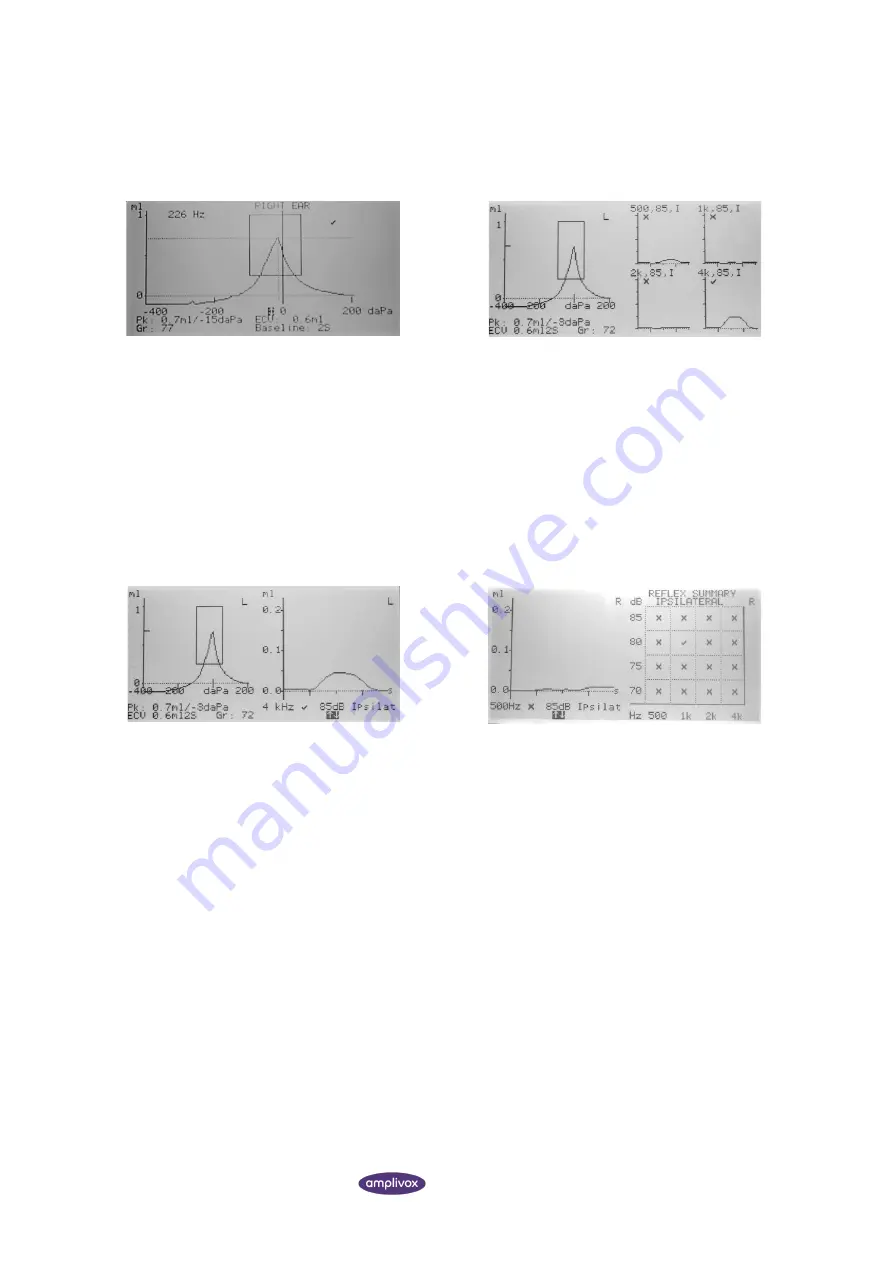
The acoustic reflex result screens will always start to
show the tympanogram first.
The combined view shows a smaller tympanogram and
the measured reflexes for either the threshold measured
or the loudest intensity presented, if no threshold could
be found.
Selecting the navigation key
►
will minimise the
tympanogram and also show the reflex (combined view).
Selecting the navigation key
◄
will show the full
tympanogram view again. Selecting the right navigation
key
►
will show the reflex measurements in more detail,
depending on the
REFLEX AUTOSTOP
function.
REFLEX AUTOSTOP ON
REFLEX AUTOSTOP OFF
If Reflex autostop has been selected the
tympanogram remains on the left hand side of the
screen with a larger scale trace of the reflex at the
lowest selected frequency with the lowest level that
gave a response.
Select the
▲ ▼
keys to scroll through the different
frequencies.
If Reflex autostop has not been selected the larger
scale trace of the reflex at the lowest frequency with
the lowest level that gave a response is shown on the
left hand side of the screen.
A summary of the levels and frequencies at which a
reflex tone was presented is shown on the right hand
side of the screen along with the result of the test (
“
✓
”
if a reflex was found, otherwise “
X
”). The dash symbol
“
-
” is shown if a reflex tone was not presented at the
level indicated.
Selecting the navigation key
◄
will show the four frequencies again. Selecting the navigation key
►
will show the
PROCESS RESULTS
screen, from where the measurement results can be processed.
If contralateral reflex measurements were taken pressing the
►
key will display similar results for these reflexes.


