


23
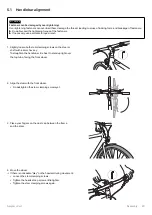
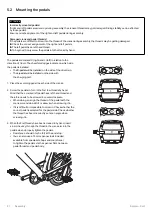
Before the first ride
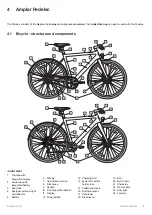
Ampler – Curt
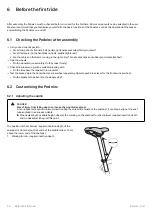
6 Before the first ride
After assembly, the Pedelec must be checked before it is used for the first time. Some components can be adapted to the user.
We also recommend that you familiarise yourself with the basic functions of the Pedelec, such as the operation of the brakes
and switching the Pedelec on and off.
6.1 Checking the Pedelec after assembly
J
Carry out a visual inspection:
y
Are all components (fenders, bell, pedals, optional accessories) firmly mounted?
y
Are all fasteners (on the handlebar, wheels, saddle) tightened?
y
Are the cables on the frame running in the right order? Are all cable clips and rubber grommets attached?
J
Spin the wheels.
y
Do the wheels move smoothly, do they coast freely?
J
Check tire pressure e.g. with a suitable bicycle pump.
y
Do the tires have the required tire pressure?
J
Test the brakes: Spin the front wheel and rear wheel separately. Operate each brake lever for the front and rear wheel.
y
Do the brakes bite well and do the wheels stop?
6.2 Customising the Pedelec
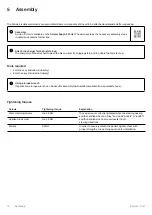
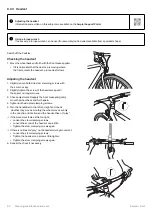
6.2.1 Adjusting the saddle
DANGER
Risk of injury from falling due to an incorrectly mounted seatpost.
A non-respected required minimum insertion depth can lead to a failure of the seatpost, it can break, slip out the seat
tube and lead to serious accidents.
When adjusting the saddle height, observe the marking on the seatpost for the minimum required insertion depth
and do
not
adjust it beyond this point.
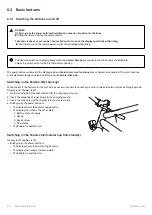
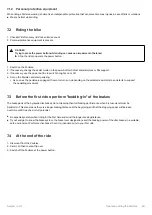
The position of the minimum required insertion depth of the
seatpost is 25 cm below the centre of the saddle rails or 10 cm
above the lower end of the seatpost.
1 Marking for min. required insertion depth


