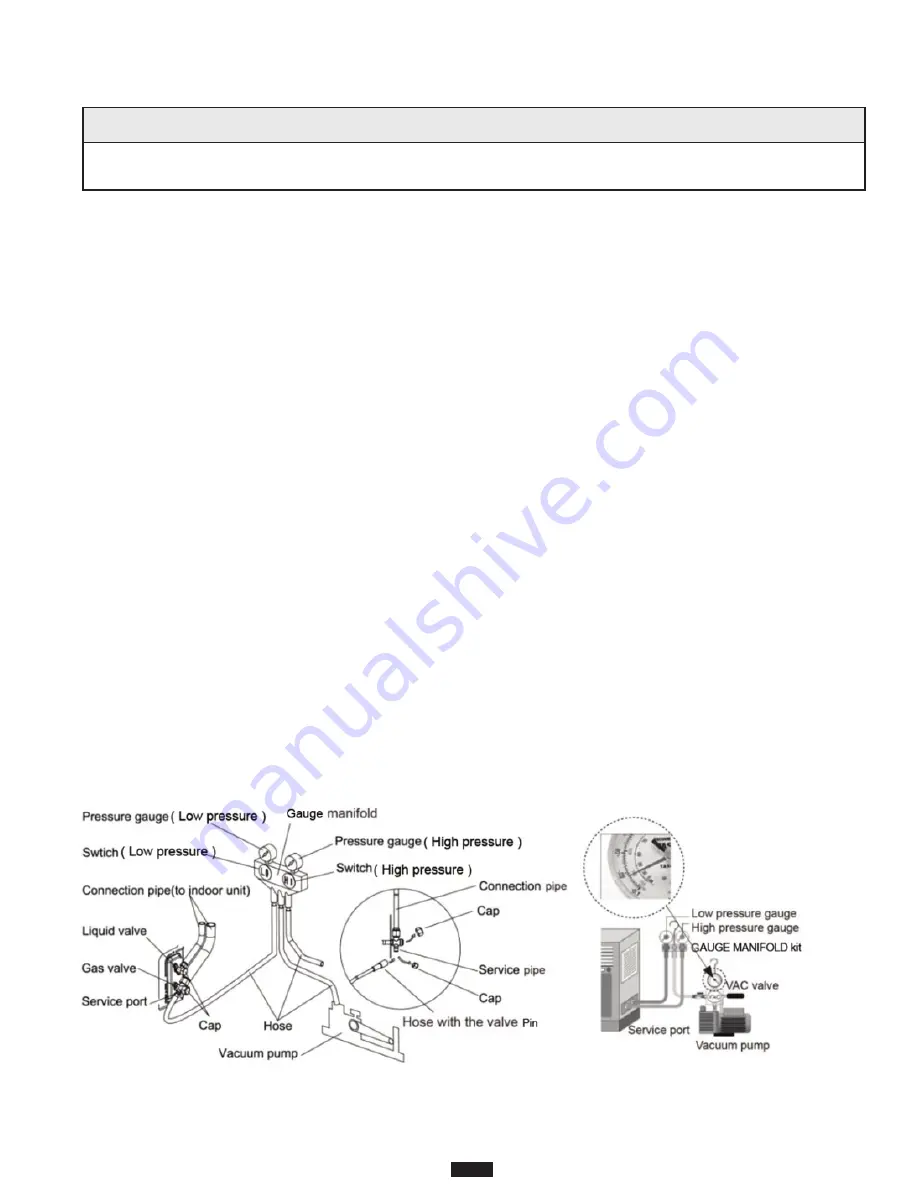
Vacuum
1. Remove the caps of the liquid valve, gas valve and service port.
2. Connect the hose at the low pressure side of the manifold valve assembly to the service port
of the unit's gas valve. The gas and liquid valves should be kept closed in case of refrigerant
leakage.
3. Connect the hose used for evacuation to the vacuum pump.
4. Evacuate until the micron gauge reads no higher than 350 microns, then close off the valve to
the vacuum pump. IMPORTANT: Do not open the service valves until the refrigerant lines and
the indoor coil leak check and evacuation are complete.
5. Observe the micron gauge. Evacuation is complete if the micron gauge does not rise above
500 microns in one (1) minute.
6. When evacuation is complete blank off the vacuum pump and micron gauge, and close the
valves on the manifold gauge set.
7. Open the liquid valve slightly and let some refrigerant go to the connection pipe to balance the
pressure inside and outside of the connection pipe, so that air will not come into the connection
pipe when removing the hose. Note that the gas and liquid valve can be opened fully only after
the manifold valve assembly is removed.
8. Put the caps back on the liquid valve, gas valve and service port.
Vacuum and Refrigerant Leakage Detection
NOTICE
Do not purge the air with refrigerant. Use a vacuum pump to vacuum the installation! There is no
extra refrigerant in the outdoor unit for air purging!
Leakage Detection
1. Check if there is leakage at all connection points with a leakage detector.
2. If a leakage detector is not available, please use soapy water. Apply the soapy water at the
suspected position and let sit for a few minutes. If bubbles appear, there is a leak that must be
repaired.
22
15 SEER Mini-Split
Summary of Contents for M4MHW15-A
Page 39: ......


