


SENSORRAIL IIIE
8200-0593-03, REV. A
SERVICE GUIDE
16 of 34
Parts Required
•
Serial communications cable (DB25 to DB9)
•
AD SensorRail Control software.
Application Installation
Run the
SETUP.EXE
located on the directory
INSTALLER\DISK.
Installation is performed in two steps:
1. LabView engine installation (automatic)
2.
ProgChariotV3.exe
installation.
The host computer does not need to be rebooted
at the end of the installation process.
Application Start-up
1. Connect the laptop communications cable to the
DB25 plug on the PowerRail communication
board.
Note:
To avoid moving jumpers in the
PowerRail module, an alternate method is to
use an RS-232 to RS-422 converter from the
control room where the RS-422 terminates.
However, only the rail being upgraded can be
connected to the converter. DO NOT connect
other domes or trolleys.
2. For RS-232 mode only, move jumpers ST4 and
ST5 to the PC position.
3. Launch the
ProgChariotV3.exe
application.
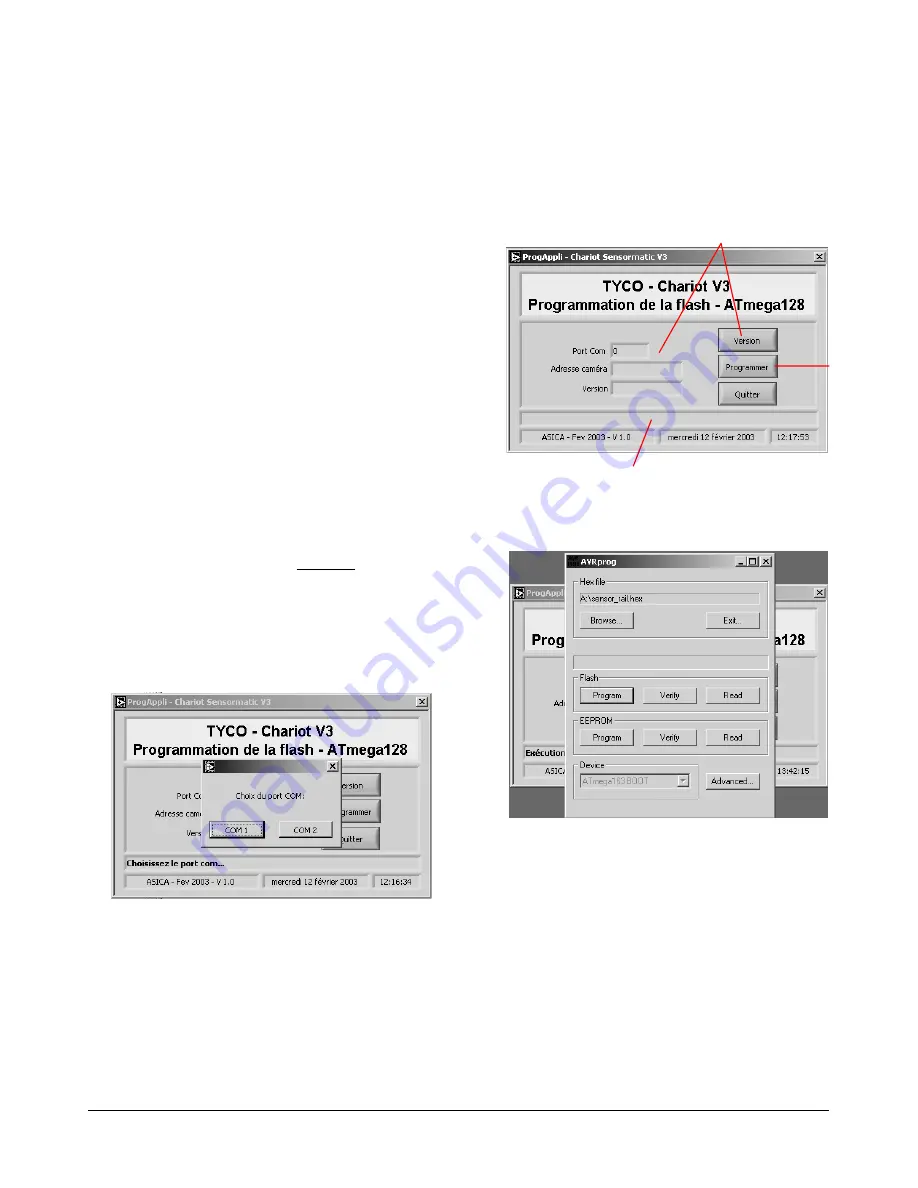
The following window appears:
4. Select the COM port to which the
communications cable is connected. Once
done, the COM port window will close. The
picture below shows application functions.
5. Select the PROGRAM button. The AVRprog
window appears:
6. The trolley’s CPU is now in boot mode, and the
two red LEDs should light.
7. Using the BROWSE button, select the firmware
(.HEX) file you want to flash into the ATMEGA.
Initiates
Flashing
Displays firmware version
present in flash memory and
the dome camera address
Communication Status Bar


