


40
Installation and Operation Guide
5.1 Microsoft Internet Explorer
5.1.1 Connecting the
IP camera
1.
Start up Microsoft Internet Explorer, and then follow the steps below to connect the IP camera.
2.
Click on the URL block at the top of the window.
3.
Enter the URL address of the IP camera into the URL block and press the “
Enter
”
button to
enter the home page.
4.
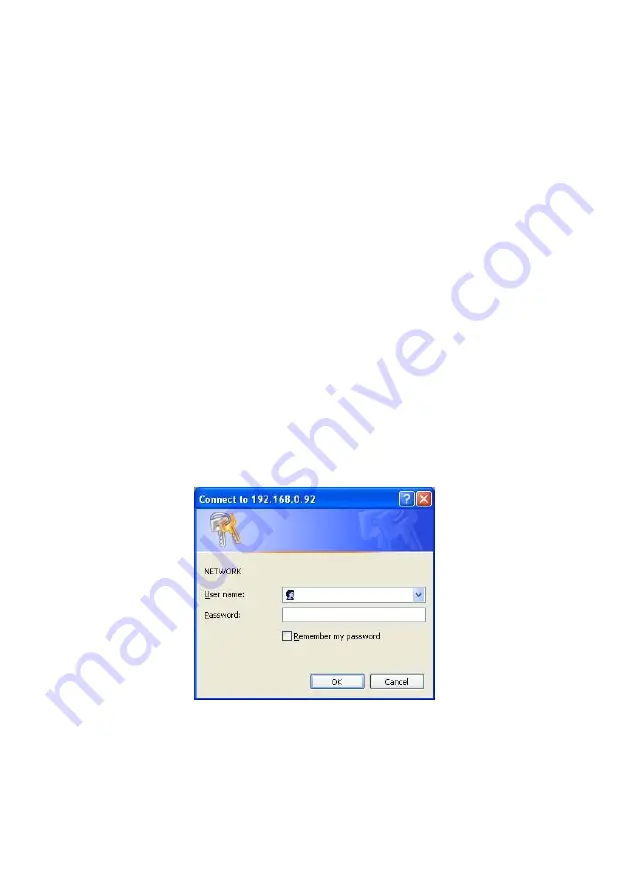
Enter the "User Name" and "Password" in the appropriate spaces.
5.
Click on the “
OK
” button to set your entries, and automatically exit the page.
NOTE:
The default "User Name" and "Password" are admin and 9999 respectively.
NOTE: The
page headlined "Enter Network Password” is shown below. Please enter the
user name and password of the IP camera when you see it. If either the user name or
the password is incorrect, please check the input data and rectify it as necessary.
NOTE: Once authorized successfully, it will not appear again until you close the window
and reconnect it.
NOTE:
The initial sequence of proceeding is to type in your IP address and click the "
Enter
" button
to access the home page. If and when you revise or change data in the "
SYSTEM USERS
"
page, the sequence will alter to initially show the "
Enter Network Password
" page.
Figure 5.2 Login
5.1.2 Live Video
The Live Video from the IP camera is displayed on the home page when your PC is online with the
IP camera. There are also additional settings provided on the home page. The ActiveX (default)
and AJAX the viewer types display different display formats on their home page.
The AJAX viewer type: Non-IE browsers support (for the JPEG mode only).


