


28. MIDI In -
This connector is to receive incoming MIDI data.
29. DMX Out -
This connector is used to send the DMX output data to a DMX dimmer
pack.
30. Music Input -
This connector is used to receive an external music source. This source
can then be used to trigger the chase patterns. Without an incoming
music source connect to this unit, the unit will automatically use the inter-
nal microphone to receive.
31. Remote Control -
This connector allows you to connect a remote foot control switch.
This foot switch give you control over two key functions, Full On and
Stand-By.
Full On will bring the out of all slider channels to full intensity.
Stand By will discontinue output to all 16 slider channels. This funtion
can be overrided by the Full On function.
32. Fog Machine Remote -
This connector allows you to connect an American DJ fog machine to
your controller, allow you quick and easy access to fog machine basic
operations. Compatible Fog machines are; Vaporizer,™ Stallion,™ Master
Blaster 700,™ and the Master Blaster 1000.™
33. Power Switch -
This switch control the units main power.
34. DC Power Input -
Plug in your DC 12v/500mA power supply to this jack to power your unit.
Controls & Functions Cont.
©
American DJ Supply
®
www.americandj.com Stage Desk-16™ Instruction Manual Page 11
©
American DJ Supply
®
www.americandj.com Stage Desk-16™ Instruction Manual Page 12
Operation
Programming
Quick Start:
Note this quick start setup will only give you full
fader output, however the master output level may still be adjusted.
Step 1:
Press the Program Button until it’s red indicator LED lights
up.
Please note: If the program LED indicator does not light
up, the controller is in Lock Mode. To unlock the controller
please see “Lock Function” in this manual, page 22.
Step 2:
Select a pattern bank (Program Buttons 1-16) you wish to
store your program to. Press the Pattern Button and its
LED will begin flashing slowly indicating program ode has
been activated.
Step 3:
Select the fader channels to be included in your new pro-
gram by tapping on the channels Flash Button. If you want
several channels included in a step, you must press all the
channels at the same time.
Step 4:
When you release the Flash Buttons all the channel LED’s
will flash briefly indicating that step has been programmed
into memory.
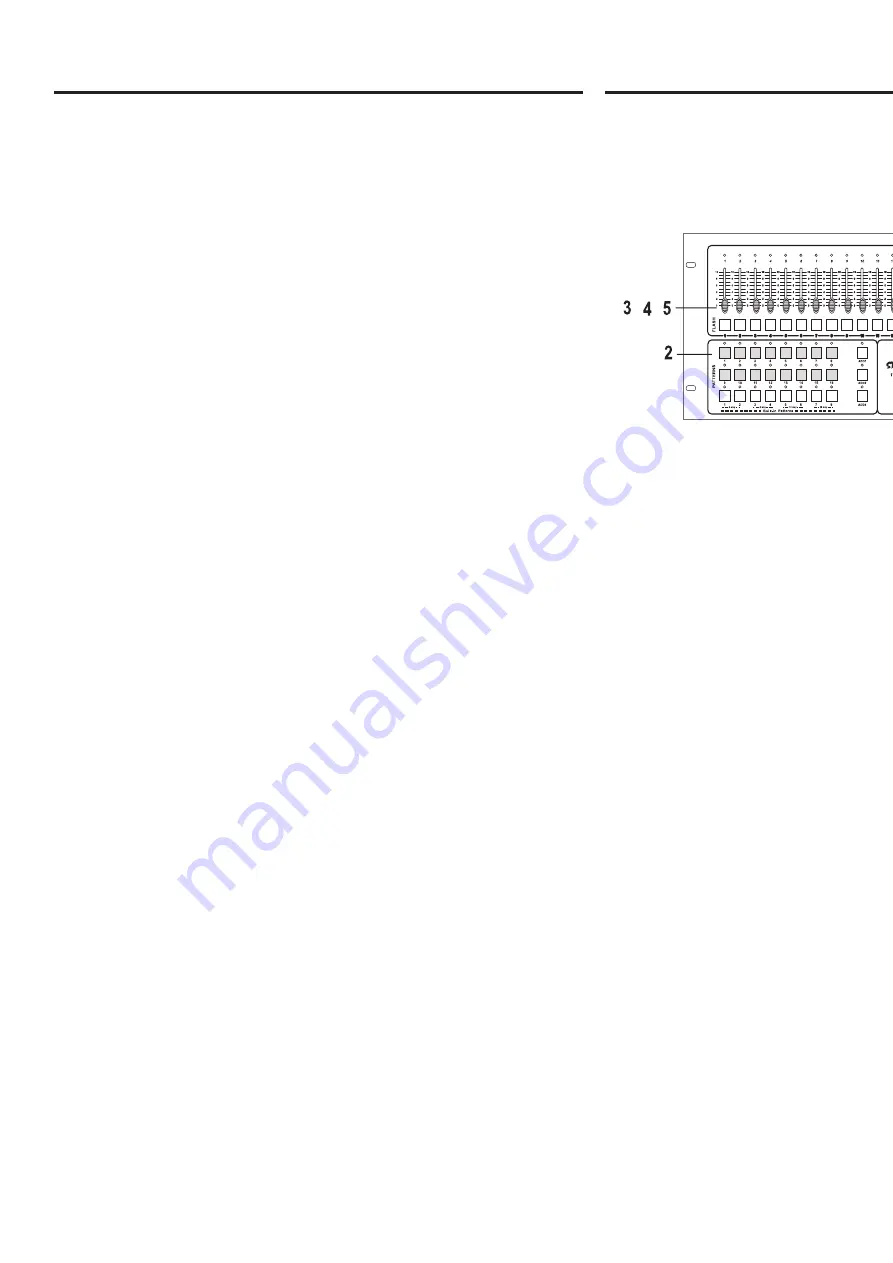
Step 1
Step 3
Step 2
All manuals and user guides at all-guides.com
all-guides.com


