background image

3

.4

Alert Setup

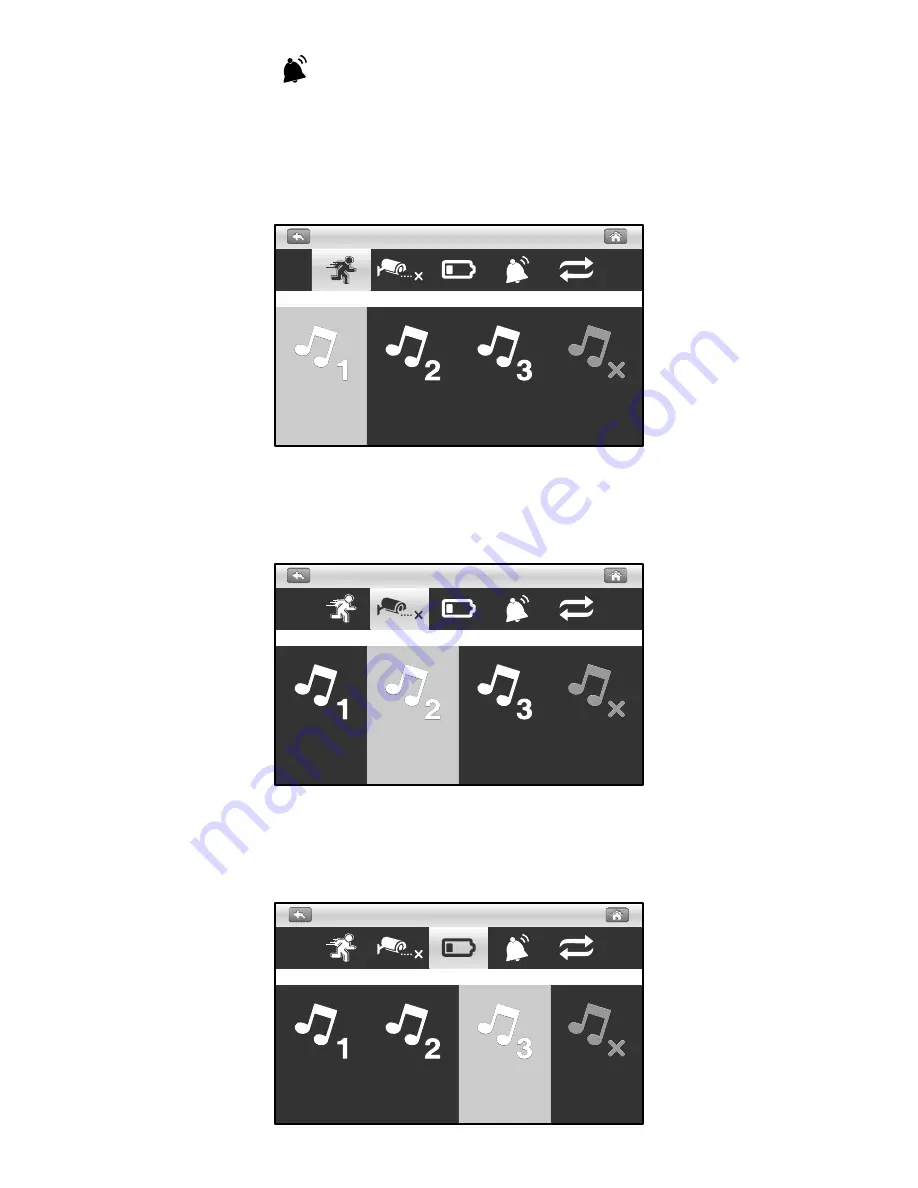
The alert menu contains 5 sub-menus.

Motion Alert:


This selection allows you to choose the alert tones or disable 
the alerts for motion detection.

3

.4.

1

Unlink Alert:


This selection allows you to choose the alert tones or disable 
the alerts when the cameras disconnected.

3

.4.

2

Battery Alert:


This selection allows you to choose the alert tones or disable 
the alerts when low on battery.

3

.4.

3

Motion Alert

Alert

Alert

Unlink Alert

Alert

Alert

Battery Low Alert

Alert

Alert

16

Summary of Contents for WLD895

Page 1: ...User s Manual HD Digital Wireless Network Surveillance Monitor Please read carefully before using this equipment...

Page 2: ...Lens 10 Light sensor Package Contents One camera One monitor Two power adapters 9V 800mA for Camera 5V 2A for Monitor Three screws and three anchors 6 7 8 10 9 Monitor 1 Antenna 2 Menu button 3 Alert...

Page 3: ...on the mounting surface Drill holes and insert the anchor included as needed Firmly attach the camera to the mounting surface using the included screws Loosen the allen screw 1 2 and the adjustment ri...

Page 4: ...ghten the allen screw and the adjustment ring to secure each camera s position 1 5 Connect the plug of the power adapter with the power in the socket of the cable from the camera Make sure power plug...

Page 5: ...he system supports MicroSD cards with a maximum capacity of 32GB Note The package doesn t include an MicroSD card 2 2 Plug one end of the provided power adapter into a wall outlet and the other end in...

Page 6: ...itched between Single view and Dual view If three or four cameras have been selected the live view screen can be switched between Single view and Quad view If you are in Dual view or Quad view tap on...

Page 7: ...stop recording 6 Battery Capacity Displays battery capacity 7 MicroSD Card Status This icon indicates that a MicroSD card has been inserted into the card slot A MicroSD is currently inserted A MicroSD...

Page 8: ...n Press again to return live view when it is in the menu The main menu contains 6 sub menus Note In menu if you don t tap the screen or press the Menu button after 1 minute the screen will return to l...

Page 9: ...rding Manual Recording Recording Time 5 min 10 min 15 min Storage Management Format MicroSD card Overwrite Non Overwrite Date and Time Power Saving 3 min 10 min OFF Default Setting Language Upgrade FW...

Page 10: ...ower LED of the camera will start to flash 3 After a short moment the LED will stop flashing and you will see an image from the camera on screen The camera is now paired 3 2 3 1 2 Camera Selection The...

Page 11: ...the camera to select the desired brightness level from 1 to 8 3 2 3 1 3 3 2 3 1 4 Anti flicker If you find that the camera s have a flicker effect cause by indoor lighting this indicates that the anti...

Page 12: ...d page displaying 12 00pm to 23 00pm Note Motion recording System only records when motion is detected by the camera and will stop recording after 30 seconds from when the last motion was detected 3 2...

Page 13: ...Format icon to format the MicroSD Card Formatting the card will remove all files that you have on there 2 Overwrite The function allows you to select if you would like to overwrite file when the card...

Page 14: ...m to factory default settings 3 2 3 3 3 Note Pairing settings will not be affected by the default setting function The camera will remain connected with the monitor 3 3 System Setup The system menu co...

Page 15: ...your system 3 3 5 Warning The firmware upgrade process must not be interrupted or the system may be damaged If the system firmware is the latest it will display the message as below Upgrade FW System...

Page 16: ...IP unless you have some experience with networking The default setting works fine 3 2 3 3 6 2 Information The display information includes the network settings UID number Also the default password is...

Page 17: ...motion detection 3 4 1 Unlink Alert This selection allows you to choose the alert tones or disable the alerts when the cameras disconnected 3 4 2 Battery Alert This selection allows you to choose the...

Page 18: ...r press the Menu button the alert tone will be stopped 3 4 5 3 5 Playback Recording files are managed based on date and time 1 Tap a date folder YYYY MM DD that you prefer to view 00000015 2013 12 01...

Page 19: ...to file list 2 Return to live view 3 Fast backward 4 Pause Play 5 Fast forward 6 Backward speed 7 Forward speed 2 Tap on the file to play the event 3 When playing the recording file tap the play butto...

Page 20: ...outer Note If your router is a Wi Fi router please make sure the distance between the monitor and the Wi Fi router is a distance of over one meter to provide better performance 4 1 2 Ethernet cable 1...

Page 21: ...of scanning the QR code The UID and QR code label is on the rear of the monitor 3 Hold your mobile device close to the QR code to scan When the code is successfully scanned the UID field will be popul...

Page 22: ...b Connection If the device status shows Connection you need to wait until the status changes to online and then tap the device photo to see the live video of the device 1 3 4 5 10 2 6 7 8 9 c Offline...

Page 23: ...ludes camera status video resolution online number and connection quality 2 Photo Tap the icon to see all of the photos you have taken 3 Snapshot Tap the icon to save a snapshot of the camera on your...

Page 24: ...ce List screen 2 Name Tap this if you want to change the device name 3 Password If you have changed the device password with another smartphone or tablet you need to tap the row to correct the passwor...

Page 25: ...viewing the live video stream 2 3 4 Advance Settings Within the settings screen you can change the default password alter the video quality and increase or decrease the interval time for alerts 4 2 5...

Page 26: ...time period to search for events A list of all video events matching your search criteria will be displayed Tap an event to play Note There is only video and no audio when you play an event file 4 2 6...

Page 27: ...monitor 2 Tap the Camera icon to enter Add Device screen The UID and QR code are located at the rear of the monitor You can manually input the UID or tap Scan to scan the QR code Please hold your smar...

Page 28: ...Online If the device status shows Online you can tap the device photo to see the live video of the device b Connection If the device status shows Connection you need to wait until the status changes t...

Page 29: ...mera information That includes camera status video resolution online number and connection quality 2 Photo Tap the icon to see all of the photos you have taken 3 Snapshot Tap the icon to save a snapsh...

Page 30: ...dvance Setting Tap this to enter advance setting 2 3 1 1 Modify Password If you want to change the password please tap this row to carry out the change Note If you have changed the password you can re...

Page 31: ...e basic network information about your device Searching Events Function Tap the Advanced function icon on Device List screen and then select View Event to switch the screen to View Event 4 3 6 2 1 Eve...

Page 32: ...shocks Operate this product using only with the power supply included or provided as an accessory Do not overload electrical outlets or extension cords this can result in fire or electric shocks Trou...

Reviews: