


40
o
The fourth column shows the Internal Port used by that service to establish communication
from the router to the camera. To edit this, click the pencil button in the modify column for
that line item.
o
The fifth column shows the External Port used by that service to establish communication
from the router to the internet. To edit this, click the pencil button in the modify column for
that line item.
o
The sixth column shows the status of the protocol. If the protocol was mapped successfully,
this field will say “Mapping Succeeded”.
o
The seventh column allows the user to open a dialog box and edit the service’s information.
To reset to default settings, click the Reset Defaults button. To refresh the page, click the Refresh button. To
save the settings, click the Save button.
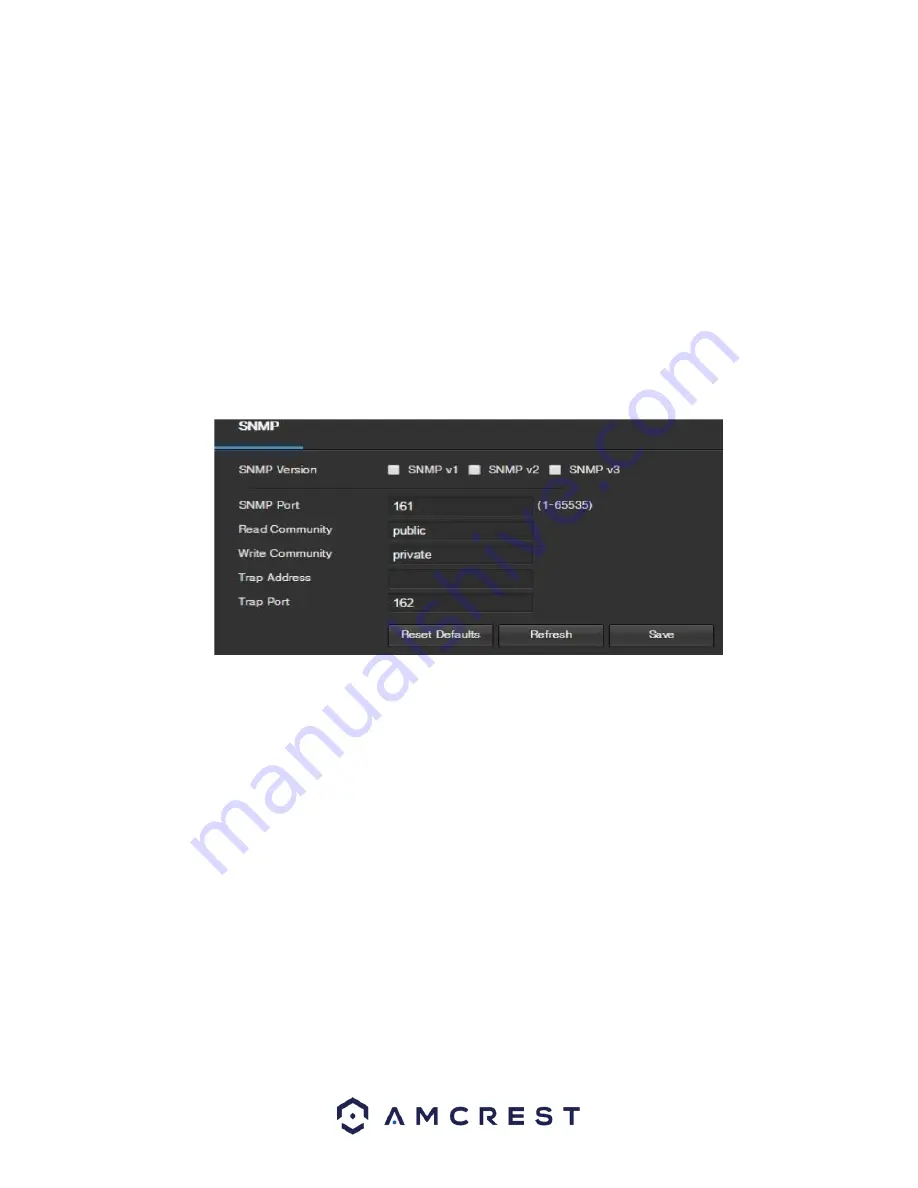
5.4.2.7. SNMP
SNMP stands for Simple Network Management Protocol. This protocol is used to provide a basic framework to
allow connection between various network devices. Below is a screenshot of the SNMP settings screen:
Below is an explanation of fields on the SNMP settings screen:
•
SNMP Version:
These checkboxes allow the user to select the SNMP version to use.
SNMP Port:
This field allows the user to write in a port for SNMP to use. The port can range from
anywhere from 1 to 65535.
•
Read Community:
This field shows which SNMP community has read access.
•
Write Community:
This field shows which SNMP community has write access.
•
Trap Address:
This field allows the user to write in a trap address.
•
Trap Port:
This field allows the user to write in a trap port number. The trap port number should not
be the same as the SNMP port.
To reset to default settings, click the Reset Defaults button. To refresh the page, click the Refresh button. To
save the settings, click the Save button.
5.4.2.8. Bonjour
Bonjour is Apple's implementation of Zero-configuration networking (Zeroconf), a group of technologies that
includes service discovery, address assignment, and hostname resolution. Below is a screenshot of the
Bonjour settings screen:


