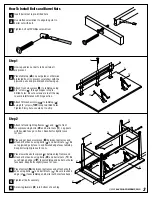
Step 3
Step 4
Lift back of tabletop into an elevated tilt position.
(See directions for adjusting tilt on the last page of
these instructions.)
Attach center drawer support (
H
) to front and
back crosspieces using 7/8" bolts (
5
) and nuts (
6
)
through pre-drilled holes. Notch in center support
should be closest to back.
Attach side drawer supports (
I
) to front and back
crosspieces using 1½" bolts (
7
) and nuts (
6
)
through pre-drilled holes.
Tighten all drawer support bolts securely.
1
2
3
4
4
1
2
Attach tilt mechanisms (
12
) to back crosspiece
using 3/4" screws (
10
) into pre-drilled holes.
Tighten firmly but use care not to strip.
Carefully return table to the upright position.
This may require two people.
HINT
Grasp entire assembly by the tabletop,
not the legs, so that the tilt mechanisms do
not open during this procedure.
12
10
6
7
7
6
I
I
H
6
5
©2009 ALVIN & COMPANY, INC.


