AC301
AC301
AC301
AC301----201
201
201
201
User’s Guide
400-0446-002
6
7. Operation
The AC301-201 requires no adjustments for operation. Once connected,
the AC301-201 will work trouble free without user intervention.
7.1 TCP/IP Setup
Note: This section uses the DeviceInstaller application to change the
AC301-201 configuration or the device.
DeviceInstaller
1.
Download the "DeviceInstaller" for the XPort device from the
ALTINEX website,
www.altinex.com
.
The "DeviceInstaller" is a software utility for the Ethernet to serial
controller. This software requires Windows .NET Framework to be
installed on the computer.
2.
Run "setup.exe" from the downloaded files to install the application.
3.
Connect the AC301-201 to the LAN using standard CAT-5 cable.
4.
The device must have power on in order to proceed. Make sure the
power LED is on and red.
5.
Launch the installer from the Start menu or from the directory noted
earlier. This will allow the configuration of the XPort device.
6.
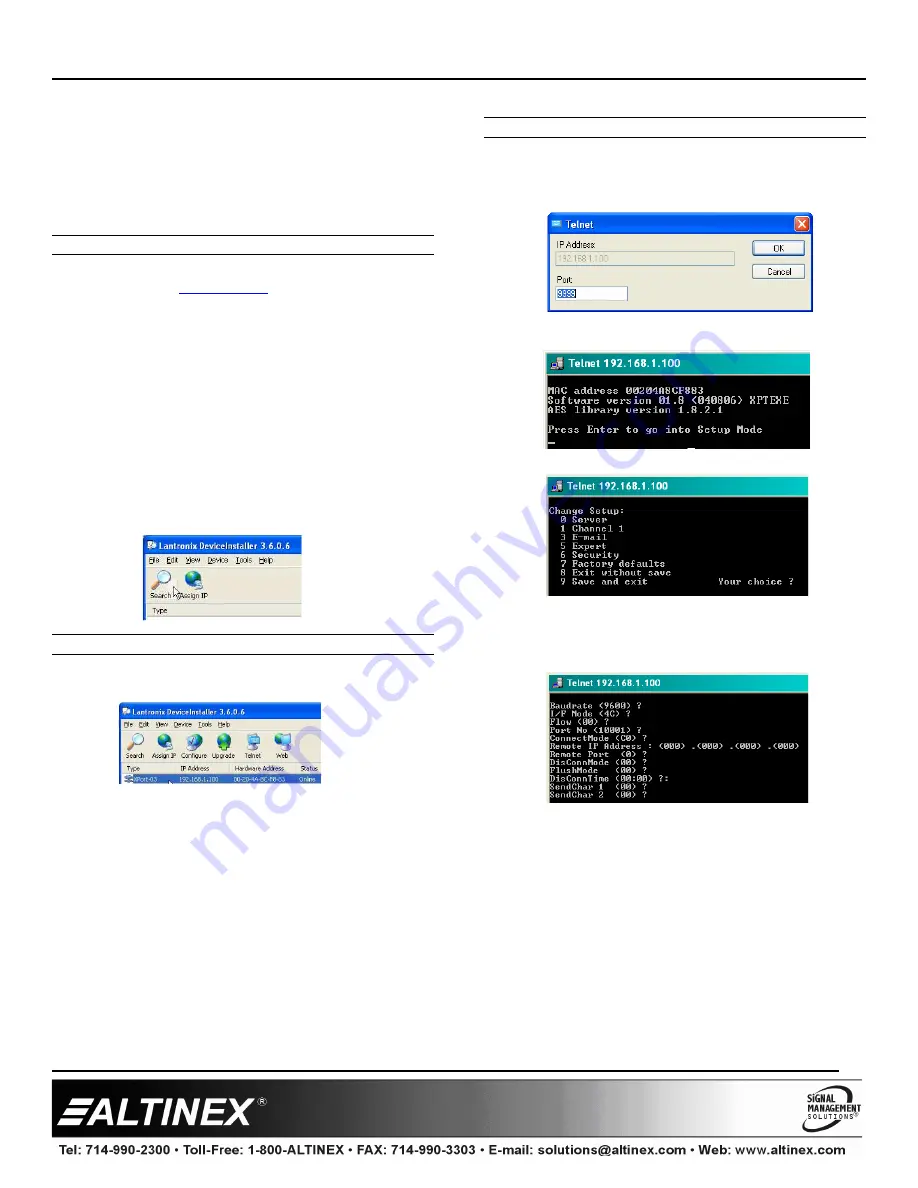
Click on the "Search" button to check for new devices on the LAN.
This will take a few seconds.
The IP Address
7.
Once the device is located, click on the device in the installer
window and make note of the IP address.
Note: If you want to assign the IP manually, click "Assign IP." This
method may require the assistance of your IT Administrator.
Configure the Device
8.
The device may be configured using a web browser or using a Telnet
session. This procedure uses the Telnet option. Click the "Telnet"
button and do not change the default port number of "9999." Click
"OK" to proceed.
9.
When the command window appears, press Enter when prompted to
enter Setup Mode.
10. At the "Change Setup" prompt, select "Factory Defaults."
11. Next, select "Channel 1 Configuration."
12. View each line item as it appears. Press Enter to leave the default
value, or enter the new value and press Enter.
NOTE:
The "Port No." in the configuration menu is the COM port used
for RS-232 communication.
13. Select "Save and Exit" to keep the changes and exit setup mode.
14. Close the DeviceInstaller; setup is complete. Use the port number
assigned above to communicate over the LAN.
15. Launch AVSnap or other communication software in order to
communicate with the MultiTasker.
16. Setup the TCP/IP connection using the Host and Port numbers
assigned during the above installation.


