background image

D000505-00 Rev. E 

43 

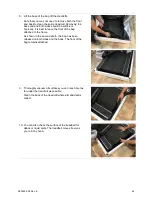
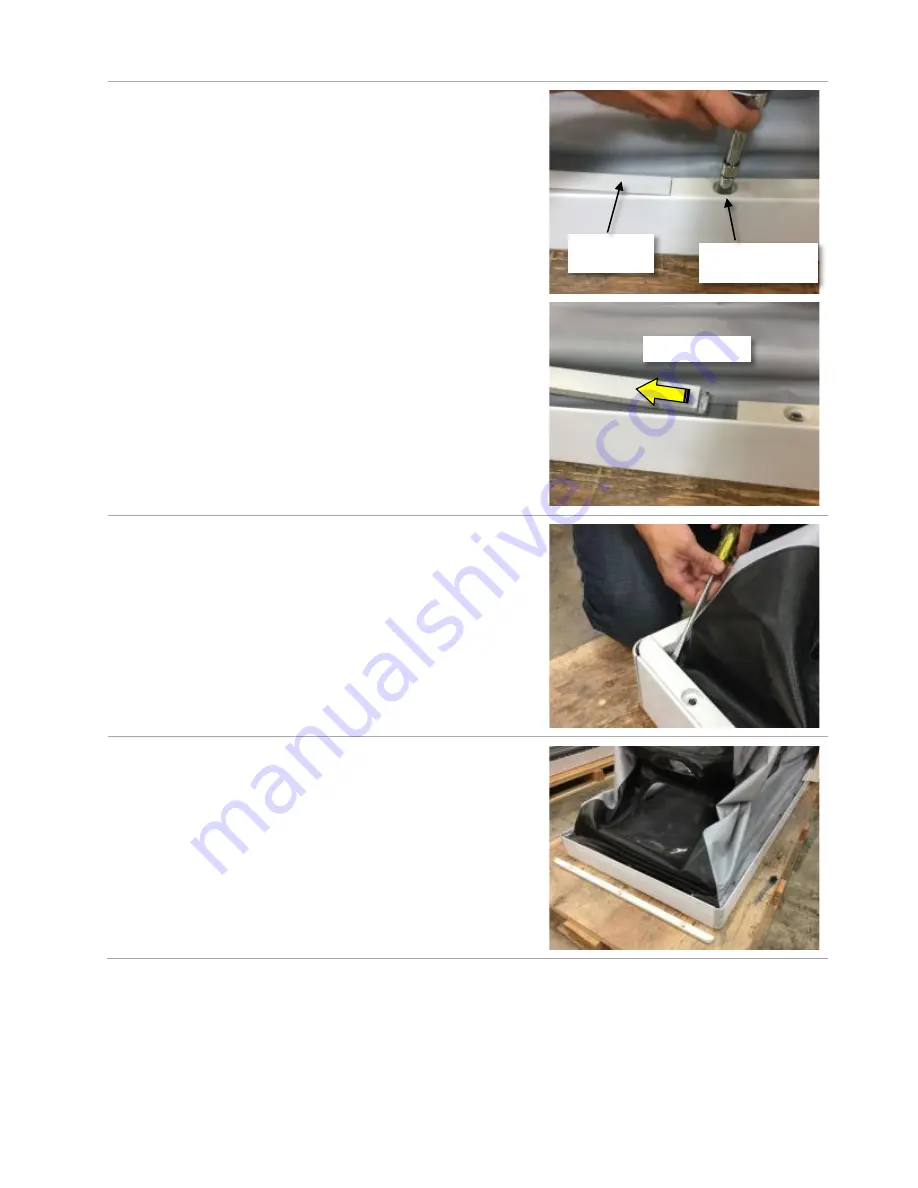
5.  The side bars have a slot on the front end, and the slot 

fits under the adjacent bar. Loosen the fastener on the 
adjacent bar, and then lift the side bar out.  


6.  If a bar is secured tightly, loosen it from underneath 

using a large screwdriver. Carefully slide the tip of the 
screwdriver under the bar. 


7.  Pull the bars completely off the frame and set aside 

with the fasteners. 


Side bar to 

be removed 

Loosen fastener 

on front bar first 

Lift the bar out 

Summary of Contents for Anti-Gravity Treadmill Fit Series

Page 1: ...User Manual Fit Series Anti Gravity Treadmill Product ...

Page 2: ...peration of the Anti Gravity Treadmill Read and understand these instructions and statements before operating the Anti Gravity Treadmill Warning Cautionary statement or operational procedure that may directly affect the safe operation of the treadmill Compliant product AlterG and Anti Gravity Treadmill are registered trademarks in the US by AlterG Inc Neoprene is a registered trademark of DuPont C...

Page 3: ...the Anti Gravity Treadmill 14 Securing the User in the Anti Gravity Treadmill 14 Starting and Completing a Workout Session 20 Stopping the Workout Session 24 Stepping Out of the Anti Gravity Treadmill 26 Heart Rate Monitoring 27 Heart Rate Monitor 27 Emergency Extraction Procedures 28 Emergency Scenarios 28 Facility Settings 29 Settings Menu Navigation 29 Adjusting Display Layout GUI Tab 29 Manage...

Page 4: ...D000505 00 Rev E 4 System Errors 48 Appendix D EMC Statement 49 ...

Page 5: ...ry it is recommended that a request for service be made to AlterG Inc The Anti Gravity Treadmill or any of its parts should only be repaired in accordance with instructions provided by AlterG Inc authorized representatives of AlterG Inc or by AlterG Inc trained personnel The Anti Gravity Treadmill must not be altered without the prior written approval of the AlterG Inc Quality Assurance Department...

Page 6: ...ation AlterG welcomes your inquiries and comments If you have any questions or comments please contact our service and support team AlterG Headquarters Service and Support 48368 Milmont Drive Fremont CA 94538 U S 1 510 270 5900 www alterg com ...

Page 7: ...tremity Rehabilitation after total joint replacement Precautions for Use Cardiovascular disease or respiratory compromise Exercise induced asthma or angina Acute and chronic back problems Ruptured or herniated disc Safety and effectiveness in pregnant women has not been established Safety and effectiveness for individuals with Functional Independence Measure score of 1 or 2 dependent of max assist...

Page 8: ...ravity Treadmill with liquid during cleaning use a sprayer or damp cloth Keep all liquids away from electric components Always unplug the Anti Gravity Treadmill before cleaning and maintenance Service should be performed by an authorized AlterG technician Service by non authorized AlterG technicians will void the warranty Contact AlterG before you or an electrician attempt any maintenance Do not p...

Page 9: ...e the user holds onto the cockpit or handrails whenever practical to support their body Make sure that the user is fully zipped into the bag before beginning the workout session and that the cockpit is adjusted at the correct height and locked in place Make sure the user wears proper athletic shoes such as those with rubber or high traction soles Do not allow shoes with heels or leather soles Make...

Page 10: ... The strong magnetic fields near a neodymium magnet can affect pacemakers ICDs and other implanted medical devices Many of these devices are made with a feature that deactivates it with a magnetic field Therefore care must be taken to avoid inadvertently deactivating such devices The Importance of Warming Up and Cooling Down It is important that users gradually warm up cool down and incorporate a ...

Page 11: ...t National Electrical Code as well as all local codes and ordinances If you are at all unsure of these requirements contact AlterG or a qualified electrician Location Requirements The Fit Anti Gravity Treadmill measures 84 213cm 38 97cm and weighs almost 550lbs 249kg It needs to be placed on a structurally sound surface If it is used above ground level it is advisable to place it near the corner o...

Page 12: ... the power outlet and leave at least 20 inches 0 5M clearance in the front of the unit for access to electronics and on off switch Transporting Your Anti Gravity Treadmill Contact AlterG if you plan on moving your Anti Gravity Treadmill Damage sustained by improperly moving the Anti Gravity Treadmill will not be covered by your warranty ...

Page 13: ...l Components Key components for operating the Anti Gravity Treadmill are labeled in the photos below Rubber mat Lockbar Power switch Magnets Bag opening Cockpit handrails Touchscreen Console and safety lanyard Bag handles each side of opening ...

Page 14: ...ek appropriate instruction from a qualified operator By tapping START SESSION you acknowledge that you have read and understand this manual Securing the User in the Anti Gravity Treadmill The procedures in this section describe Putting on the shorts Stepping into the Anti Gravity Treadmill Zipping into the bag Setting the cockpit height Attaching the safety lanyard Putting on the Shorts Your Anti ...

Page 15: ...ill ensure that the cockpit is at the lowest level Entering with the treadmill with the cockpit in a higher position may cause the cockpit to move with the potential for the user to lose balance Enter the treadmill from the back and step into the bag opening It is fine to step on the bag but make sure that no rocks or sharp objects are embedded in the soles of shoes that could mar or damage the ba...

Page 16: ...e cockpit can be set higher Note Make sure there is sufficient room above the handrails to allow your arms to swing comfortably during the workout session Note Inseam heights are posted on the side stanchions These can be used to mark the cockpit height for different users For more information see the description of the inseam height labels in Labels Locations Interpretation 3 With the cockpit at ...

Page 17: ...ock message disappears and the Welcome screen appears 4 Grasp the handle on each side of the bag and lift the bag straight up to the handrails 5 Pull up until both sides of the bag snap to the magnets on the underside of the handrails ...

Page 18: ...sitioned while the user is exercising stop the session You can then change the height of the cockpit Zipping into the Bag When the cockpit is in place zip into the Anti Gravity Treadmill The zipper is started at the front and center of the body and zipped counter clockwise all the way around until it returns to overlap in the front Make sure that the zipper is completely closed to complete the sea...

Page 19: ...directly over the circular indicator on the console labeled Emergency Stop otherwise the Anti Gravity Treadmill will not operate CAUTION Never attempt to defeat this critical safety feature by fastening the lanyard to the bag structure of the Anti Gravity Treadmill or anywhere else other than to the user s wrist Should the user fall while exercising the magnet is pulled off the console and power t...

Page 20: ...an accurate calibration it is critical that the user s full body weight be applied to the belt surface Holding onto any other part of the treadmill for example resting an arm on the top of the bag while the treadmill calibrates will result in an erroneous calibration and inaccurate body weight adjustment during exercise It is recommended that the user hold their arms out to their sides or crossed ...

Page 21: ...adjustment range allows the user to exercise at weights between 20 and 100 of their body weight For example if the user weighs 160lbs 73kg and body weight percentage is set to 20 the effective body weight is 32lbs 15kg 3 Speed mph Tap up arrow to increase tap down arrow to decrease For more information see Adjusting Anti Gravity Treadmill Speed and Direction 4 Tap to stop the session 5 Tap to paus...

Page 22: ...12 9 Jog 8 to 10 12 9 to 16 1 Run 10 to 13 16 1 to 21 Fast run 13 21 Advanced runner 1 to 3 1 6 to 4 8 Walk 4 6 4 Careful becomes difficult quickly To determine the maximum speed for your particular treadmill model see Appendix A Anti Gravity Treadmill Specifications Adjusting Body Weight To minimize any discomfort while exercising adjust the user s body weight It may not be necessary to reduce we...

Page 23: ...pain level is 10 worst possible 2 Tap the number on the scale that corresponds to the current pain level 3 To confirm the selected pain level tap SET PAIN LEVEL This places the selection in the display area to the right It confirms the time and shows the user s selected body weight percentage 4 To rate different pain levels during the workout session repeat these steps 5 Tap SESSION to return to t...

Page 24: ...t This puts the treadmill in freewheel mode and depressurizes the bag If the treadmill is stopped in this manner the user should continue to step in place to avoid becoming light headed Upon stopping the Session Complete screen appears The user s average running pace and average body weight for the entire workout session are displayed These averages will be low if the user performs a slow warmup F...

Page 25: ...e e mail option enter a report name and e mail address Tap SEND REPORT If you selected the USB option enter a report name Tap SAVE REPORT 4 When the Session Complete screen reappears tap EXIT SESSION and then tap OK 5 Continue to Stepping Out of the Anti Gravity Treadmill ...

Page 26: ...stop 2 Wait for the bag to completely deflate 3 The user can then Remove the safety wrist strap Unzip the shorts from the bag Disengage the cockpit locking mechanism by pulling the lockbar toward them Gently lower the cockpit Exit the treadmill Turn around step out of the bag opening and carefully step off the back of the treadmill ...

Page 27: ...it is disconnected from your body However as moisture may activate the transmitter and salt buildup from sweat can be a problem rinse the transmitter with water and wipe it dry after use The chest band is washable After you have detached the transmitter wash the band in warm water using mild soap and rinse thoroughly in clean water The Receiver You must be within two and a half feet of the receive...

Page 28: ...vity Treadmill Scenario 1 The patient falls or becomes fatigued to the point of inability to exit the treadmill before the air chamber is inflated with air Option 1 If the patient can stand stop the treadmill and secure the belt with your foot Help the patient exit the treadmill Option 2 Prevent the belt from moving by securing it with your foot Remove the bag rods at the treadmill base Option 3 P...

Page 29: ...ings Menu Navigation Your facility will have limited access to the Settings navigation bar to aid in troubleshooting and diagnostics You will be granted access to the GUI Support and Service and other highlighted tabs Inaccessible tabs and buttons will be grayed out Adjusting Display Layout GUI Tab AlterG has set the default layout in the factory to the first setting listed Alternative layouts can...

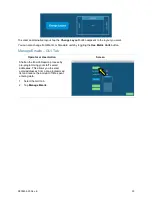
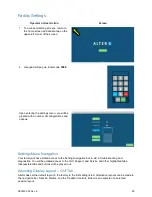
Page 30: ...Standard units by toggling the Use Metric Units button Manage Emails GUI Tab Operator or User Action Screen Shorten the End of Session process by pre programming your staff s email addresses This allows you to select email addresses from a pre programmed list and reduce the amount of time spent entering data 1 Select the GUI tab 2 Tap Manage Emails ...

Page 31: ...D000505 00 Rev E 31 Operator or User Action Screen 3 Enter the clinician s name and email address and tap ADD 4 You have the option of displaying the pre programmed list by name or by email ...

Page 32: ... through the procedure below Operator or User Action Screen 1 In Facility Settings under the Support Tab tap Tech Support Within 5 seconds you should see a TeamViewer window pop up After another 5 10 seconds the ID and password fields will auto populate 2 Read the ID and password back to your technician This will allow them to connect to your unit and control the screen Restart App Operator or Use...

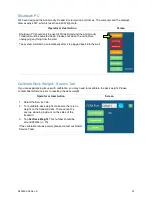
Page 33: ...ll start up automatically after it is plugged back into the wall Calibrate Deck Weight Service Tab If you are experiencing issues with calibration you may need to recalibrate the deck weight Please contact AlterG Service prior to resetting the deck weight Operator or User Action Screen 1 Select the Service Tab 2 To recalibrate deck weight make sure there is no weight on the treadmill deck There ca...

Page 34: ...ion of the Anti Gravity Treadmill Follow all instructions on the labels for a safe and enjoyable exercise experience Should any label become damaged and unreadable contact AlterG immediately to order a replacement The locations of the labels are indicated in the diagram below A graphical representation and detailed description of each label follow 4 7 8 9 6 6 5 10 1 14 2 3 ...

Page 35: ...bel is located on the front panel near the base of the Anti Gravity Treadmill Always unplug the treadmill before cleaning or servicing to reduce the risk of injury from moving parts or electrical shock Label 3 AlterG manufactures the system This label is located on the front panel near the base of the Anti Gravity Treadmill and identifies the serial and model number of the system as well as the po...

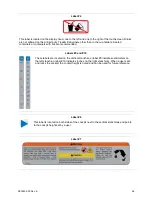
Page 36: ...ers with lids are recommended Labels 5 and 10 These labels are located on the vertical stanchions label 5 indicates centimeters on the left stanchion label 10 indicates inches on the right stanchion When a user sets and locks the cockpit the cockpit height is noted and can be used for future reference Label 6 This label is located on both sides of the cockpit next to the vertical stanchions and po...

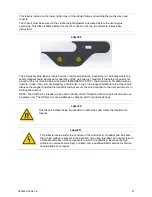
Page 37: ...ny sort of emergency should arise a tug on the lanyard attached to the magnet will displace the magnet and stop the treadmill Always secure the safety lanyard to the user s wrist prior to starting the workout NOTE The USB port is intended to be used to transfer End of Session data and customized work out programs only The USB port is not suitable as a charging port for portable devices Label 9 Thi...

Page 38: ...electrical shock protection Label 14 This label is located next to the product label on the front panel near the base of the Anti Gravity Treadmill It indicates that this product can expose you to chemicals which are known to the State of California to cause cancer or birth defects or other reproductive harm For more information visit www P65Warnings ca gov ...

Page 39: ...ction is of neoprene and urethane you can consult the manufacturer of your preferred cleaning agents regarding suitability and directions for use The shorts will tolerate exposure to a 10 bleach solution Follow CDC recommended procedures for decontamination when shorts become exposed to human waste or blood or when high risk patients or high risk microbial contamination is involved Disposal of the...

Page 40: ... plastic surfaces Also do not soak any surface with a liquid because the sensitive electronics can be damaged and introduce an electrical hazard Daily 1 Inspect and remove any loose debris from the interior of the bag 2 Check for abnormal operation Ensure that there are no unusual performance characteristics such as Unusual sounds such as hissing of air leaks from the treadmill air blower or bag U...

Page 41: ...ers or organic chemicals such as paint thinner acetone toluene xylene propyl or isopropyl alcohol or kerosene Suitable cleaning products are commercially available and pre packaged for use one example of such a product is Klear Screen or commercially available off the shelf retail brands such as Glass Plus Glass and Surface Cleaner made by Reckitt Benckiser Use of incorrect cleaners can result in ...

Page 42: ...he bag Bag Removal and Treadmill Cleaning 1 Power off and unplug the Anti Gravity Treadmill 2 You can suspend the bag for better access by securing the bag to the cockpit and then raising and locking the cockpit 3 Locate the bag retaining bars on the frame The bars on the sides and rear are shown You will remove these three bars It may be easiest to start with the rear bar 4 Using a socket wrench ...

Page 43: ...e adjacent bar and then lift the side bar out 6 If a bar is secured tightly loosen it from underneath using a large screwdriver Carefully slide the tip of the screwdriver under the bar 7 Pull the bars completely off the frame and set aside with the fasteners Side bar to be removed Loosen fastener on front bar first Lift the bar out ...
Page 44: ... the front of the bag attached to the frame As shown in the second photo the bag has been released on both sides and the back The front of the bag remains attached 9 Thoroughly vacuum all surfaces you can reach Get as far under the treadmill as possible Clean the back of the treadmill where dirt and debris collect 10 You can also check the surface of the treadbelt for debris or liquid spills The t...

Page 45: ...fs on the frame 2 Replace the bag retaining bars on the frame The side bars must be placed slot first under the adjacent front bar Tighten the front bar fastener 3 Replace and tighten all fasteners Make sure they are snug Do not over tighten Slide side bar slot under front bar Tighten fastener on front bar ...

Page 46: ...ing while running The running surface is 6 15cm off the ground Environmental Operating Conditions Ambient Temperature 55 F to 84 F 13 C to 29 C Relative Humidity 20 to 95 Transportation and Storage Conditions Temperature Range 0 F to 120 F 0 C to 49 C Relative Humidity 20 to 95 Electrical Ratings Power Requirements Recommended 220 VAC 20A 60 Hz Operational AC Voltage range 200 240 VAC 50 60 Hz At ...

Page 47: ...D000505 00 Rev E 47 Appendix B Options and Accessories Please visit the AlterG Store at http store alter g com or contact your AlterG Sales representative for pricing and ordering ...

Page 48: ...e check and make sure the safety magnet is on the console in the correct location Next check that the treadmill is plugged in 2 The treadmill belt will not move until you start the user interface If the treadmill belt is moving in another instance contact AlterG immediately If the treadmill belt will not move during operation test other functions such as incline If this works check the screen for ...

Page 49: ...o help facilitate the process for you in any circumstance Extended Warranty AlterG offers an Extended Warranty on a year by year basis for the Fit Anti Gravity Treadmill as follows If you purchase the Extended Warranty at the time of your purchase AlterG will provide one 1 free preventative maintenance check and service of the Fit by a qualified technician at the end of the first year of use An Ex...

Reviews: