Chapter 1: About the EthernetBlaster Communications Cable
1–11
Cable Setup
© June 2008
Altera Corporation
EthernetBlaster Communications Cable User Guide
Configuring the EthernetBlaster Hardware to Use Dynamic IP Addressing
To configure the EthernetBlaster communications cable to use dynamic IP addressing,
follow the directions below:
1
Depending on your connection mode, this section assumes that you have completed
the steps in
“Remote Connection via Network Using Default Factory Settings” on
page 1–4
, or
“Direct Connection to a Computer Using Default Factory Settings” on
page 1–7
.
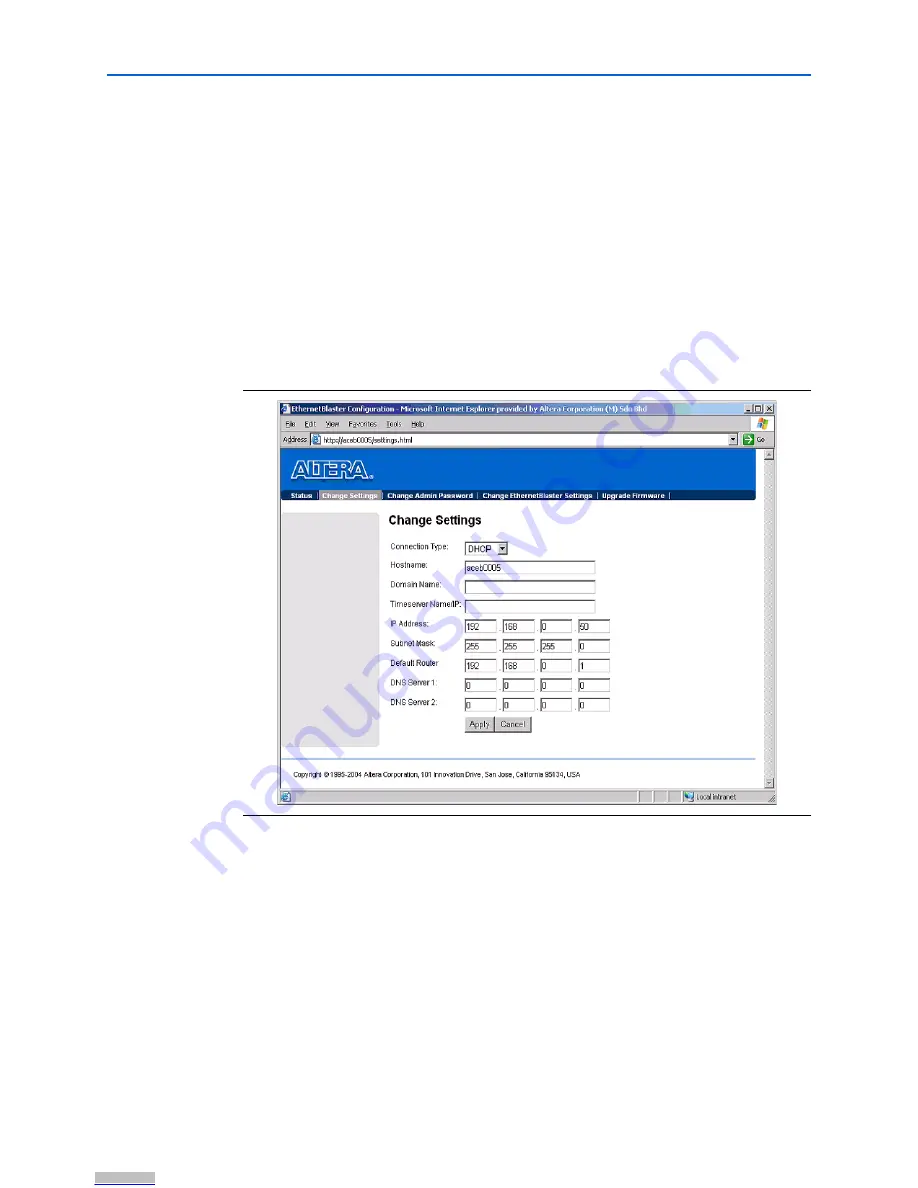
1. Open the
EthernetBlaster Status
page.
2. Click the
Change Settings
tab and select
DHCP
from the
Connection Type
menu.
See
Figure 1–9
below.
1
Contact your network administrator if you do not know the settings to
complete the
Change Settings
page.
3. Click
Apply
. The EthernetBlaster communications cable automatically restarts.
When the status LED returns to a steady green state, the EthernetBlaster
communications cable has successfully restarted and can now be added to the
Quartus II software. See
“Setting Up the EthernetBlaster Hardware in the
Quartus II Software” on page 1–12
.
Figure 1–9.
EthernetBlaster Change Settings Page
Downloaded from
Downloaded from
Downloaded from
Downloaded from
Downloaded from
Downloaded from
Downloaded from
Downloaded from
Downloaded from
Downloaded from
Downloaded from
Downloaded from
Downloaded from
Downloaded from
Downloaded from
Downloaded from
Downloaded from
Downloaded from
Downloaded from