background image

21

-EN

01GB05DVA9861Ri.fm

ALPINE DVA-9861Ri 68-04123Z62-A (EN)

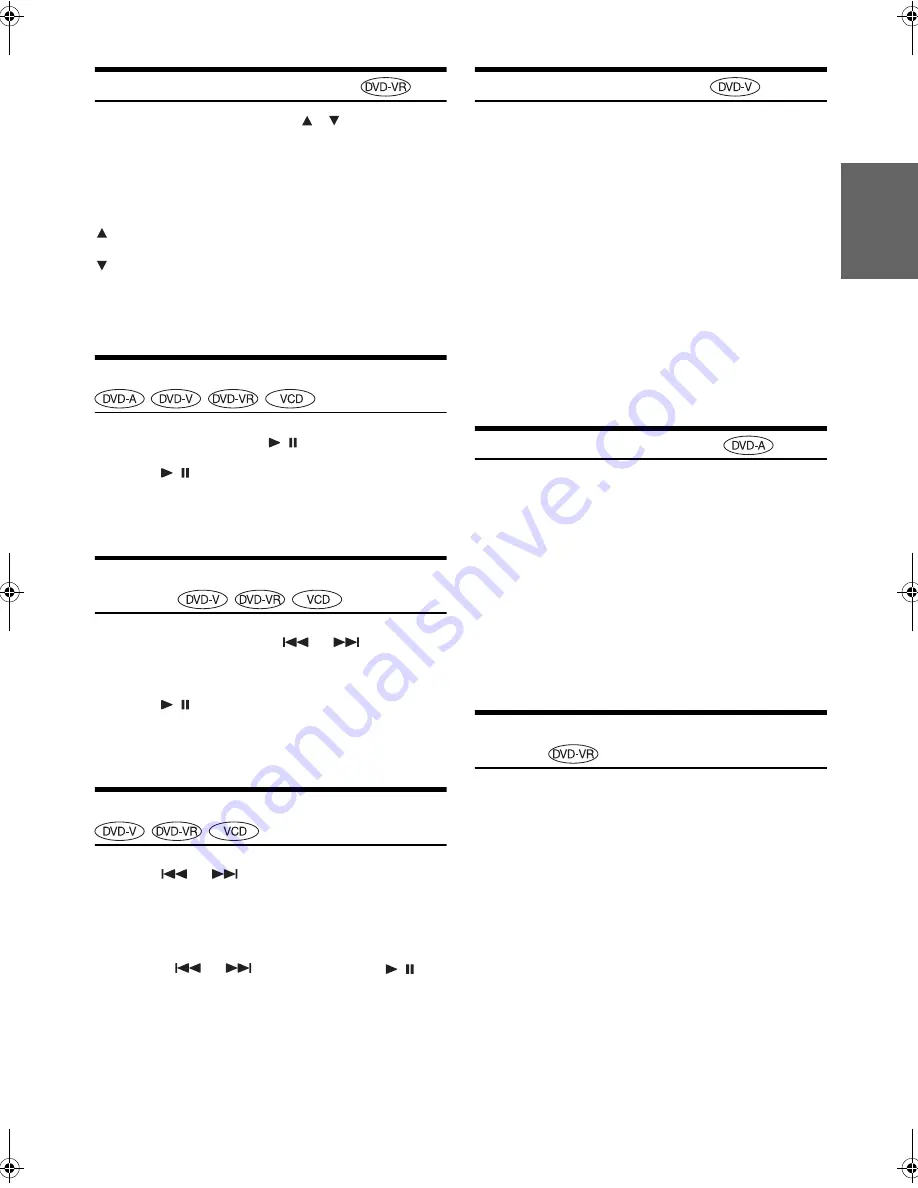
Selecting Programme/Playlist 

During playback or pause, press 

 , 

 on the unit or 

UP, DN on the remote control to select the previous or 
next programme/playlist.

The programme/playlist switches each time the button is 
pressed, and playback of the selected programme/playlist 
starts.

Only when a playlist is managed on the disc, playlist can be selected 
and operation can be performed.

Playing Still Frames (pausing) 

1

During playback, press 

/

.

2

Press 

/

 to resume playback.

No sound is played during the still mode.

The image or sound may stop temporarily when playback starts from 
the pause mode. This is not a malfunction.

Forward/reverse frame-by-frame 
Playback 

1

In the pause mode, press 

 or 

.

The picture advances or reverses by one frame each time 
the button is pressed.

2

Press 

/

 to resume normal playback.

No sound is output during forward/reverse frame-by-frame playback.

For DVD-VR and video CD, reverse frame-by-frame playback is not 
available.

Slow Motion Playback 

1

When 

 or 

 is pressed and held in while in 

the pause mode, the 1/8th speed slow motion 
playback mode is set. 

When held in for 5 more seconds, the slow motion speed 
switches to 1/2 the normal speed.

2

Release 

 or 

 to pause, and press 

/

 to 

playback.

No sound is played during slow motion playback.

Slow playback is not available when playing back a slide show.

1/2 and 1/8 are approximate speeds. The actual speed differs from 
disc to disc.

For DVD-VR and video CD, reverse slow motion playback is not 
available.

Searching by Title Number 

Use this function to easily find positions on the DVD using the DVD’s 
title.

 This operation is performed by the remote control unit.

1

When playback stops, input the number of the title 
you want to play using the 

numeric keypad

 (“0” to 

“9”).

2

Press 

ENT

.

Playback starts from the selected title number.

While in PRE-STOP, this function finds the beginning of the chapter 
by its number.

This function cannot be used on discs on which no title numbers are 
recorded.

Press 

CLR

 to delete the last digit in the title number. Press and hold 

CLR

 for at least 2 seconds to cancel the input mode.

The playback starts automatically for two digit title numbers even if 

ENT

. in procedure 2 is not pressed.

Searching by Group Number 

A group number on a DVD identifies various audio sections similar to 
chapters for video. Use this function to easily find positions on the DVD 
using its group number.

 This operation is performed by the remote control unit.

When playback stops, input the number of the group you 
want to play using the 

numeric keypad

 (“0” to “9”).

Playback starts from the selected group number.

While in PRE-STOP, this function finds the beginning of the track by 
its number. For operation, refer to “Searching Directly by Chapter or 
Track Number” (page 22).

This function cannot be used on discs on which no group numbers 
are recorded.

Searching by Programme or Playlist 
Number 

Use this function to easily find positions on the DVD using the DVD’s 
programmes/playlists.

 This operation is performed by the remote control unit.

1

When playback stops, input the number of the 
programme or playlist you want to play using the 

numeric keypad

 (“0” to “9”).

2

Press 

ENT

.

Playback starts from the selected programme or playlist 
number.

While in PRE-STOP, this function finds the beginning of the chapter 
by its number.

This function cannot be used on discs on which no programme or 
playlist numbers are recorded.

Press 

CLR

 to delete the last digit in the programme/playlist number. 

Press and hold 

CLR

 for at least 2 seconds to cancel the input mode.

Depending on the number of digits input, playback may start 
automatically even if ENT. is not pressed in step 2.

, UP:

Press this to start playback from the beginning of the 
following programme or playlist.

, DN:

Press this to start playback from the beginning of the 
previous programme or playlist.

01GB00DVA9861Ri.book  Page 21  Wednesday, December 7, 2005  12:00 PM

Summary of Contents for DVA-9861Ri

Page 1: ... Tokyo 141 0031 Japan Phone 03 5496 8231 ALPINE ELECTRONICS OF AMERICA INC 19145 Gramercy Place Torrance California 90501 U S A Phone 1 800 ALPINE 1 1 800 257 4631 ALPINE ELECTRONICS OF CANADA INC 777 Supertest Road Toronto Ontario M3J 2M9 Canada Phone 1 800 ALPINE 1 1 800 257 4631 ALPINE ELECTRONICS OF AUSTRALIA PTY LTD 161 165 Princes Highway Hallam Victoria 3803 Australia Phone 03 8787 1200 ALP...

Page 2: ...ceiving Traffic Information While Playing CD or Radio 13 Priority News 13 Displaying Radio Text 14 CD MP3 WMA Playback 14 Repeat Play 15 M I X Random Play 16 Searching from CD Text 16 File Folder Name Search concerning MP3 WMA 16 About MP3 WMA 17 DVD Video CD Playing a Disc 19 Searching by Programme 19 Searching by Playlist 19 Stopping Playback PRE STOP 20 Stopping Playback 20 Fast forwarding Fast...

Page 3: ...dio Setup Audio Setup Operation 33 Setting the Digital Output 33 Setting the Downmix Mode 34 Custom Setup Custom Setup Operation 35 Setting the DVD Audio Playback Mode 35 Setting the CD Play Mode 35 Setting the Video CD Play Mode 35 Playing the Bonus Group 35 External Audio Processor Optional Adjustment Procedure for Dolby Surround 36 Setting the Speakers 37 Set MX Mode of the External Audio Proce...

Page 4: ... 48 Changer Optional Controlling CD Changer Optional 49 Quick Search 49 Playing MP3 Files with the CD Changer Optional 49 Multi Changer Selection Optional 49 Remote Control Controls on Remote Control 50 When Using the Remote Control 51 Battery Replacement 51 Information About DVDs 52 Terminology 53 List of Language Codes 54 List of Country Codes 55 In Case of Difficulty 57 Specifications 61 Instal...

Page 5: ...e product HALT USE IMMEDIATELY IF A PROBLEM APPEARS Failure to do so may cause personal injury or damage to the product Return it to your authorized Alpine dealer or the nearest Alpine Service Centre for repairing DO NOT MIX NEW BATTERIES WITH OLD BATTERIES INSERT WITH THE CORRECT BATTERY POLARITY When inserting the batteries be sure to observe proper polarity and as instructed Rupture or chemical...

Page 6: ...oint pen or other such instrument then insert the disc again Irregular Shaped Discs Be sure to use round shape discs only for this unit and never use any special shape discs Use of special shape discs may cause damage to the mechanism Installation Location Make sure the DVA 9861Ri will not be installed in a location subjected to Direct sun and heat High humidity and water Excessive dust Excessive ...

Page 7: ... to extreme temperatures or sunlight e g left in the car or this unit discs recorded under unstable conditions discs on which a recording failed or a re recording was attempted copy protected CDs which do not conform to the audio CD industry standard Use discs with MP3 WMA files written in a format compliant with ISO9660 level 1 or level 2 For details see pages 17 and 18 To customers using CD R CD...

Page 8: ...DVD R DVD RW 5 55 C Disc terminology Title If titles are programmed for the DVD these are the largest units of division of the information recorded on the disc Chapter Each Title may also be divided into smaller divisions called chapters These can be specific scenes or musical selections This product incorporates copyright protection technology that is protected by U S patents and other intellectu...

Page 9: ...become hot in normal usage especially the connector terminals on the back of the front panel This is not a malfunction To protect the front panel place it in the supplied carrying case When detaching the front panel do not apply excessive force as it may result in malfunction Do not leave the front panel open or drive the car with the panel open as it may result in accident or malfunction Attachin...

Page 10: ...n also be manually set by pressing TITLE To synchronize the clock to another clock watch or radio time announcement press and hold MODE for at least 2 seconds after setting the hour Minutes will reset to 00 If the display shows over 30 minutes when you do this the time will advance one hour Listening to Radio 1 Press SOURCE POWER until a radio frequency appears in the display 2 Press BAND repeated...

Page 11: ...omatically seek and store 6 strong stations in the selected band They will be stored into buttons 1 to 6 in order of signal strength When the automatic memory has been completed the tuner goes to the station stored in preset location no 1 If no stations are stored the tuner will return to the original station you were listening to before the auto memory procedure began Tuning to Preset Stations 1 ...

Page 12: ...onger station in the AF Alternative Frequencies list 5 If the preset station and the stations in the AF list cannot be received When the PI SEEK setting is on refer to PI SEEK Setting on page 12 the unit searches again for a station in the PI Programme Identification list If there are still no stations receivable in the area the unit displays the frequency of the preset station and the preset no d...

Page 13: ...P RETURN OFF BASS ENGINE 2 Press or to select the AUTO CLOCK mode then press MODE 3 Turn the Rotary encoder to select ON or OFF 4 Press MENU to select RETURN After 2 seconds the unit returns to normal mode Pressing and holding MENU for at least 2 seconds will return to normal mode Receiving Traffic Information 1 Press TA so that the TA indicator lights up 2 Press or to select your desired traffic ...

Page 14: ...he unit automatically returns to the original source play before the traffic information broadcast began When traffic information stations cannot be received In the tuner mode When the TP signal can no longer be received for over 1 minute the TA indicator blinks In the CD mode When the TP signal can no longer be received the traffic information station of another frequency will be selected automat...

Page 15: ...ive a text message properly the display shows NO TEXT Playback 1 Press OPEN The front panel will open 2 Insert a disc with the label side facing up The disc will be pulled into the unit automatically Close the front panel manually When a disc is already inserted press SOURCE POWER to switch to the DISC mode The mode will change every time the button is pressed TUNER DISC IPOD 1 CHANGER 2 TUNER 1 O...

Page 16: ...LE to switch the display Please see Displaying the Text page 27 for information about display switching If the folder number or file number is three digits F or T becomes numbers of hundred rank Repeat Play Press 4 to play back repeatedly the track being played The track file will be played repeatedly Press 4 again and select RPT to deactivate repeat play CD mode 1 When a CD changer is connected I...

Page 17: ...e Folder Name Search concerning MP3 WMA You can display and search for the folder and file name while listening to the file currently being played back 1 During MP3 WMA playback press to activate the search mode 2 Turn the Rotary encoder to select Folder Name Search mode or File Name Search mode then press Folder Name Search mode 3 Turn the Rotary encoder within 10 seconds to select the desired fo...

Page 18: ...le sizes Method for creating MP3 WMA files Audio data is compressed by using MP3 WMA specified software For details on creating MP3 WMA files refer to the user s manual for that software MP3 WMA files that can be played back by this device have the file extension mp3 wma Files with no extension cannot be played back WMA ver 7 1 8 and 9 are supported Supported playback sampling rates and bit rates ...

Page 19: ...nto the specified audio compression format Tag Song information such as track titles artist names album names etc written into MP3 WMA files MP3 ID3 tag WMA WMA tag Root folder The root folder is found at the top of the file system The root folder contains all folders and files In this section both remote control and main unit operation are described DVD Video CD operations can be performed from b...

Page 20: ...menu screen using the number keys 0 to 9 If the DVD Audio disc is set to VCAP operation can be performed Refer to Setting the DVD Audio Playback Mode on page 35 Video CD menu Use the numeric keypad 0 to 9 to select the desired number then press ENT The menu screen does not appear when the PBC function is turned off In this case set VCD PLAY MODE to turn on the PBC function For details refer to Set...

Page 21: ...sed for more than 1 second the disc is forwarded reversed at 21 times the normal speed 2 Release or to return to normal playback Set VCAP Video Capable Audio Player or VOFF Video OFF in Custom Setup For details refer to Setting the DVD Audio Playback Mode page 35 No sound is played during fast forwarding fast reversing Fast forwarding fast reversing of only a track being played back can be made on...

Page 22: ...STOP this function finds the beginning of the chapter by its number This function cannot be used on discs on which no title numbers are recorded Press CLR to delete the last digit in the title number Press and hold CLR for at least 2 seconds to cancel the input mode The playback starts automatically for two digit title numbers even if ENT in procedure 2 is not pressed Searching by Group Number A g...

Page 23: ... pressed DVD Audio VCAP mode 1 DVD Audio VOFF mode 1 DVD Video DVD VR while playing back programme DVD VR while playing back Playlist VIDEO CD 1 Set VCAP or VOFF in Custom Setup For detail refer to Setting the DVD Audio Playback Mode page 35 2 Displayed only in the changer mode The track disc repeat modes cannot be used on video CDs with playback control PBC Set VCD PLAY MODE to turn the PBC funct...

Page 24: ...disc is set to VCAP operation can be performed Refer to Setting the DVD Audio Playback Mode on page 35 Switching the Subtitles subtitle language With multiple subtitle language DVDs the subtitle language can be switched during playback or subtitles can be hidden This operation is performed by the remote control unit During playback press SUBTITLE The subtitle switches between the languages recorde...

Page 25: ...form If the DVD Audio disc is set to VCAP operation can be performed Refer to Setting the DVD Audio Playback Mode on page 35 Repeat setting Default setting REPEAT OFF P L A Y REPEAT OFF SUBT JPN 1 2 ANGLE 1 3 1 18 1 2 3 4 5 AU O D I 1 1 9 k 2 b ML P 6 6 4 DVD A NTSC Playback disc Currenttrack number TV system NTSC or PAL Track playback time Current audio signal output Current angle number Current ...

Page 26: ...o the factory defaults Depending on the connected devices some functions and display indications do not work Setting the Bass Control You can change the Bass Frequency emphasis to create your own tonal preference 1 Press MENU to select the BASS ENGINE mode then press MODE BASS ENGINE SETUP RETURN OFF BASS ENGINE 2 Press or to select the BASS bass Centre frequency control mode BASS TREBLE 3 1 Press...

Page 27: ...RCE POWER to select the desired treble Centre frequency 10 0kHz 12 5kHz 15 0kHz 7 5kHz 10 0kHz Emphasizes the displayed Treble frequency ranges 3 2 Turn the Rotary encoder to select the desired treble level 7 7 You can emphasize the treble level 4 Press MENU to select RETURN After 2 seconds the unit returns to normal mode Pressing and holding MENU for at least 2 seconds will return to normal mode ...

Page 28: ...me artist name and album name All other tag data is ignored If there is no tag information ARTIST ALBUM SONG will be displayed If SCROLL AUTO is set in Scroll Setting TEXT SCROLL page 29 tag information will automatically be scrolled 5 The recording sampling rate and bit rate of the MP3 WMA file are displayed A WMA file of variable bit rate displays the average bit rate You cannot display title or...

Page 29: ... a CD MP3 WMA audio or if a DVD disc is stopped If several files are stored in a disc only the first file will be stored on the unit Insert a CD R CD RW disc containing data After sensing the disc the data file is updated Up to 2 files can be stored on this unit If a third file is downloaded the first file is overwritten and new one memorized To change the wallpaper press and hold ENT on the remot...

Page 30: ... playback of CD data only When a disc contains both CD or the MP3 data playback starts from the CD data portion of the disc Change discs after performing this setting Turning Mute Mode On Off INT MUTE If a device having the interrupt feature is connected audio will be automatically muted whenever the interrupt signal is received from the device Setting the AUX Mode V Link You can input TV video so...

Page 31: ...ge 35 3 Press or to change the setting then press ENT 4 When the setting is complete press SETUP The setup returns to normal mode POWER IC ON Initial setting POWER IC OFF POWER IC OFF Use this mode when the front and rear pre amplifier of the unit are used to drive an external amplifier connected to the speakers In this setting the head unit s internal amplifier has no output to drive speakers POW...

Page 32: ...ous screen Setting the Country Code Set the country code of which you want to set the rating level Parental lock Setting item PARENTAL Further setting item COUNTRY CODE Setting contents CODE 1 Press or to select PARENTAL then press ENT The password input mode is activated 2 Use the numeric keypad 0 to 9 to input the 4 digit password then press ENT PASSWORD Input numbers are displayed as The defaul...

Page 33: ... is pressed Press CLR for at least 2 seconds to delete all digits Press RETURN to return to the previous screen If the password is wrong the unit returns to the password input display after displaying PASSWORD ERROR for 3 seconds 3 Press or to select PARENTAL LEVEL then press ENT 4 Press or to select the restriction level 1 to 8 then press ENT Select OFF to cancel the parental lock or if you do no...

Page 34: ... press ENT Setting contents BITSTREAM LPCM Press or to select BITSTREAM or LPCM then press ENT Press RETURN to return to the previous screen Audio Setup The following 5 steps are common to each of the Audio Setup settings Refer to the specific section for details AUDIO SETUP items DIGITAL OUT DOWNMIX MODE RETURN SETUP ENT L A N G U A G E S C U S T O M S E T U P S E T U P A U D I O T V S C R E E N ...

Page 35: ...TREAM Bit stream Max 7 1ch OK DTS ES CD DA DVD V DVD A 44 1kHz 16 20 24bit LPCM 44 1kHz 16bit Decoded 2ch 2chDownmix OK BITSTREAM Bit stream Max 6 1ch OK 48 96kHz 16 20 24bit LPCM 48kHz 16bit Decoded 2ch 2chDownmix OK BITSTREAM Bit stream Max 6 1ch OK MPEG1Layer II VCD DVD V DVD A DVD VR 44 1kHz 16bit LPCM 44 1kHz 16bit Decoded 2ch OK BITSTREAM Bit stream OK 48kHz 16bit LPCM 48kHz 16bit Decoded 2c...

Page 36: ...ents PBC ON PBC OFF Playing the Bonus Group In addition to the usual group DVD Audio also includes an addition Bonus Group When the Bonus Group is selected although the password input screen is displayed you can pre input a 4 digit password Setting item BONUS CODE Setting contents CODE 1 Press or to select BONUS CODE then press ENT 2 Use the numeric keypad 0 to 9 to input 4 digit password then pre...

Page 37: ...ment Procedure for Dolby Surround Make the adjustments described below in order to reproduce Dolby Digital and DTS sound with greater accuracy Adjustment procedure In case of combining the Automatic adjustments etc We recommend to make the Automatic adjustments before the Dolby Surround adjustments External Audio Processor Optional BAND Rotary encoder MODE Preset buttons 1 through 6 TA 1 2 3 4 5 6...

Page 38: ...uces a well balanced sound close to the original MX FM OFF FM MX 1 to 3 The medium to high frequencies become more clear and produces well balanced sound in all the bands MX DVD OFF MOVIE MX 1 to 2 The dialog portion of the video is reproduced more clearly MX AUX 1 to 3 OFF CMPM MX MOVIE MX MUSIC MX Choose the MX mode CMPM MOVIE or MUSIC that corresponds to the media connected 5 When the setting i...

Page 39: ... the various speakers 2 Calculate the difference in distance between the farthest speaker and the other speakers 3 Divide the distances calculated for the different speakers by the speed of sound 343 m s temperature 20 C This value is the time correction value for the various speakers Concrete examples Calculating the time correction value for the front left speaker on the diagram below In other w...

Page 40: ...ed 3 Select the G EQ mode by pressing TA repeatedly 4 Select L R or L R by pressing and holding BAND for at least 2 seconds When parametric EQ is adjusted this setting will be turned off 5 Select the desired channel by pressing or then press MODE When L R is selected FRONT REAR CENTER SUBWOOFER FRONT When L R is selected FRONT L FRONT R REAR L REAR R CENTER SUBWOOFER FRONT L The speakers display d...

Page 41: ...ther channels repeat steps 5 to 10 12 When the setting is complete press and hold TA for at least 2 seconds The unit returns to the normal mode When the speaker is set to the OFF mode the parametric equalizer for that speaker cannot be set Refer to Setting the Speakers page 37 It is not possible to adjust the frequencies of adjacent bands within 7 steps Check the playable frequency ranges of the c...

Page 42: ...encoder Subwoofer is set to ON OFF only 6 Repeat steps 4 and 5 to set each speaker 7 When the setting is complete press and hold TA for at least 2 seconds The unit returns to the normal mode If the centre speaker is turned OFF the centre channel s audio signals are added to the audio signals output from the front speakers If you set the speaker response to OFF also set the speaker setting to OFF p...

Page 43: ...tting is set to OFF For linear PCM signals the voice is output from the rear speaker regardless of the REAR FILL and REAR MIX setting When the setting is complete it is recommended to store the setting contents For storing refer to page 44 In most installations the centre speaker must be placed directly between the front passenger and driver Using this function the centre channel information is di...

Page 44: ...ng refer to page 44 Using the Pro Logic II Mode Pro Logic processing can be conducted on the music signals recorded on two channels to achieve Dolby Pro Logic II surround sound For two channel Dolby Digital and DTS signals there is also a REAR FILL function for outputting the signals of the front channel to the rear channel 1 Check that Defeat mode is off page 25 2 Press and hold TA for at least 2...

Page 45: ...F in Setting the Speakers page 37 Storing Settings in the Memory Up to 6 set and adjusted contents can be stored on the unit All that are setting and adjusting items described below are stored in one preset memory Depending on the input signal sound effect may not be obtained 1 Adjust and set the value to be stored 2 Press and hold for at least 2 seconds any one of the preset buttons 1 through 6 i...

Page 46: ...B Changes the adjusting item C Changes the adjusting item D BAND more than 2 seconds Switches L R or L R BAND more than 2 seconds E Adjusts the selected setting item and changes the set contents Rotary encoder Turn F Adjusts the selected setting item and changes the set contents Rotary encoder Turn G ENT Changes the setting item in the selected setting item MODE H Numeric Keypad 1 to 6 Stores Reca...

Page 47: ...YLIST search mode then press PLAYLIST ARTIST ALBUM SONG PLAYLIST 3 1 Turn the Rotary encoder to select the desired Playlist 4 Press The selected Playlist is played back To search for a song in the selected playlist 1 After selecting the playlist in step 3 1 press to change to the song search mode of the selected playlist 2 Turn the Rotary encoder to select a song and press MODE The selected song i...

Page 48: ...rn to the previous mode If you choose ALL in step 3 3 and you press all songs in the iPod will be played back If you choose ALL and you press the SONG search mode for all albums is activated Album name search cannot be made during M I X play In the search mode you can jump to an assigned position by pressing any one of buttons 1 through 6 for quick search purposes For details refer to Direct Searc...

Page 49: ...selecting Shuffle M I X the songs will not play back randomly even when Shuffle album is selected Shuffle All Shuffle ALL plays all songs in the iPod randomly Any one song does not play back again until all songs have been played back 1 Press 6 The songs will be played back in random sequence 2 To cancel M I X play select off with the above procedure If Shuffle All is selected the selected songs w...

Page 50: ...the CD Changer Optional If you connect a changer compatible with MP3 you can play CD ROMs CD Rs and CD RWs containing MP3 files on this unit 1 Press SOURCE POWER to switch to the MP3 Changer mode 2 Press any one of the disc select buttons 1 through 6 corresponding to one of the discs loaded in the CD Changer 3 To pause playback press Pressing again will resume playback The unit can play discs cont...

Page 51: ...he beginning of the current track Press and hold to fast reverse MP3 WMA iPod mode Press the button to go back to the beginning of the current file Press and hold to fast reverse DVD Video CD Move to the desired position on the disc During playback press and hold for more than 1 second to reverse the disc at double speed Hold for more than 5 seconds to reverse the disc at 8 times the normal speed ...

Page 52: ...r mode Switches the disc mode Radio mode Selects in ascending order stations programmed into the radio s presets MP3 WMA mode Folder Select UP Button to select the folder DVD mode Selects programme or playlist in ascending order DVD VR only Changer mode DISC Select UP Button selects a disc in ascending order MP3 compatible CD changer mode Pressing and holding the DISC Select UP button will select ...

Page 53: ...WAY FROM SAFELY DRIVING YOUR VEHICLE Any function that requires your prolonged attention should only be performed after coming to a complete stop Always stop the vehicle in a safe location before performing these functions Failure to do so may result in an accident Controllable With Remote Control Point the remote control transmitter at the remote control sensor Connectable to Remote Control Inter...

Page 54: ...technology used to decode programs encoded in Dolby Surround Pro logic decoding will provide you with four channels of sound front left right centre and monaural rear surround from a 2 channel stereo source The separately sold digital audio processor PXA H900 is required to enjoy Dolby Pro Logic surround sound Dolby Pro Logic II plays 2 channel sources in 5 channels over the entire frequency range...

Page 55: ...979 6983 6984 6985 7065 7073 7074 7079 7082 7089 7165 7168 7176 7178 7185 7265 7273 7282 7285 7289 7365 Abbreviation IE IK IN IS IT IW JA JI JW KA KK KL KM KN KO KS KU KY LA LN LO LT LV MG MI MK ML MN MO MR MS MT MY NA NE NL NO OC OM OR PA PL PS PT QU RM Code 7369 7375 7378 7383 7384 7387 7465 7473 7487 7565 7575 7576 7577 7578 7579 7583 7585 7589 7665 7678 7679 7684 7686 7771 7773 7775 7776 7778 ...

Page 56: ... IS IT JM JO JP KE KG KH 6877 6879 6890 6967 6969 6971 6972 6982 6983 6984 7073 7074 7075 7077 7079 7082 7165 7166 7168 7169 7170 7172 7173 7176 7177 7178 7180 7181 7182 7183 7184 7185 7187 7189 7275 7277 7278 7282 7284 7285 7368 7369 7376 7378 7379 7381 7382 7383 7384 7477 7479 7480 7569 7571 7572 Dominica Dominican Republic Algeria Ecuador Estonia Egypt Western Sahara Eritrea Spain Ethiopia Finl...

Page 57: ...367 8368 8369 8371 8372 8373 8374 8375 8376 8377 8378 8379 8382 8384 8386 8389 8390 8467 8468 8470 8471 8472 8474 8475 8477 8478 8479 8480 8482 8484 8486 8487 8490 8565 8571 8577 8583 8589 8590 8665 8667 8669 8671 8673 8678 8685 8770 8783 8969 8984 8985 9065 9077 9087 PE PF PG PH PK PL PM PN PR PT PW PY QA RE RO RU RW SA SB SC SD SE SG SH SI SJ SK SL SM SN SO SR ST SV SY SZ TC TD TF TG TH TJ TK TM...

Page 58: ...uorescent tube Unable to receive stations No antenna or open connection in cable Make sure the antenna is properly connected replace the antenna or cable if necessary Unable to tune stations in the seek mode You are in a weak signal area Make sure the tuner is in the DX mode If the area you are in is a primary signal area the antenna may not be grounded and connected properly Check your antenna co...

Page 59: ...d disc The sound is not output from the speakers Unit has no output signal of the internal amplifier POWER IC is switched to ON page 30 Protective circuit is activated due to high temperature The indicator will disappear when the temperature returns to within operation range No CD is inserted Insert a CD Although a disc is inserted NO DISC is displayed and the unit does not start to play or eject ...

Page 60: ...t a malfunction Disc does not match regional code number Load a disc that matches the regional code number Protective circuit is activated due to high temperature The indicator will disappear when the temperature returns to within operation range Leave the power OFF until the temperature decreases and then turn the power ON again Mechanism error 1 Press and eject the disc If the disc does not ejec...

Page 61: ...n empty magazine into the Changer to receive the disc left inside the Changer No magazine is loaded into the Changer Insert a magazine No indicated disc Choose another disc The iPod is not connected Make sure the iPod is correctly connected refer to Connections Make sure the cable is not bent excessively The iPod s battery remains low Refer to the iPod s documentation and charge the battery There ...

Page 62: ...l Harmonic Distortion 0 008 at 1 kHz Dynamic Range 95 dB at 1 kHz Channel Separation 85 dB at 1 kHz Signal system NTSC PAL Horizontal resolution 500 lines or greater Video output level 1Vp p 75 ohms Video S N ratio DVD 60 dB Audio S N ratio 105 dB Wave length DVD 665 nm CD 785 nm Laser power CLASS II Battery Type CR2025 battery Width 51 mm 2 Height 119 mm 4 11 16 Depth 13 mm 1 2 Weight 50 g 1 75 o...

Page 63: ...cified accessory parts Use of other than designated parts may damage this unit internally or may not securely install the unit in place This may cause parts to become loose resulting in hazards or product failure ARRANGE THE WIRING SO IT IS NOT CRIMPED OR PINCHED BY A SHARP METAL EDGE Route the cables and wiring away from moving parts like the seat rails or sharp or pointed edges This will prevent...

Page 64: ...d this unit Dashboard Mounting sleeve Included 2 When your vehicle has the Bracket mount the long hex bolt onto the rear panel of the DVA 9861Ri and put the Rubber Cap on the hex bolt If your vehicle does not have the Mounting Support reinforce the head unit with the metal mounting strap not supplied Connect all the leads of the DVA 9861Ri according to details described in the Connections section ...

Page 65: ...ush the locking pin to the up position see above drawing As each pin is unlocked gently pull out on the unit to make sure it does not re lock before unlocking the second pin 3 Pull the unit out keeping it unlocked as you do so JAPANESE CAR Face Plate Screws M5 8 Included Mounting Bracket this unit ...

Page 66: ...ONT White Pink JASO Antenna Plug ISOAntenna Plug To vehicle phone To amplifier or equalizer To the instrument cluster illumination lead To power antenna Ignition Key Battery Speakers Rear Left Front Left Rear Right To remote output lead To monitor control lead To video input terminal CD Changer Sold Separately Speakers Amplifier Amplifier Amplifier Front Left Front Right Rear Left Rear Right Subwo...

Page 67: ... vehicle s fuse box or another unused power source which provides 12V only when the ignition is turned on or in the accessory position Ground Lead Black Connect this lead to a good chassis ground on the vehicle Make sure the connection is made to bare metal and is securely fastened using the sheet metal screw provided Power Antenna Lead Blue Connect this lead to the B terminal of your power antenn...

Page 68: ...included Touch panel compatible monitor box sold separately Touch panel compatible monitor sold separately Remote control input Lead White Brown Remote control output Lead White Brown Monitor control Lead White Pink Monitor control Lead White Pink To Digital output terminal Fiber optic Cable Fiber optic input terminal for head unit Ai NET Cable Ai NET output terminal Ai NET compatible digital audi...

Page 69: ... des DVD Audio Wiedergabemodus Falsch Richtig Einstelloption DVD A PLAY MODE Einstellungen VIDEO VCAP VOFF VIDEO Bei Discs mit DVD Video und Audiodaten werden nur die DVD Videodaten wiedergegeben VCAP DVD Audiodaten werden mit Videoinformation wiedergegeben VOFF DVD Audiodaten werden ohne Videoinformation wiedergegeben Die werkseitige Einstellung ist VCAP Setting item DVD A PLAY MODE Setting conte...

Page 70: ...e data mum and Minimum settings for the speaker levels OUTPUT LEVEL For example the actual display at either extreme should mode Instead the display will show 0 or 0 respectively n Alpine Theater Amp angeschlossen ist können die Pegel der verschiedenen Surround Modi die beim Verstärker Prozessor ngepasst werden Da die meisten Anzeigen der Setup Funktion für eine Videoanzeige entwickelt wurden zeig...

Page 71: ...arie modalità surround comprese con e Poiché gran parte delle schermate delle funzioni di configurazione sono state progettate per un dispositivo dotato di display piccola unità non mostra i dati completi relativi alle impostazioni Massimo e Minimo per i livelli degli altoparlanti OUTPUT iascun estremo la visualizzazione reale dovrebbe essere 10 o 10 per ogni modalità Il display mostra invece 0 e ...

Page 72: ...do di riproduzione di DVD audio Errato Corratto Voce selezionata DVD A PLAY MODE Contenuto dell impostazione VIDEO VCAP VOFF VIDEO Il DVD video viene riprodotto solo se il disco contiene audio e video DVD VCAP L audio DVD viene riprodotto insieme al video VOFF L audio DVD viene riprodotto senza il video L impostazione predefinita è VCAP Fel Rätt Inställning DVD A PLAY MODE Inställningsalternativ V...

Page 73: ...rsatilidad y más ventajas CHA S634 es un cambiador de seis discos de alto rendimiento con nuevo M DAC CD R RW PLAY BACK MP3 PLAY BACK y CD TEXT El modelo CHA 1214 Ai NET alberga 12 discos y el modelo CHM S630 M Bus es un cambiador de seis discos de tamaño reducido con un CD R RW PLAY BACK I caricatori CD Alpine danno di più Più scelta più versatilità più comodità Il modello CHA S634 è un caricator...

Page 74: ......

Page 75: ......

Page 76: ......

Reviews: