background image

CONTENTS


1 FEATURE


1


2 SPECIFICATION


2


3 OPERATION


3


3-1 FRONT PANEL OPERATION


3


3-1-1 POWER ON/OFF


      3


3-1-2 QUAD/AUTO SEQUENCE/PIP KEY & FULL SCREEN MODE   

3


3-1-2-1 QUAD SCREEN  


       3


3-1-2-2 AUTO SEQUENCE KEY


       4


3-1-2-3 PIP KEY  


       4


3-1-2-4 FULL SCREEN KEY  


       4 

      3-1-2-5 SPECIAL SYSTEM KEY FUNCTION                  


5


3-2 OSD MENU SET


6


   3-2-1 TIME/DATE 

       7


3-2-2 CAMERA SET 

       8 

   3-2-3 CAMERA ID 

       8 

   3-2-4 FUNCTION 

       9 

   3-3-5 VGA SET 

      10 

   3-2-6 EXIT 

      10


 3-3 BACK PANEL CONNECTION


11 


3-3-1 CAMERA INPUT 

       11 

   3-3-2 EXT. INPUT 

       11 

   3-3-3 MONITOR OUTPUT 

       11 

   3-3-4 VGA OUTPUT 

       11 

   3-3-5 DC IN 

       11 

 3-4 FREEZE SET 

      12 


3-4-1 FREEZE OF QUAD / FULL SCREEN MODE


12, 13


4 REMOTE CONTROLLER


14, 15, 16, 17 


5 SYSTEM CONNECTION 


18


Summary of Contents for Quad404LV

Page 1: ...DIGITAL COLOR QUAD SPLITTER with VGA OUTPUT USER S MANUAL ENGLISH ...

Page 2: ...le is in tended to alert the user to the presence of uninstalled Dangerous Voltage within the product s enclosure that may be of sufficient magnitude to constitute a risk of electric shock to persons USER OF THE SYSTEM ARE RESPONSIBLE FOR CHECKING AND COMPLYING WITH ALL FEDERAL STATE AND LOCAL LAWS AND STATUTES CONCERNING THE MONITORING AND RECORDING OF VIDEO AND AUDIO SIGNALS GANA I C CO LTD SHAL...

Page 3: ...ice to sudden and severe temperature changes This could cause moisture condensation inside the unit which could damage your device In the event of moisture condensation allow the device to dry out completely before use Clean only with dry cloth Never clean your device with it powered on Never attempt to disassemble repair or make any modification to your device Never use organic solvents such as b...

Page 4: ...2 4 FULL SCREEN KEY 4 3 1 2 5 SPECIAL SYSTEM KEY FUNCTION 5 3 2 OSD MENU SET 6 3 2 1 TIME DATE 7 3 2 2 CAMERA SET 8 3 2 3 CAMERA ID 8 3 2 4 FUNCTION 9 3 3 5 VGA SET 10 3 2 6 EXIT 10 3 3 BACK PANEL CONNECTION 11 3 3 1 CAMERA INPUT 11 3 3 2 EXT INPUT 11 3 3 3 MONITOR OUTPUT 11 3 3 4 VGA OUTPUT 11 3 3 5 DC IN 11 3 4 FREEZE SET 12 3 4 1 FREEZE OF QUAD FULL SCREEN MODE 12 13 4 REMOTE CONTROLLER 14 15 1...

Page 5: ...n Quadrant screen and Auto Switching mode High Quality Simple Version Real Time Quad Display Full Quad PIP Double Triple Screen Display Mode Programming the MENU in OSD On Screen Display Built in Time Date Title Generator Programmable Dwell Time 1 60 sec Freeze in Quad Full Screen Mode Display Screen Zoom In Out Function Loop Out Function Auto Sequence Border Line Display ON OFF CAMERA ID Display ...

Page 6: ...play Up to 8 Character Camera ID Display On Off Selectable Time Date Display YYYY MM DD HH MM SS Time Date Display Format Type Selectable i e YYYY MM DD MM DD YYYY DD MM YYYY Time Date Display Position Top Under Selectable Time Date Display ON OFF Mode Selectable Freeze QUAD Full Screen Mode Remote Controller IR Remote Controller Power Supply DC 12V 1A Dimension Weight 260 x 210 x 43 mm W X D X H ...

Page 7: ...ODE button introduces you to select the Quad Screen AUTO Sequence PIP DOUBLE TRIPLE Mode Once your screen shows quad mode screen you can change your screen mode to auto sequence PIP mode by pressing MODE button in sequence 3 1 2 1 QUAD Screen The Quad screen is default when you turn on this system The below is the Quad screen 3 OPERATION 3 QUAD Mode QUAD AUTO 1 PIP 3 PIP DOUBLE TRIPLE ...

Page 8: ...mera ID showing the bottom side 3 1 2 3 PIP KEY As you see the below pictures when you want some mode you can select your favorite mode by pressing the key in sequence 3 1 2 4 Full Screen Key To choose the full screen of each channel press by using each channel key button AUTO Sequential Mode 4 Full Screen Mode DOUBLE Mode 3 PIP Mode 1 PIP Mode TRIPLE Mode Channel Key Button 1 4 3 2 ...

Page 9: ...mation will be lost i e Time Date Camera I D Brightness Contrast User must set system again To switch CAMERA ID Toggle ON OFF 1 Press and hold button and then Power on the system 2 Release your button To switch TIME DATE Toggle ON OFF 1 Press and hold button and then Power on the system 2 Release your button To switch NTSC PAL Type 1 Turn your system off 2 Press and Hold button 3 Power on the syst...

Page 10: ...nge Setting Value Use or button To move Next line Select menu To go to Previous Page Use button To change Display Mode Use button To switch Screen to External Input Use button When you press the Menu button the following picture will be displayed This picture is the OSD menu OSD MENU Use button 6 ...

Page 11: ... following screen will be displayed To change the Time Date use the direction button User can select the Display On Off of the TIME DATE in your screen User can change Time Date Format Position Top or Bottom in your screen To save setting value Select Save Exit menu in the screen Time Date MENU 7 ...

Page 12: ...nu in the screen 3 2 3 CAMERA ID User can give the title to the cameras up to 8 characters choose CAM ID menu then press ENTER button Use the direction button to change Camera ID User can also select the Display on off of the screen To save setting value Select EXIT menu in the screen CAMERA ID MENU CAMERA Set MENU 8 ...

Page 13: ...ect EXIT menu to save in the screen Default Setting Value Factory set value of each menu is as below TIME DATE DISPALY ON TIME DATE FORMAT YYYY MM DD TIME DATE POSITION TOP CAMERA SET BRIGHTNESS 0 CONTRAST 0 COLOR 0 CAMERA ID C1 C2 C3 C4 FUNCTION FACTORY SET NO FUNCTION BORDER LINE ON FUNCTION AUTO SEQUENCING TIME 02 SEC VGA SET RESOLUTION 1024 X 768 VGA SET BRIGHTNESS CONTRAST 0 Function MENU 9 ...

Page 14: ... monitor s Resolution Brightness and Contrast In case of Resolution there are 3 modes 1280x1024 1024x768 800x600 after choosing your setting value Select EXIT menu to save in the screen 3 2 6 EXIT After setting everything press ENTER button in EXIT menu Then your setting value will be saved on the system VGA SET MENU 10 ...

Page 15: ... Camera 3 3 3 MONITOR OUTPUT This BNC output connection is used to display the mode of operation selected by User Quad PIP Full screen or Switched Full Screen 3 3 4 VGA OUTPUT This VGA output connection will provide the high quality screen through your LCD monitor and display the mode of operation selected by User Quad PIP Full screen or switched Full screen 3 3 5 DC IN Plug the 12V 1A switching a...

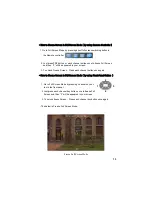
Page 16: ...e press the same channel button once again How to Freeze Screen in QUAD Mode When your display is in QUAD mode 1 Press FRZ button in the Remote Controller C1 channel will be frozen and F will be appeared in frozen channel 2 C2 C3 C4 channel will be frozen by pressing FRZ button in order F will be appeared in each frozen channel 3 User can return to camera mode by pressing FRZ button after all 4 ch...

Page 17: ... in your screen 3 To unlock Freeze Screen Press each channel button once again How to Freeze Screen in Full Screen Mode by using Front Panel Button 1 Go to Full Screen Mode by pressing channel key but ton in the front panel 2 Just press each channel key button once to freeze Full Screen and then F will be appeared in your screen 3 To unlock freeze Screen Press each channel key button once again Th...

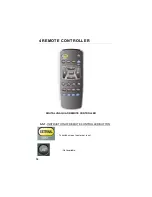
Page 18: ...3 5 1 INSTRUCTION OF REMOTE CONTROLLER BUTTON To switch screen to external input Not available DIGITAL VGA QUAD REMOTE CONTROLLER 4 REMOTE CONTROLLER 14 ...

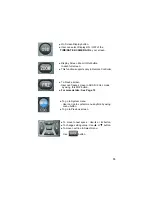
Page 19: ... supports only in Remote Controller To Freeze screen User can freeze screen in QUAD FULL mode by using this FRZ button For more details See Page 12 To go to System menu User can go to system menu anytime by using menu button To go to Previous screen To move to next space Use or button To change setting value Use or button To move next line Select menu Use button 15 ...

Page 20: ... Button User can go to Double Triple display mode For more details See page 4 Screen switching button in PIP mode When your display is in 1 PIP mode and press each button 1 Button C1 is main and C2 is sub display 2 Button C2 is main and C1 is sub display 3 Button C3 is main and C3 is sub display 4 Button C4 is main and C3 is sub display Changing main and sub display example in the 1 PIP mode as be...

Page 21: ... C1 C2 C4 are sub display 4 Button C4 is main and C1 C2 C3 are sub display Changing main and sub display example in the 3 PIP mode as below Direct switching button for each camera s full screen User can go to each camera s full screen directly by using this button Each Camera s full display mode as below 17 1 Button 2 Button 3 Button 4 Button 1 Button 2 Button 3 Button 4 Button ...

Page 22: ...SWITCHING ADAPTER DC12V 1A LCD MONITOR BACK VIEW VGA IN EXT IN MONITOR EXTERNAL BACK VIEW 5 SYSTEM CONNECTION 18 ...

Page 23: ... MEMO ...

Page 24: ... MEMO ...

Reviews: