AllSee Technologies TL40H1 User Manual Download Page 10


LCD Video Wall


User’s Manual  


1


CLOCKER

Set current time 


2


ON TIEM


Automatically power on as the time you set.  


3


OFF TIME


Automatically power off as the time you set.  


4


CURRENT X: 

Number of X on the digital wall 


5)  

CURRENT Y: 

Number of Y on the digital wall 


6)

  TOTAL X:   

Total number of monitor on X axis 


7)

  TOTAL Y:   

Total number of monitor on Y axis 


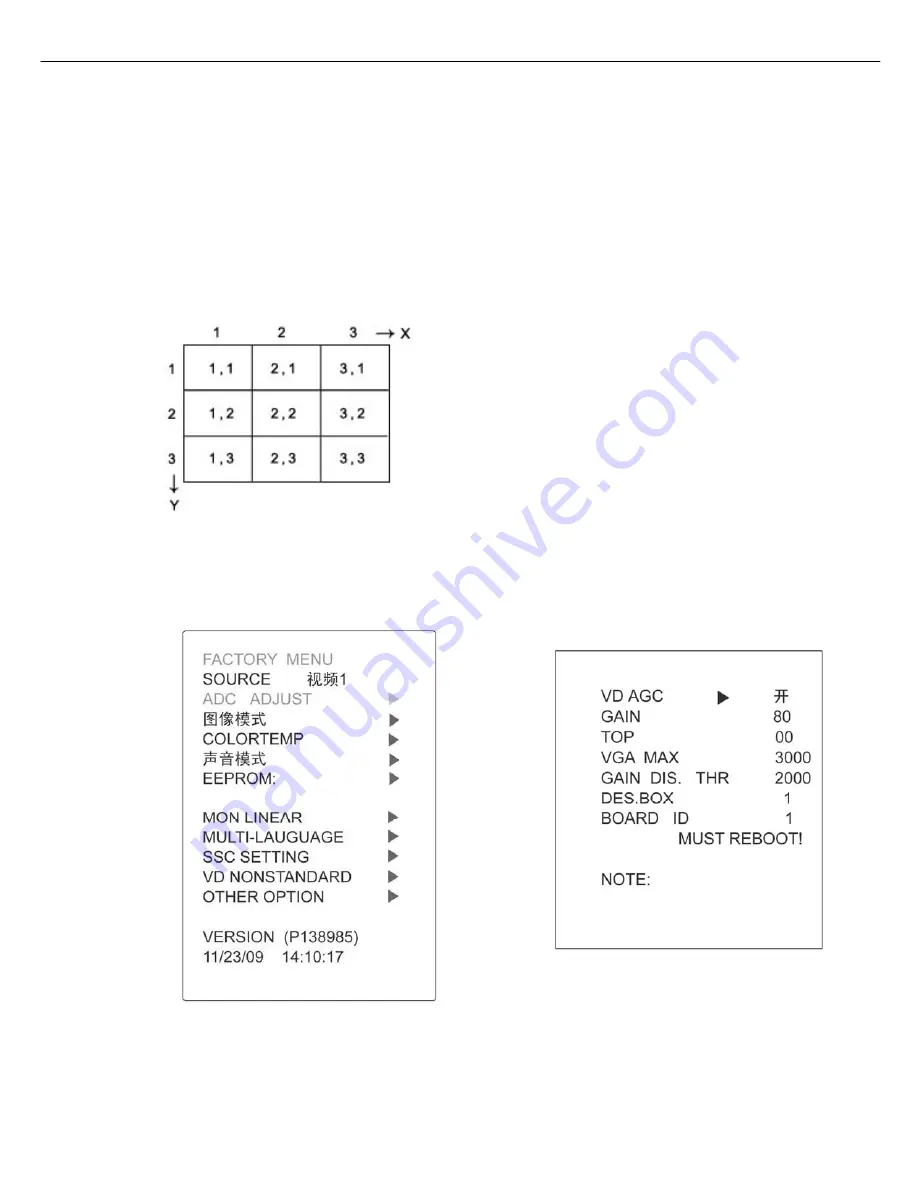
Take 3×3 wall for example,The following sketch map for your reference. 


3.4 Set board ID


  Press “MENU” and “1”, “8”, “4”, “2” in sequence. You will see following picture. 


   Press “▼” and let halo on “OTHER OPTION”, then press “

” to open subsidiary menu. Press “▼” to let halo  

on “BOARD ID”, then press “ ,  ”to change ID number.  


Summary of Contents for TL40H1

Page 1: ......

Page 2: ...LCD Video Wall User s Manual LCD Video Wall Universal User s Manual Video Wall Model TL40H1 TL46H1 TL46H2 TL46H3 1...

Page 3: ...2 Introduction to OSD buttons 4 Chapter II Connecting 5 2 1Control video wall through RS232 5 2 2 Display DVI Signal 5 Chapter III Introduction to Remote Control and Signal Input 6 3 1 Introduction to...

Page 4: ...T OUTPUT RS232C serial Port C BNC RGB HV IN R G B H V BNC Connector for VGA signal D DVI DVI D IN DVI D Connector for digital signal input VGA2 D SUB IN VGA Connector for analogue signal input E E BNC...

Page 5: ...on to OSD buttons 1 Left and Right buttons a adjust volume b select in OSD menu c select in signals input d adjust values 2 Open Close OSD Menu or Return to Previous Menu 3 Open signals input list 4 S...

Page 6: ...cable There are two RS232 connectors on the monitor one for signals input the other for signals output Every monitor needs a separate ID number to manage through RS232 2 2 Display DVI Signal Multiple...

Page 7: ...nput Navigation Butt ons Press these but tons to select preference and MENU for confirmation 3 2 Instruction to signal input selection Press MODE button to enter signals input list and use navigation...

Page 8: ...ge parameters 1 Contrast Adjust the contrast ratio of the picture Press to change parameters and press MENU to save your settings 2 BRIGHTNESS Change luminance of the picture 3 Color mode You can choo...

Page 9: ...fan will shut down automatically 3 RESET recall the default settings OSD 1 OSD LANGUAGE Press to change the kind of language You can choose English or Chinese 2 MENU Display configuration horizontal p...

Page 10: ...RENT Y Number of Y on the digital wall 6 TOTAL X Total number of monitor on X axis 7 TOTAL Y Total number of monitor on Y axis Take 3 3 wall for example The following sketch map for your reference 3 4...

Reviews: