


32”
High
Definition
Digital
Advertising
Display
User’s
Manual
Page
33
5.6 My media file does not fit properly on the screen
If
your
media
is
being
displayed
with
black
edges
please
refer
to
section
2.2.
This
has
happened
because
the
file
is
not
16:9
aspect
ratio
(1366x768).
Please
resize
file
to
1366x768
pixels
and
try
loading
the
media
onto
the
display
once
again.
5.7 My media file will not display or is missing from the playlist
In
this
situation
the
first
step
to
take
to
find
the
root
of
the
problem
is
to
start
with
a
blank
USB
drive.
Copy
1
file
onto
the
blank
USB
drive
and
insert
this
into
the
unit,
ensuring
that
the
file
name
is
11
characters
or
less.
If
this
works
and
the
file
displays
then
re
‐
name
all
the
files
that
are
12
characters
or
more
to
have
shorter
file
names.
If
this
does
not
work
please
check
first
that
the
media
file
is
the
correct
size
to
fit
the
screen
–1366x768
pixels.
If
it
is
any
bigger
than
this
there
is
a
danger
of
the
media
file
not
displaying.
For
images,
check
that
it
is
around
1
‐
2
MB
in
size
and
that
it
is
a
baseline
JPEG
not
a
progressive
one
–
as
these
will
be
skipped.
This
can
be
checked
by
using
free
software
called
IrfanView.
1)
Download
Irfanview
from
http://download.cnet.com/IrfanView/3000
‐
2192_4
‐
10021962.html?part=dl
‐
IrfanView&sub
j=dl&tag=button
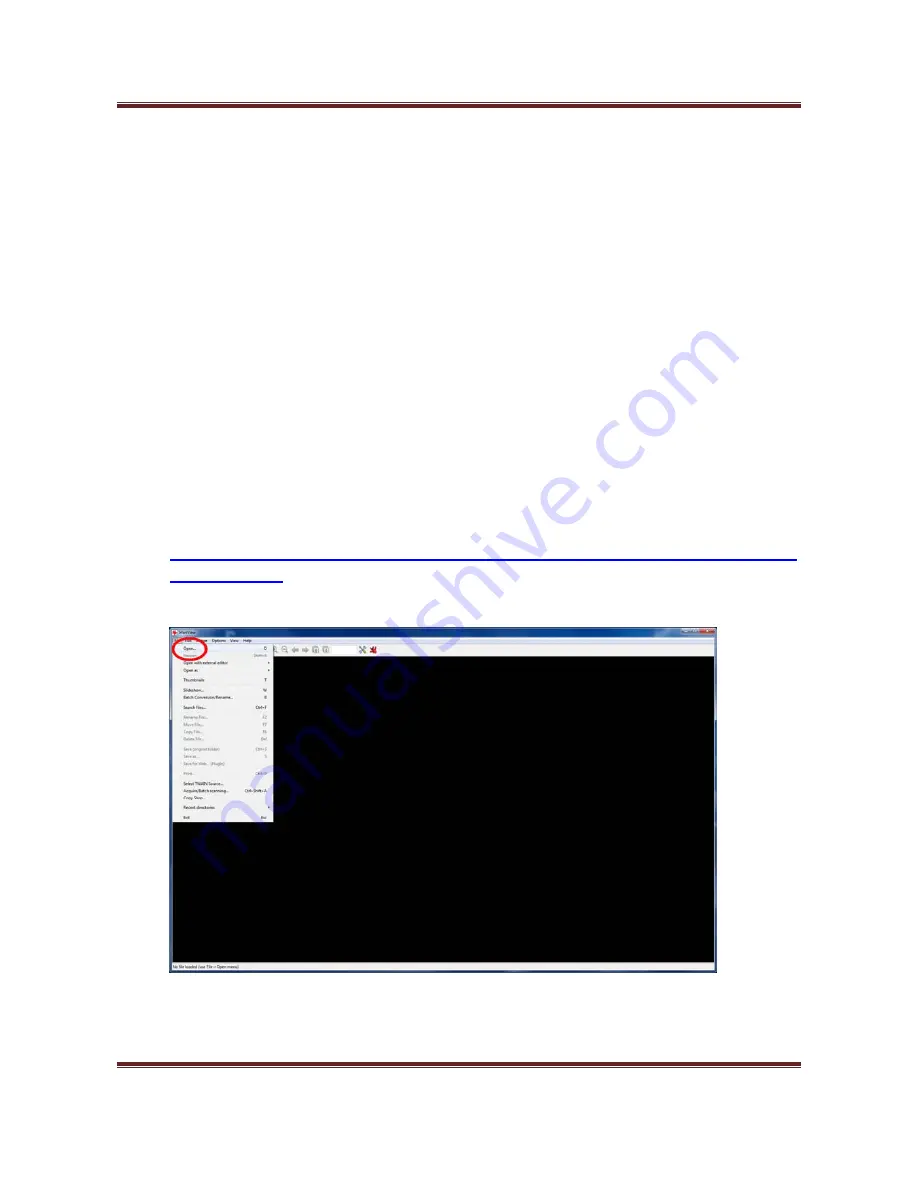
2)
Launch
the
software
then
open
image
file
within
the
program.
3)
In
the
toolbar
click
on
“Image”
>
“Information”.
4)
This
brings
up
the
“Image
property
options”.
Summary of Contents for 32" High Definition Digital Advertising Display
Page 1: ...32 High Definition Digital Advertising Display User s Manual Manual Version PF32HD1 0...
Page 2: ...32 High Definition Digital Advertising Display User s Manual Page 1 Our Full Product Range...
Page 8: ...32 High Definition Digital Advertising Display User s Manual Page 7 1 3Remote Control...
Page 27: ...32 High Definition Digital Advertising Display User s Manual Page 26...


