background image

POEFE8T User Manual 

Alloy Computer Products Pty Ltd Copyright ©2011 

3.


Installation


3.1


Installation


Method


The


site


where


you


install


the


switch


may


greatly


affect


its


performance.


When


installing,


please


take


the


following


into


consideration.


Install


the


switch


in


a


cool,


dry


place.


See


technical


specifications


for


the


acceptable


temperature


and


humidity


operating


ranges.


Install


the


switch


on


a


secure,


level


surface


that


can


support


its


weight,


at


least


5Kg.


Before


connecting


the


Power


Cord


please


ensure


the


appropriate


voltage


switch


is


set,


this


switch


can


be


found


at


the


back


of


the


POEFE8T.


Leave


at


least


10cm


of


space


at


the


front


and


rear


of


the


switch


to


ensure


adequate


ventilation.


3.2


Desktop


or


Shelf


Installation


When


installing


the


switch


on


a


shelf


on


desktop


please


ensure


guidelines


are


above


are


following,


including


level


surface


and


adequate


ventilation.


3.3


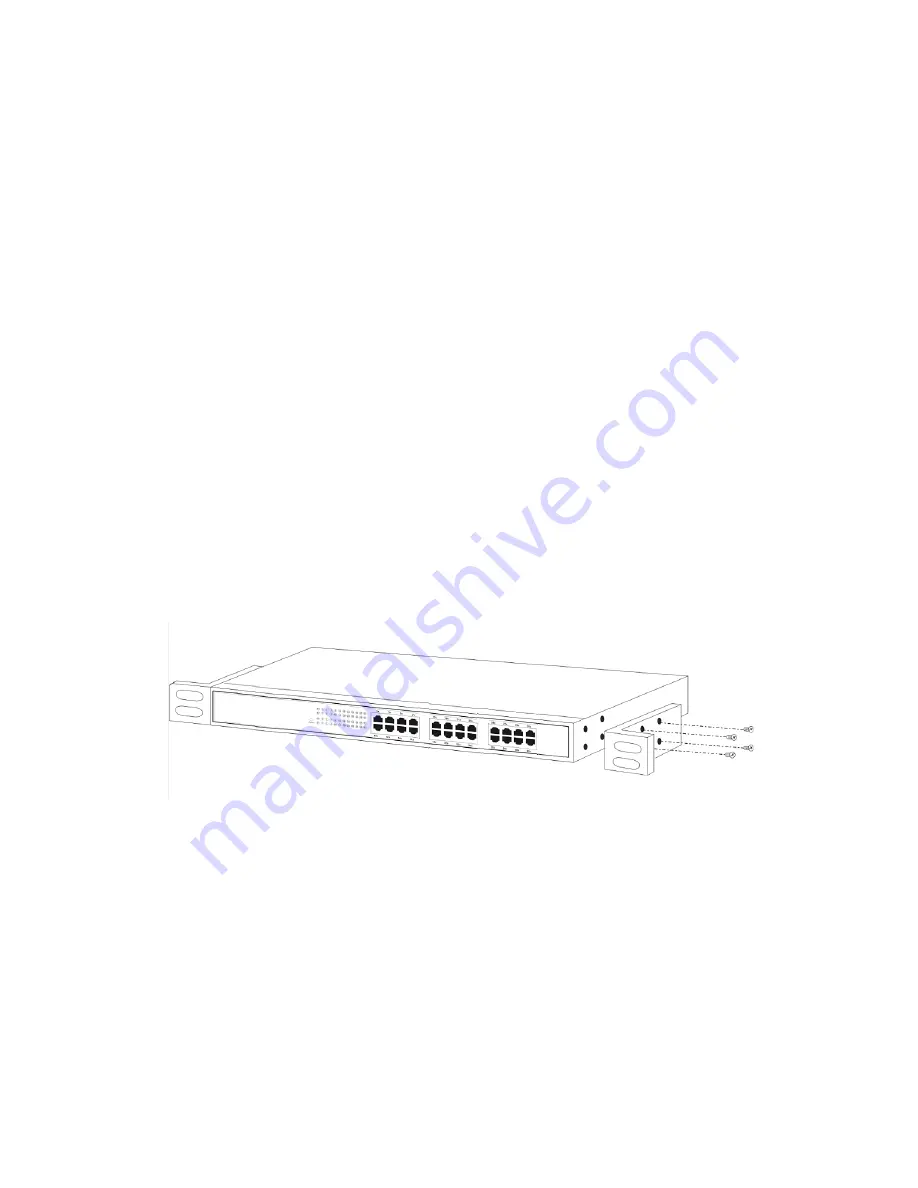
Rack


Installation


The


POEFE8T


is


a


rack


mountable


switch


and


can


be


installed


in


an


EIA

19


based


equipment


rack.


First


install


the


provided


rack


mount


brackets


onto


each


side


of


the


switch


using


the


screws


provided.


Using


the


screws


provided


with


your


rack


mount


the


switch


into


your


equipment


rack.


Fig.


1


Rack Mount


kit


installation

Summary of Contents for POEFE8T

Page 1: ...POEFE8T User Manual Alloy Computer Products Pty Ltd Copyright 2011 User Manual POEFE8T 8 Port Fast Ethernet PoE Switch Version 1 1 January 2011...

Page 2: ...tents 1 Introduction 4 2 Checklist 4 3 Installation 5 3 1 Installation Method 5 3 2 Desktop or Shelf Installation 5 3 3 Rack Installation 5 4 Powering on the Switch 6 5 LED Description 6 6 Network Con...

Page 3: ...and found to comply with the limits for a Class A computing device pursuant to Subpart J of Part 15 of FCC Rules which are designed to provide reasonable protection against such interference when oper...

Page 4: ...g low cost PoE capability to your newly deployed IP PBX and IP Phone infrastructure Features Supports PoE power up to 15 4W for each PoE port Supports PoE power up to 65W for all PoE ports Supports Po...

Page 5: ...the appropriate voltage switch is set this switch can be found at the back of the POEFE8T Leave at least 10cm of space at the front and rear of the switch to ensure adequate ventilation 3 2 Desktop or...

Page 6: ...h can be set to 100V or 220V AC Note Please double check and ensure power voltage is correctly configured if set incorrectly damage to the switch is possible 5 LED Description LED Colour Function Powe...

Page 7: ...ction Connect your devices computer router switch IP Phone Wireless Access Point IP Camera etc to the ports with a CAT 5 CAT 5e CAT 6 network cable Since the switch supports Auto MDI MDI X you can use...

Page 8: ...um 100m EIA TIA 568 100 STP maximum 100m Transfer Method Store and Forward Switching Capacity 1 6G MAC Address Table 2K Frame Filtering and Forward Rate 10Mbps 14880pps 100Mbps 148800pps POE Up to 15...

Page 9: ...signal MDI X signal 1 TX RX 2 TX RX 3 RX TX 4 not used not used 5 not used not used 6 RX TX 7 not used not used 8 not used not used Below is a diagram of a typical straight through and cross over cabl...

Reviews: