Reinstallation of Shipping Materials
To prevent damage while moving the unit, the shipping materi-
als MUST be reinstalled.
1. Disconnect washer from electrical supply.
2. Remove two screws at bottom of front access panel.
3. Rotate bottom of panel out and remove panel.
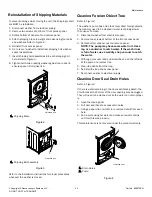
4. Attach shipping brace to weight and base using four bolts
and washers. Refer to
.
5. Reinstall front access panel.
6. Go to rear of washer to install rear shipping bolt, washer,
spacer assemblies.
7. Insert shipping bolt assemblies into each shipping bolt
hole. Refer to
.
8. Tighten bolt while pressing washer against rear panel to
ensure spacer is fully inserted.
FLW2296N_SVG
1
1. Shipping Brace
Figure 2
FLW2297N_SVG
1
1. Shipping Bolt Assembly
Figure 3
Refer to the Installation instructions for proper procedures
whenever the washer is moved.
Cleaning Foreign Object Trap
Refer to
.
The washer’s pump has a trap that may collect foreign objects.
The trap may need to be cleaned if water is draining slower
than usual. To clean:
1. Disconnect washer from electrical supply.
2. Remove two screws at bottom of the front access panel.
3. Rotate bottom of panel out and remove panel.
NOTE: The pump may have some water in it. Use a
rag or a container to catch water. If the wash drum
is full of water, use a wet/dry shop vacuum to catch
the water.
4. With rag or vacuum ready, unscrew the cap on the left side
of the pump and remove trap.
5. Clean the debris from the trap.
6. Reinstall the trap and access panel.
7. Reconnect washer to electrical supply.
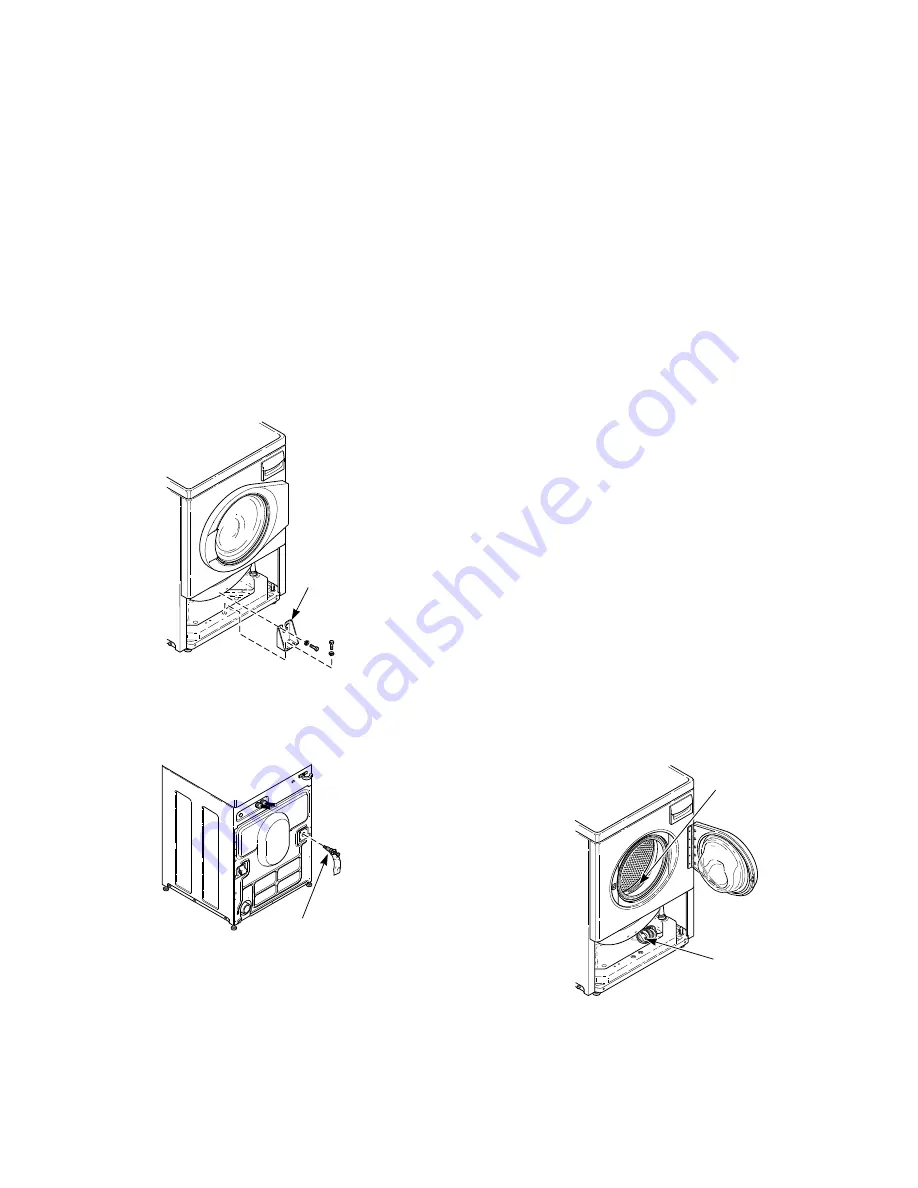
Cleaning Door Seal Drain Holes
Refer to
.
If there is water remaining in the door seal (black gasket), the
drain holes at the bottom of the door opening may be plugged.
They will need to be cleaned out so the water can drain proper-
ly.
1. Open the loading door.
2. Pull door seal back to access drain holes.
3. Using a paper clip or similar tool, remove debris from each
hole.
4. Run a cycle using hot water and make sure water drains
out from this area properly.
This maintenance is not covered under the product warranty.
FLW2444N_SVG1
1
2
1. Drain Holes
2. Pump
Figure 4
Maintenance
©
Copyright, Alliance Laundry Systems LLC -
DO NOT COPY or TRANSMIT
25
Part No. 806970EN
Summary of Contents for FF7005SN
Page 2: ......


