GR4 User Guide
10
AP10223 Issue_2
Installing GR4
5.1
Mounting the unit
The GR4 can be used as a stand-alone unit
and placed on a hard surface or rack-mounted
in a standard 1U 19” profile.
You will need the following items;
T8 Torx screwdriver
Small flat blade screwdriver
Rack ears (supplied)
4 x M3 Torx screws (supplied)
Posi Screwdriver
4 x M6 Screws
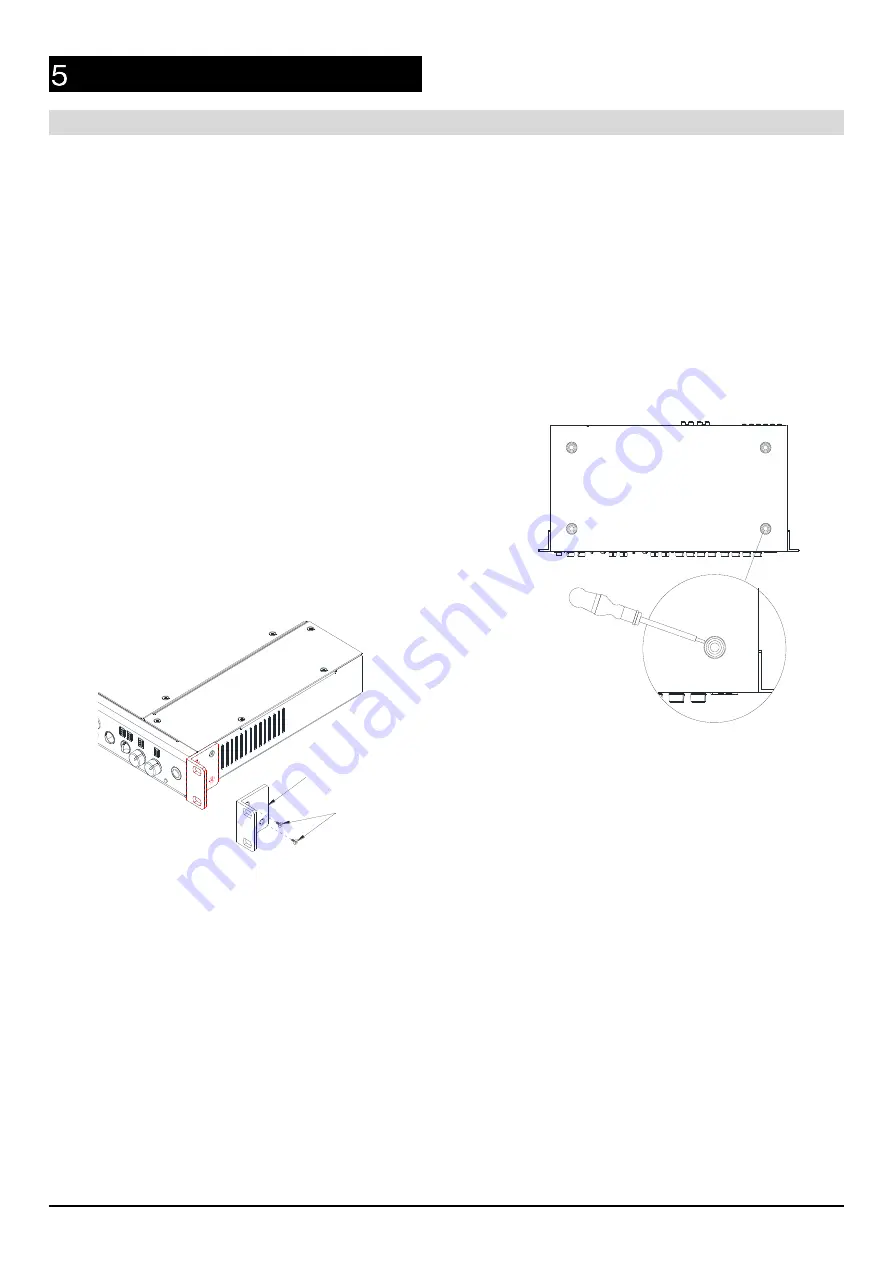
To rack-mount the unit follow the below
procedure;
1.
Using the supplied rack ears and M3 Torx
screws fit to the unit as in the below
diagram.
M3 Torx Screw
M3 Torx Screw
Rackear
Be sure to use the supplied screws or
exact replacements (damage to internal
PCB’s can result when using longer
screws).
2.
Using the small flat bladed screwdriver
gently remove the four rubberized feet on
the base of the unit.
Gently prize the central plastic grommet
away from the unit. Once removed the
rubberized feet can be strored safely for
future use.
To reinstate simply push the grommet
into place.
3.
Install within the 19” rack making sure the
unit is secure.
Please ensure you have enough depth
within the rack to accommodate the GR4
together with sufficient cable bending
radius (the GR4 is 220mm deep).
Note: Please ensure adequate ventilation
is provided and the sides of the unit are
not obstructed to maintain adequate
airflow.


