87
Report Generator Software
Introduction
PSM comes with a Report Generator Software program. The Report Generator software provides
concise reports to summarize and document findings. Comparison reports are excellent for presenting
before/after comparisons of power usage and projected cost. Separate logs can be compared or
sections of the same log can be compared for this analysis. Summary reports summarize the data of a
log or a designated section of the log. The reports can be data only, or can combine data and graphs.
Generating a Report
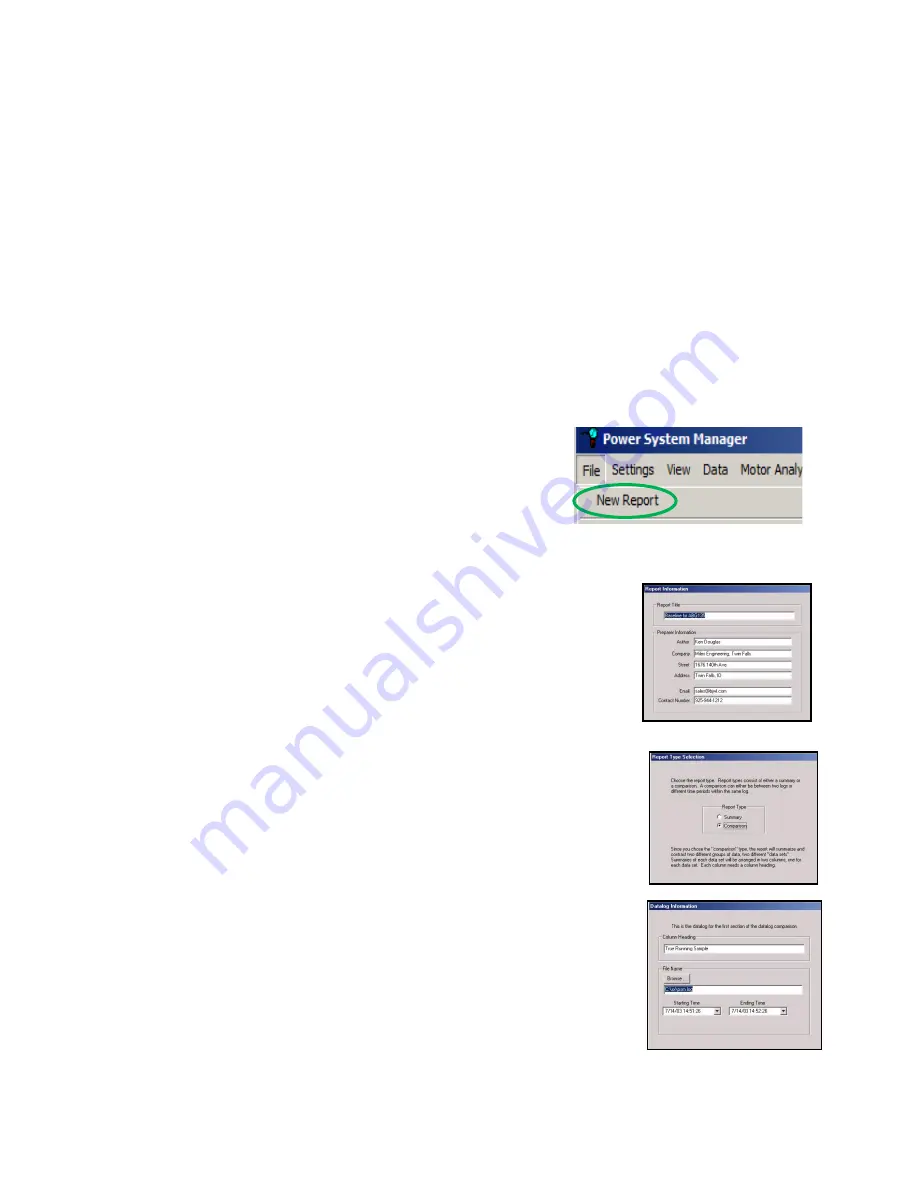
To generate a report, either click “File” and then “New Report” at the main menu of PSM or run the
program “Report.exe” located in the same directory of your computer that psm.exe is installed in.
The “Report Information” screen will now be displayed. This
screen allows you to enter general information that will be
printed on the report, such as the title of the report and contact
information about the preparer of the report, so the reader can
contact him. When you are done entering the information, click
on “Next”.
The “Report Type Selection” screen will now be displayed. You
must choose between doing a summary report or a comparison report. A
summary report provides a concise summary of data from one
consumption log. This is great for preparing a report of a load study. A
comparison report compares data from one log to the data of another log.
Or it compares one section of data of a log to another section of data in the
same log. This type of report is great for preparing “before” and “after”
reports to verify energy savings or to prepare longitudinal reports,
documenting how performance or load has changed over time. When you
are done entering the information, click on “Next”.
The next screen is a “Datalog Information” screen. In this screen, specify
what log is to be used for the summary report or for the “before” column of
the comparison report. If you do not want to use all the records of the log,
select a starting time and/or an ending time in order to discard records
outside of those times. This can be especially important in comparison
reports, because yo
u generally want to compare equal “before” and “after”
timeframes.
When you are done entering the information, click on “Next”.
If you are doing a comparison report, another Datalog Information screen
will appear. In this screen, specify what log is to
be used for the “after”
column of the comparison report. Adjust the starting and ending records to
use, just as you did in the previous screen. If you need to go back and
amend your previous entries, just click on the “Back” button and make your
changes. When you are done entering the information of this screen, click
on “Next”.
Summary of Contents for ATPOL II
Page 109: ...109...


