


63
When PSM is connected to ATPOL II, you can also capture a waveform
set at any given moment
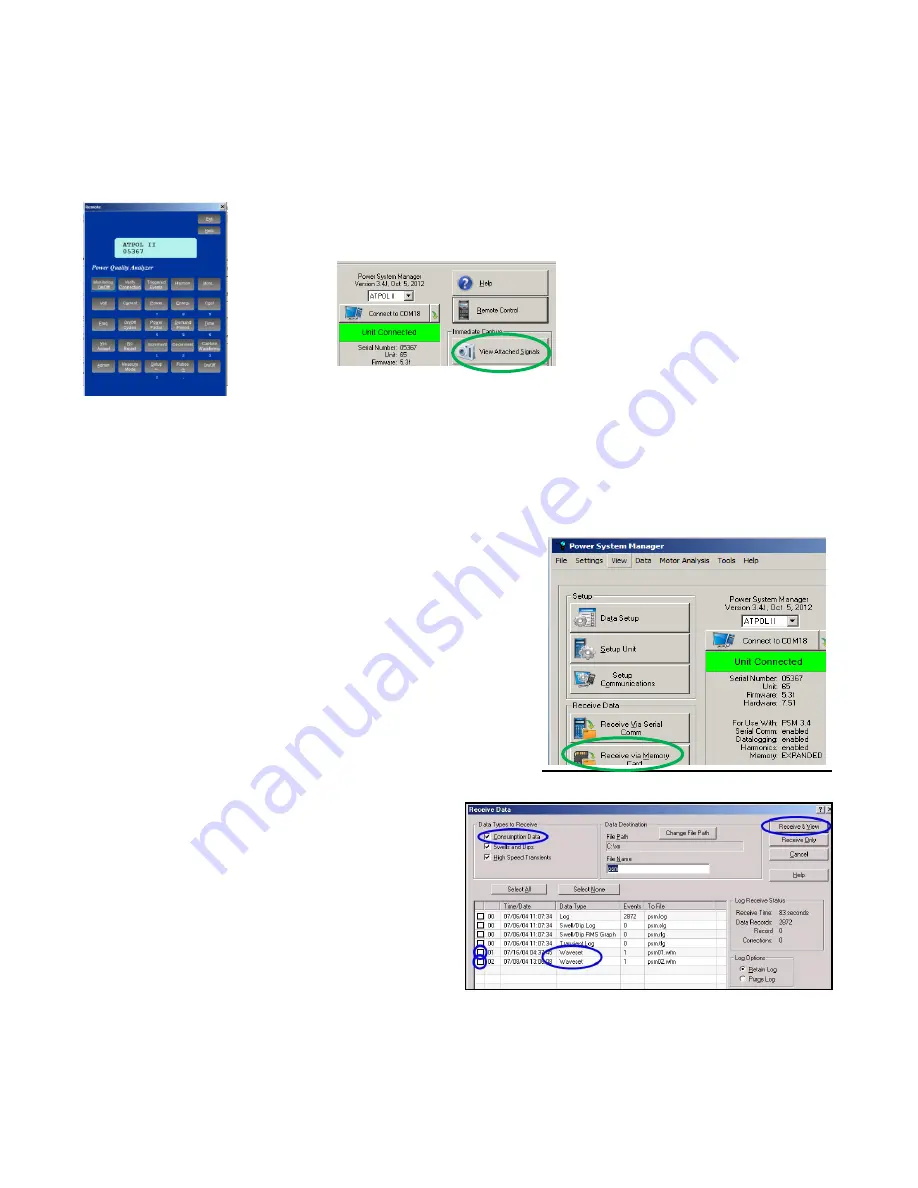
by clicking on the “View Attached Signals” button on the Main Menu.
A waveset captured this way is immediately stored in the PC and shown on the screen. It does not
affect waveform sets stored on the ATPOL II meter that is attached. It is a convenient way of viewing
the signals that are attached, repeatedly.
Receiving Stored Consumption Waveforms
Waveform sets that are stored inside of a connected ATPOL
II can be received by PSM in either of two ways. At the Main
Menu, you can either click on the “Receive Data” button or
on the “Data” dropdown button and then “Receive Data”. In
either case, the Receive Data menu will open and all the
different types of data files in the connected ATPOL II will be
displayed.
Make sure that there is a check in the box before
the line
“Consumption Data” in the Data Types to
Receive section
. Then look for the “Waveset”
Data Type lines. These files are the stored
waveform sets stored in the ATPOL II. Make sure
that the box at the start of the line is checked and
then click on “Receive and View” to transfer the
waveform set to your computer. The default name
of the file is psm01.wfm.
Remember that waveset1 is special. It is an
automatic recording of the waveforms at the time that monitoring last began.
Summary of Contents for ATPOL II
Page 109: ...109...


