


4
www.Observint.com
© 2017, 2018 Observint Technologies. All rights reserved.
a.
Click on the message to install the plugin.
b.
In the message bar at the bottom of the screen, click
Run
, and then close the browser.
WebComponents
will install automatically. When the following screen opens, click
Finish
to exit the installer.
c.
Open Internet Explorer again, and then log into the camera. The
Live View
screen with the
camera video image should appear.
Capture, Record, Zoom icons
Screen select tabs
Logout button
Live View image
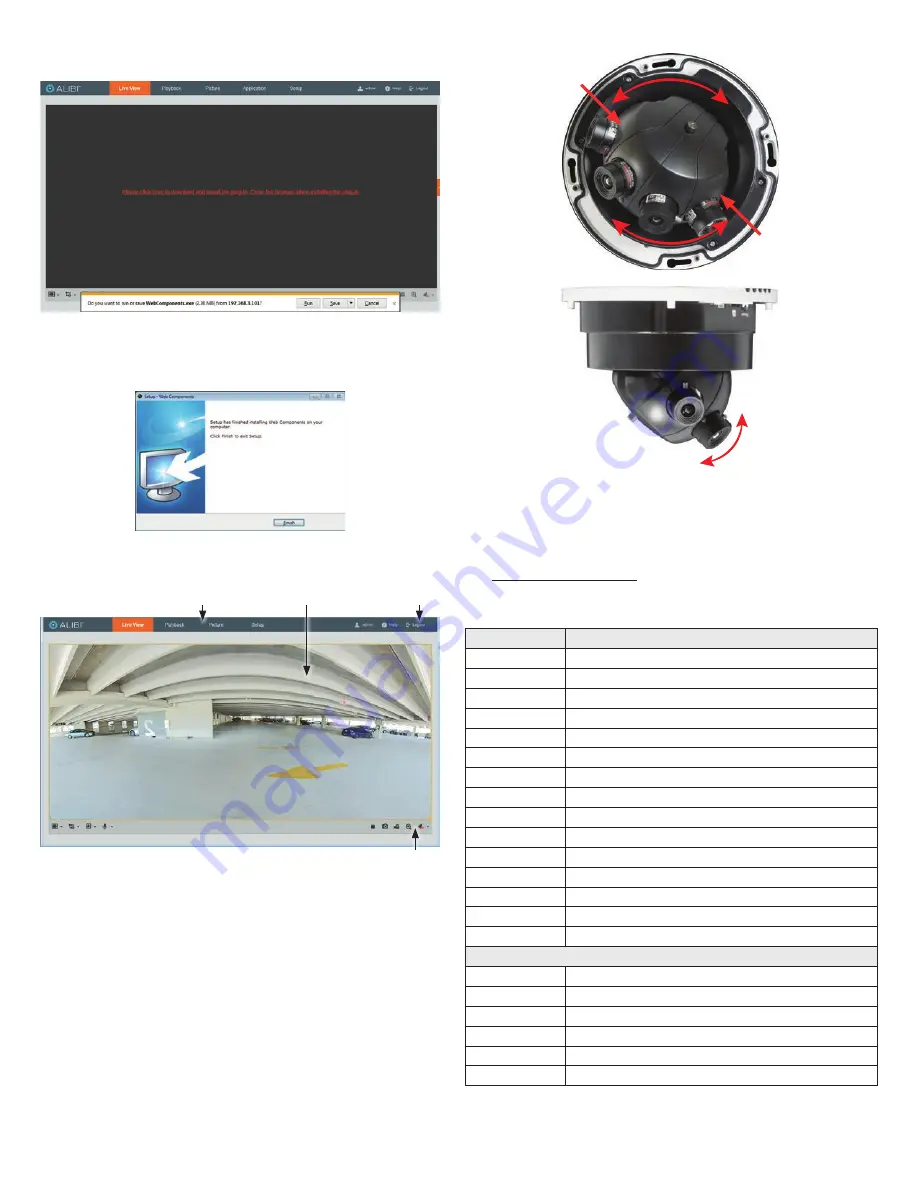
Step 5. Adjust the camera pan and tilt
1.
Open the Live View display to observe the video image from the camera.
2.
Adjust the pan and tilt of the camera as needed to aim the camera at the preferred field of view.
Grasp here on
both sides
Grasp here on
both sides
Pan adjustment (0 ~ 355
˚
)
)
Tilt adjustment (0 ~ 60
˚
)
3.
Loosen the thumbscrews for each sensor, and then adjust the focus for each. Tighten the
thumbscrews to hold the adjustments in place.
4.
Reinstall the dome cover.
5.
Use the
ALIBI™ IP Camera Firmware User Manual
provided for this camera at
www.alibisecurity.com/resources
to configure the device as needed.
Specifications
Camera
Specification
Image Sensor
1/1.8” CMOS
Scanning Mode
Progressive Scan
Resolution
Up to 4096 x 1800
Effective Pixels
Approx. 8 Megapixel
Minimum Illumination
Color: 0.002 Lux (@
f
1.2 AGC ON), B/W: 0 Lux (IR ON)
Day/Night
True D/N w/Mechanical cut filter
Electronic Shutter (sec)
1/25 ~ 1/100,000
Wide Dynamic Range
Digital
Gain Control
Auto
White Balance Mode
Auto
Noise Reduction
3D DNR
IR Sensitivity
700 - 1100 nm
Panning Range
0° ~ 360°
Tilting Range
45° ~ 90°
Rotation Range
0°
Lens
Lens Type
Fixed
Focal Length
4 - 5 mm Lenses
Iris
DC Driven Auto
Focus
4 - Fixed
Field of View (FOV)
180° H × 78.4° V
F-number
F1.2


