


4
www.observint.com
© 2014 Observint Technologies. All rights reserved.
NOTE
Some computer security software may attempt to block you from running
WebComponents.exe
. If
necessary, open the Internet Explorer downloads list, right click on the WebComponents.exe file name,
then click
Run Anyway
.
b.
In the
Setup - WebComponents
window opens, click
Next
to continue.
Installing the WebComponents plugin may require that you close the browser. Follow the
on-screen instructions, then restart your browser after the installation is finished.
c.
Allow the plug-in installation to complete. When the following window appears, click
Finish
.
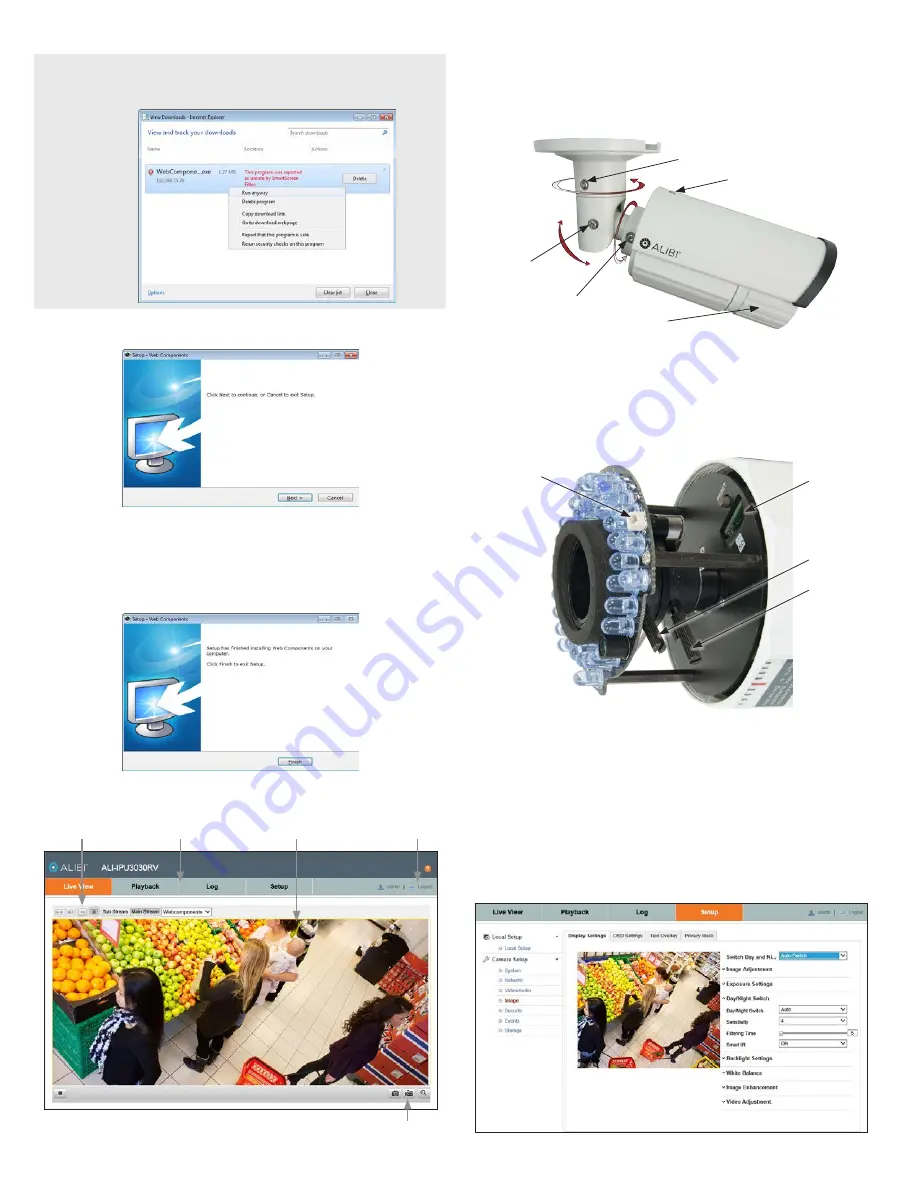
After logging into the camera, the Live View - Main stream window will appear.
Capture, Record, Enable e-PTZ icons
Screen select tabs
Live View options
Logout button
Live View image
Step 4. Adjust the camera for your surveillance target
1.
While observing live video from your camera, unscrew the Pan, Tilt and Rotation lock screws at least
two turns using the security L-wrench provided, then move the camera to point at the center of your
surveillance target. Tighten the lock screws to hold the camera in position.
Pan lock screw
Sun shield set screw
Lens cover
Tilt lock screw
Rotation lock screw
2.
Remove the sun shield set screw, then lift away the sun shield.
3.
Remove the lens cover from the camera body by unscrewing it counterclockwise (observing it from
the lens end).
4.
Unscrew the Wide - Tele and Near - Far adjustment levers about 1/4 turn, then adjust the lens zoom
and focus as needed. Tighten the levers screws until snug to hold them in place.
Wide (W) /Tele (t)
zoom control
MicroSD
card slot
Near (N) / Far (F)
focus control
Video test
monitor
cable
connector
5.
If needed, insert a MicroSD card into the slot shown in the photo above.
6.
Reattach the lens cover and the sun shield.
Step 5. Setup the video image
The video Display Settings menu includes the image-related configurable parameters for the camera. It
contains several sub-menus such as Image Adjustment, Exposure Settings, Day/Night Switch, etc. that can
be opened or closed for compactness. Additionally, several adjustments can be seen in the Live View image
on the menu. To open the Display Settings menu, go to
Setup
tab
| Image | Display Settings


