3
GB
bodies seem to move quickly through the viewing field even at low
power. The movement is even clearer at high power. At high power,
the telescope will show dramatic views of the features of moons
or planets, but it can also be a little frustrating until you get better
at tracking the object in a smooth, careful way. For this reason, we
recommend that you start at low power (using the 20 mm eye lens).
Power: Choose the eyepiece
Power is the telescope’s ability to magnify an image – make it bigger
– or to make it seem like the object gets closer to the person who is
looking. The power is indicated by a number followed by an X (the
times symbol). That means if you look at an object at 100X, you will
see it as if you were 100 times closer to the object than you really are.
You can calculate the power by dividing the focal length of the
telescope’s objective lens by the focal length of the eyepiece you
choose. The focal length of the eyepiece is usually marked on the
eyepiece itself
(example: 4 mm).
400 mm (focal length of the objective lens)
Example: --------------------------------------- = 100X (power)
4 mm (focal length of the eyepiece)
The longer the focal length of the eyepiece, the less the telescope
can magnify – and the shorter the focal length of the eyepiece, the
higher the magnification power of the telescope.
Help choosing an eyepiece
20 mm = 20X (power):
Use this eyepiece when you want to look at
the moon and the stars.
4 mm = 100X (power):
Use this eyepiece when you want to look at
the moon, animals and objects in nature in daylight.
TAking cAre oF your TeleScoPe
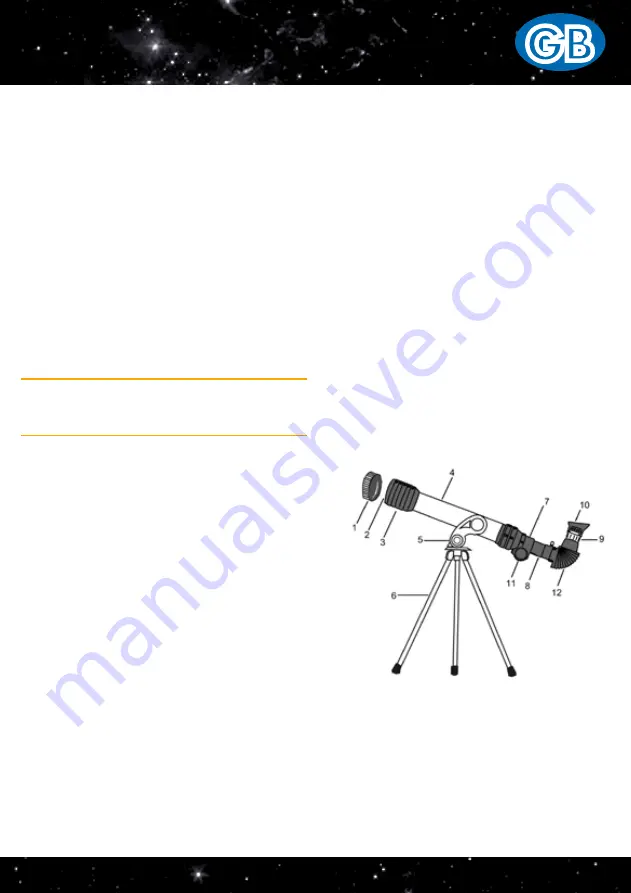
The objective lens
The objective lens (2) of the telescope has been polished and shaped
for high precision. It must be cleaned very carefully and as seldom as
possible so that you do not damage the precision and performance.
The lenses should only be taken out of their mountings by an expert.
It is also a good idea to put the telescope outside (on the balcony, for
instance) or in the garage for one hour to prevent condensation on
the lens and to achieve better image quality.
Cleaning the lens
Only clean the lens if it is really necessary. First, remove dust with
a camel hair brush or blow it away with a puffer or small syringe.
Drop a few drops of ether or isopropyl (rubbing) alcohol onto a clean
cotton cloth that has been washed several times and wipe the lens
very carefully. Do not rub in circles. Use the puffer or small syringe to
blow away any lint or dust.
Important! If there are any spots on the lens afterwards, you must wipe
them off very carefully after the lens is completely dry.
Setting up the tripod
1. Take the tripod (6) out of the box. Stand the tripod upright and
pull out the legs all the way.
2. Remove the knob (5) from the telescope mount.
3. Adjust the holes on the tripod to match the holes on the mount.
Replace the knob and tighten it.
Mounting the diagonal mirror and the eyepiece
1. Place the diagonal mirror (12) on the focusing tube (8). Fix it in
place by tightening the small screw.
2. Place the eyepiece (9) on the diagonal mirror. Fix it in place by
tightening the small screw. Attach the eyepiece cap (10) to the
eyepiece if needed.
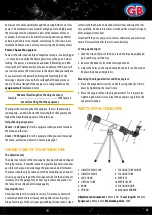
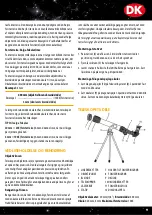
PArTS oF THe TeleScoPe
1. OBJECTIVE LENS CAP
2. OBJECTIVE LENS
3. LENS HOOD
4. OPTICAL TUBE
5. KNOB
6. TRIPOD
7. FOCUSING TUBE MOUNT
8. FOCUSING TUBE
9. EYEPIECE
10. EYEPIECE CAP
11. FOCUSING KNOB
12. DIAGONAL MIRROR
Objective lens diameter:
30 mm (1.18”)
Focal length:
400 mm
Eyepieces:
20 mm, 4 mm
Maximum power:
100X


